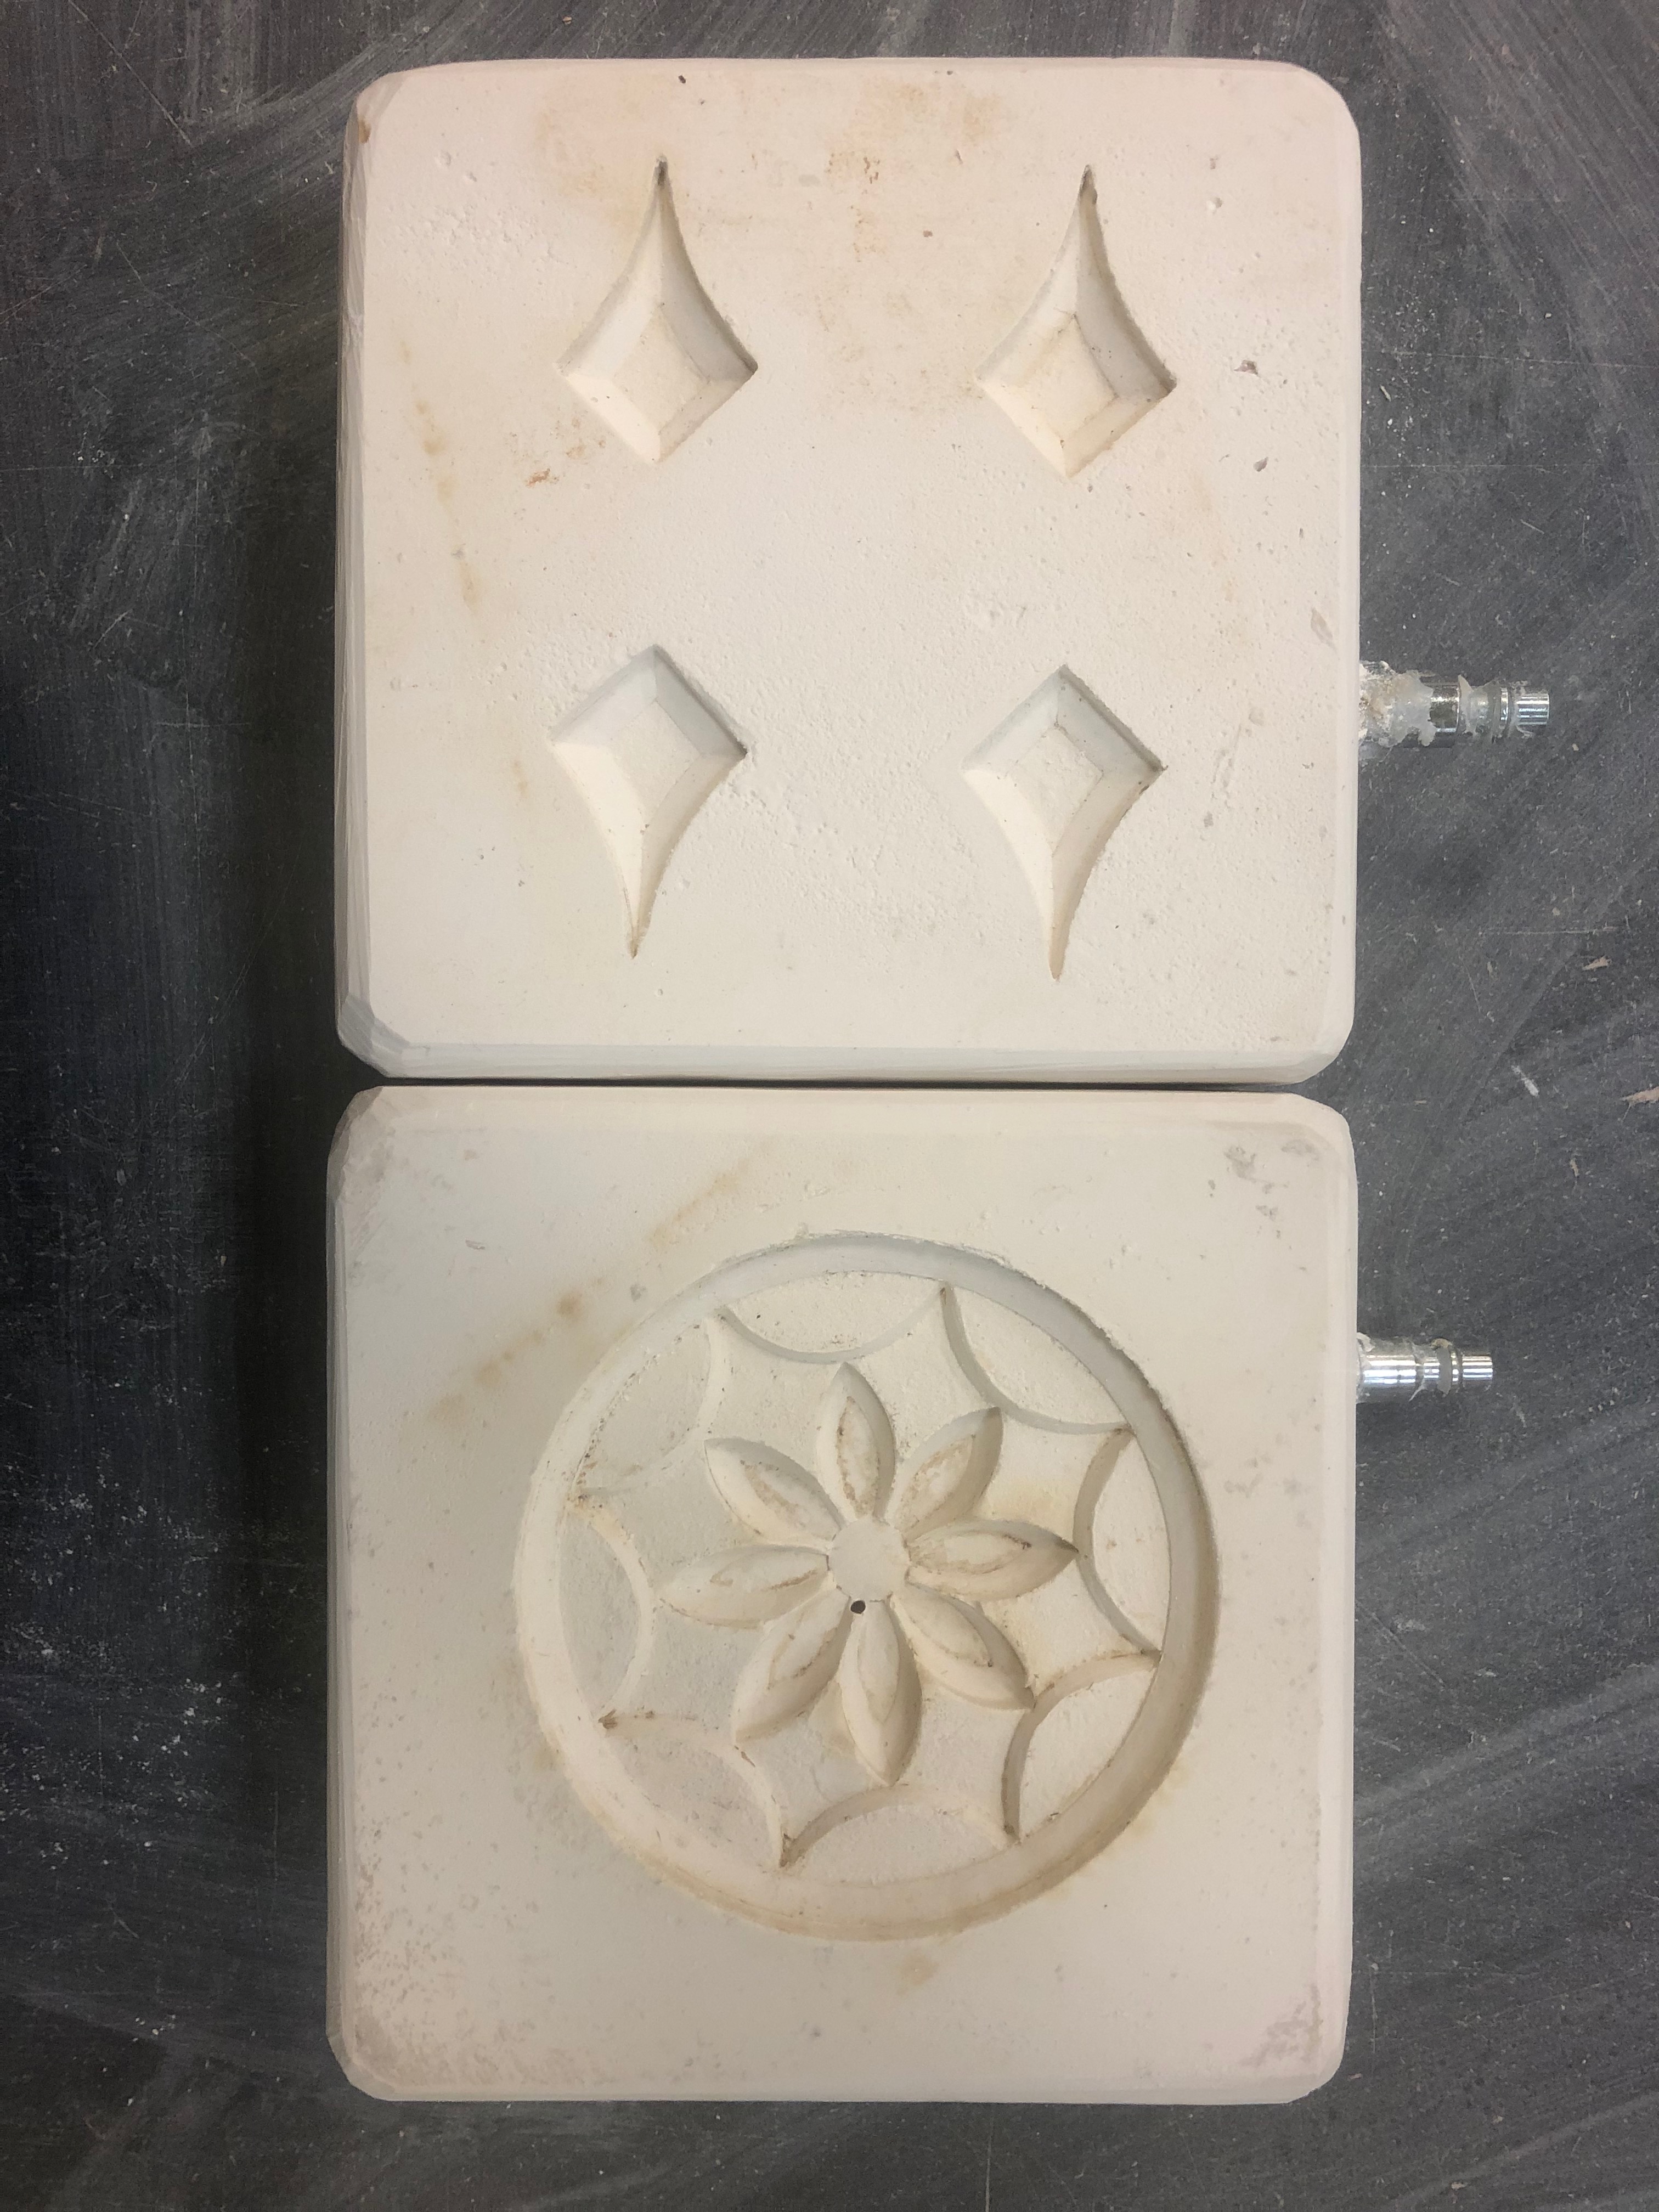
An air-release mold has become an essential part of my work with tile-making. Below I will describe the materials, tools, and the necessary steps I use to create the molds which allow me to quickly produce my tiles. All of my methods have been taught to me by Jason Green while studying at Alfred University.
Materials and tools list:

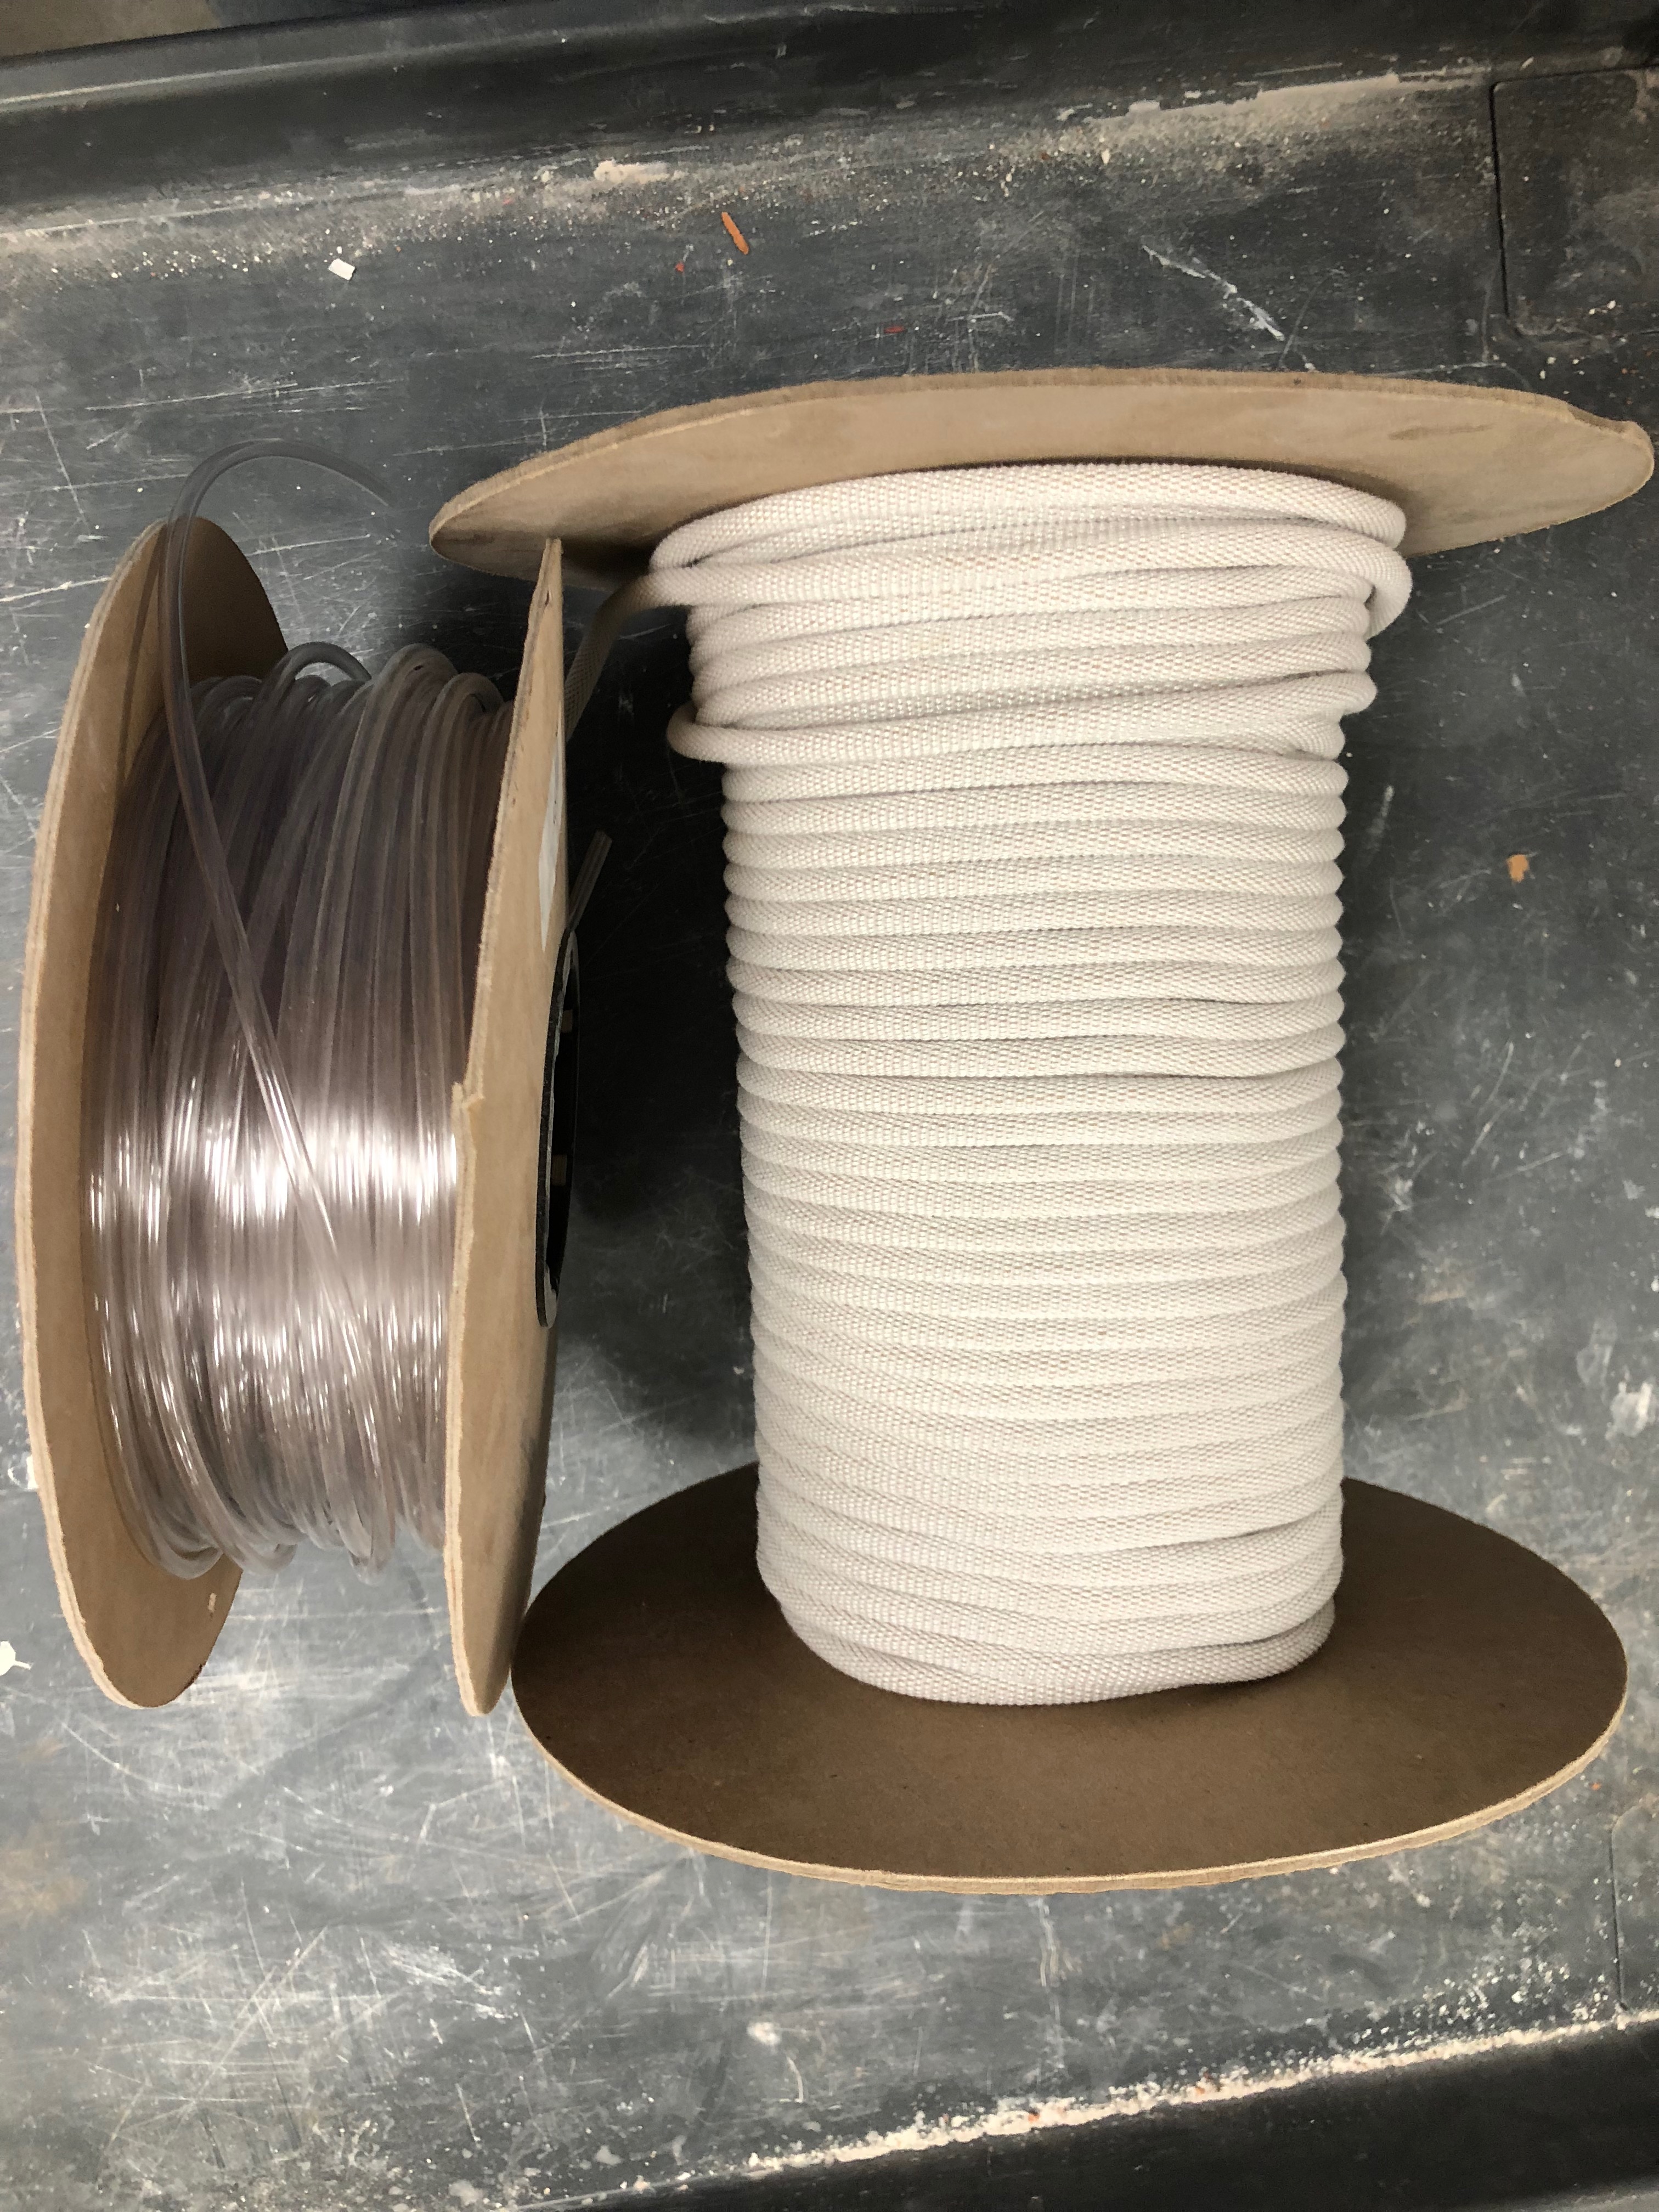
- Molduct tubing - 1/8" (from RAM Products Inc.)
- No. 8 Plastic tubing (from RAM Products Inc.)
- Ceramicale (from US Gypsum)
- zip-ties (4-inch ones work great)
- 2 buckets for mixing plaster
- 1/4 inch Male NPT Plug
- Air Compressor with plug attachment
- Thermal Temperature reader
- Needle Nose Pliers
- Wire Cutters
- 1-inch grid cage wire
- Adhesive spray
- silicone
- Duct-tape
- a tiny piece of clay or plasticine, etc.
- set of 4 C-Clamps’
- 1 small screw (1-inch is fine)
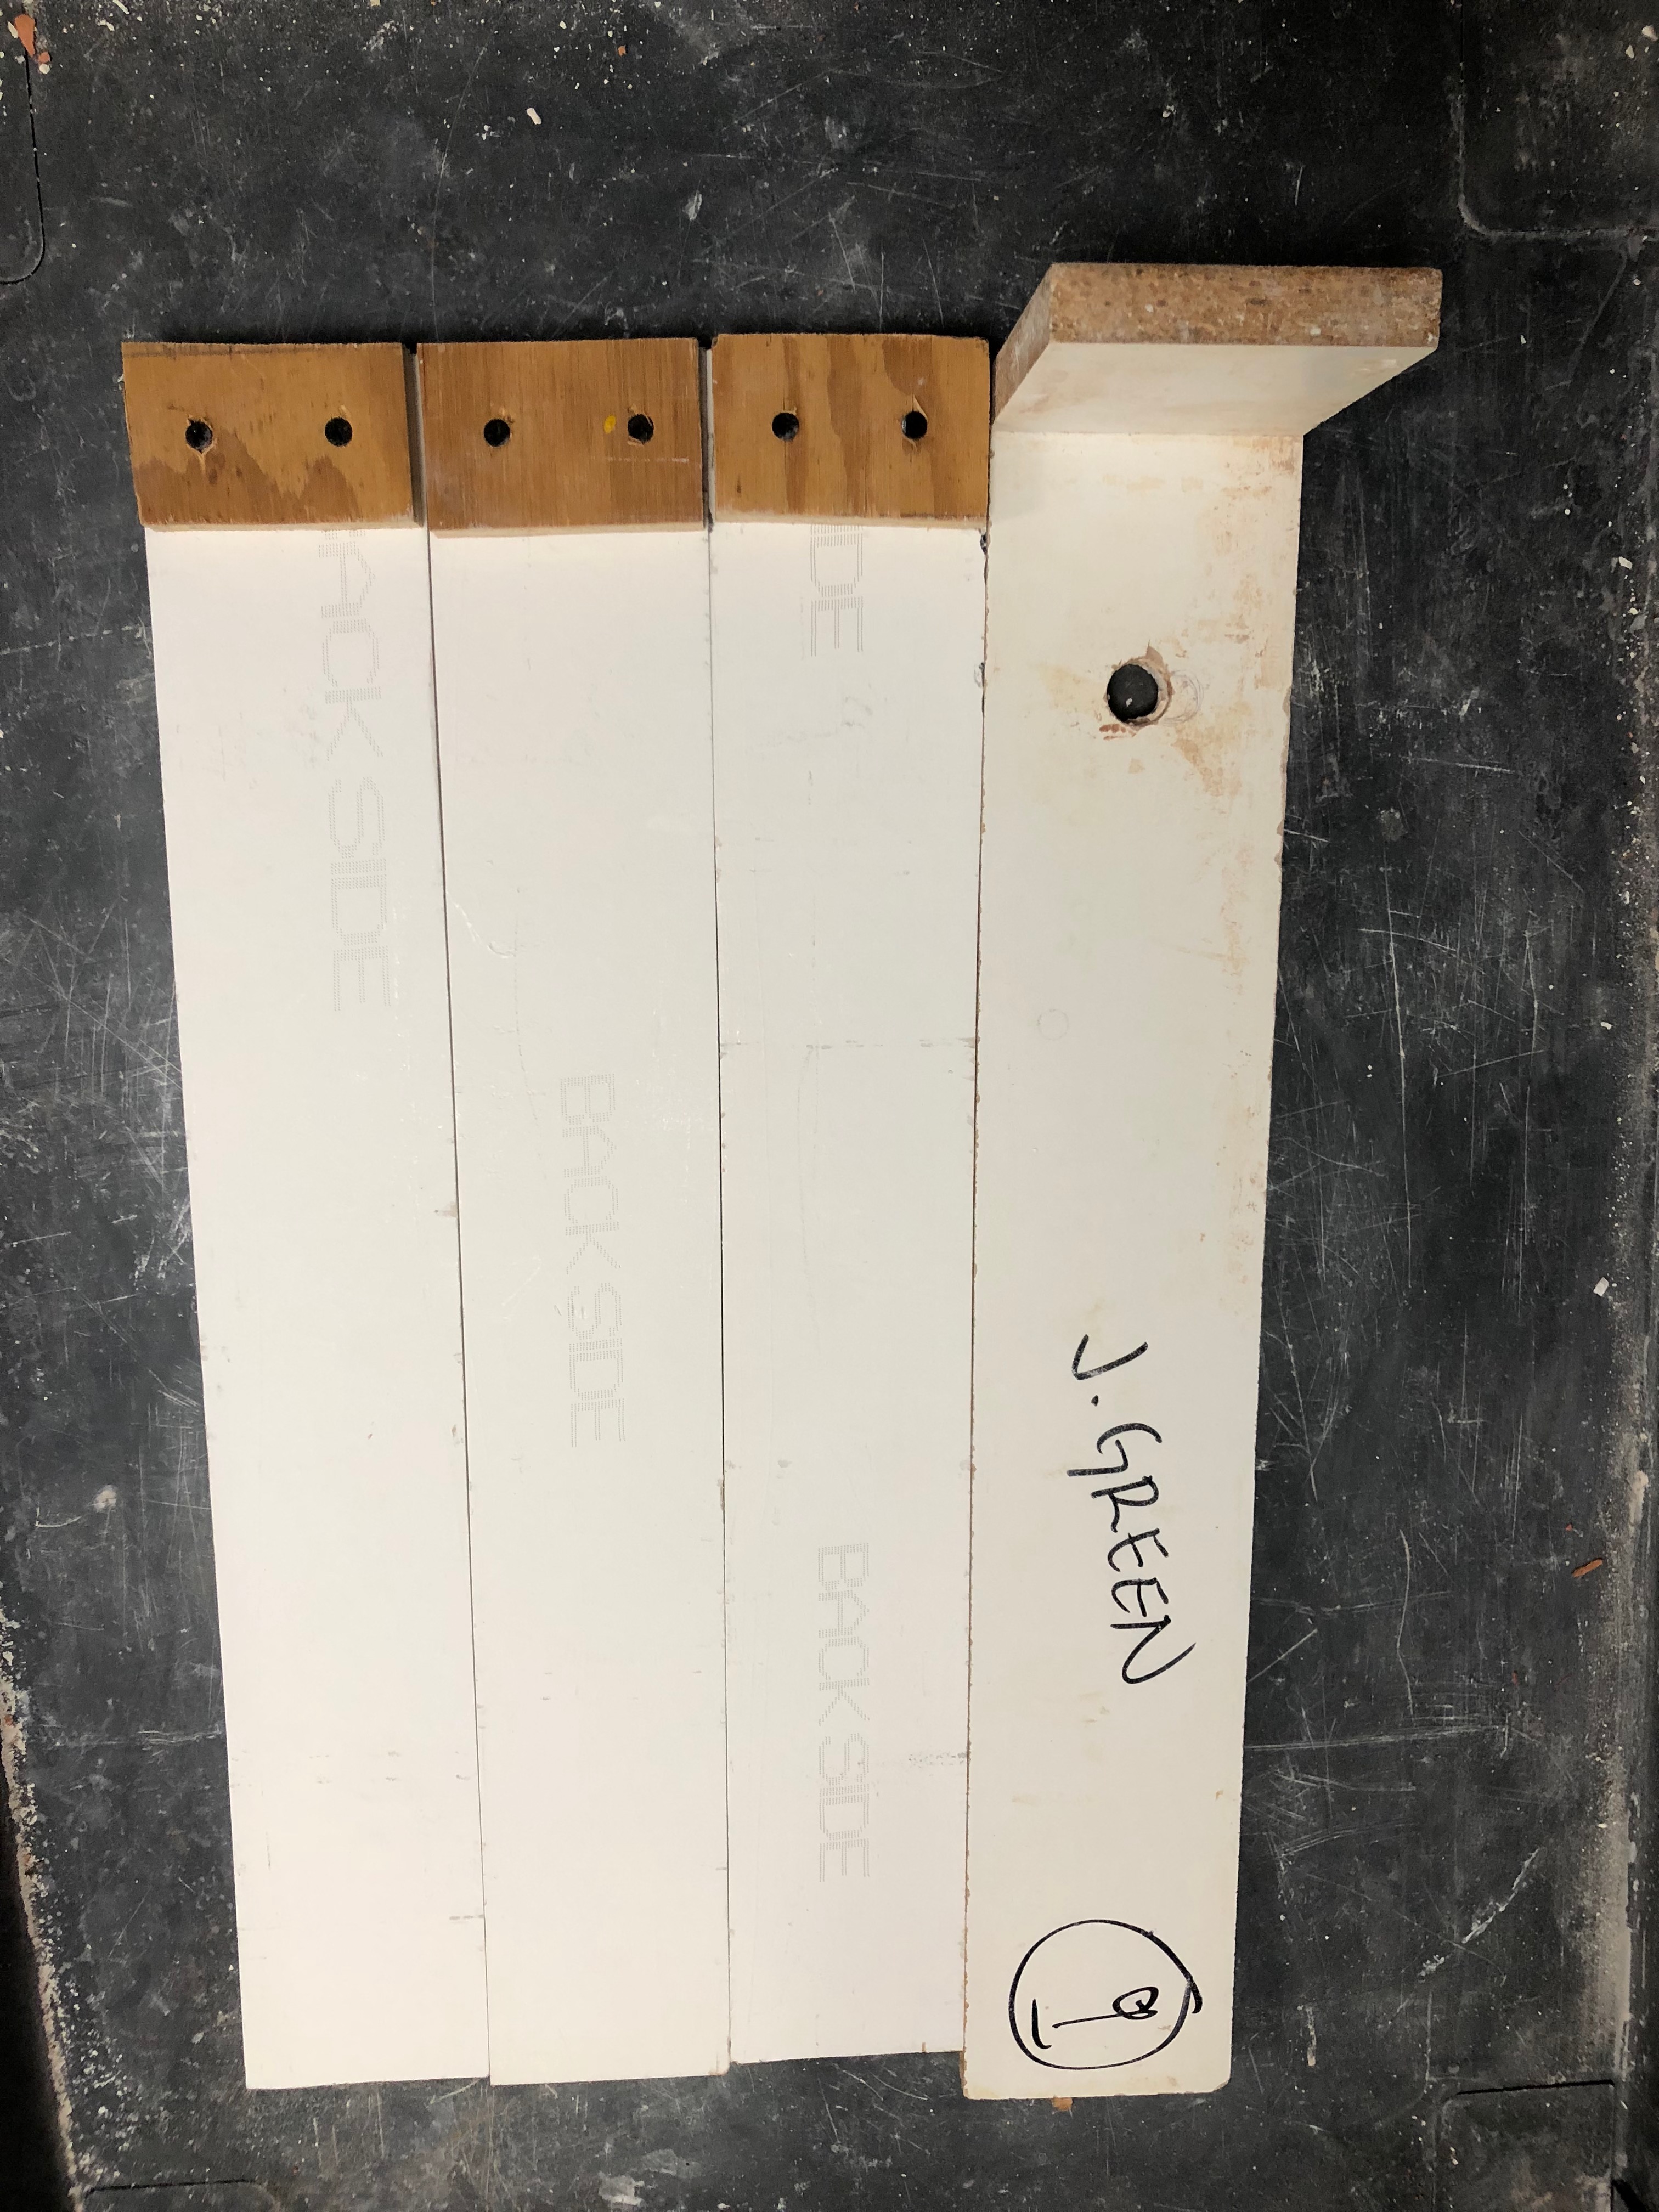
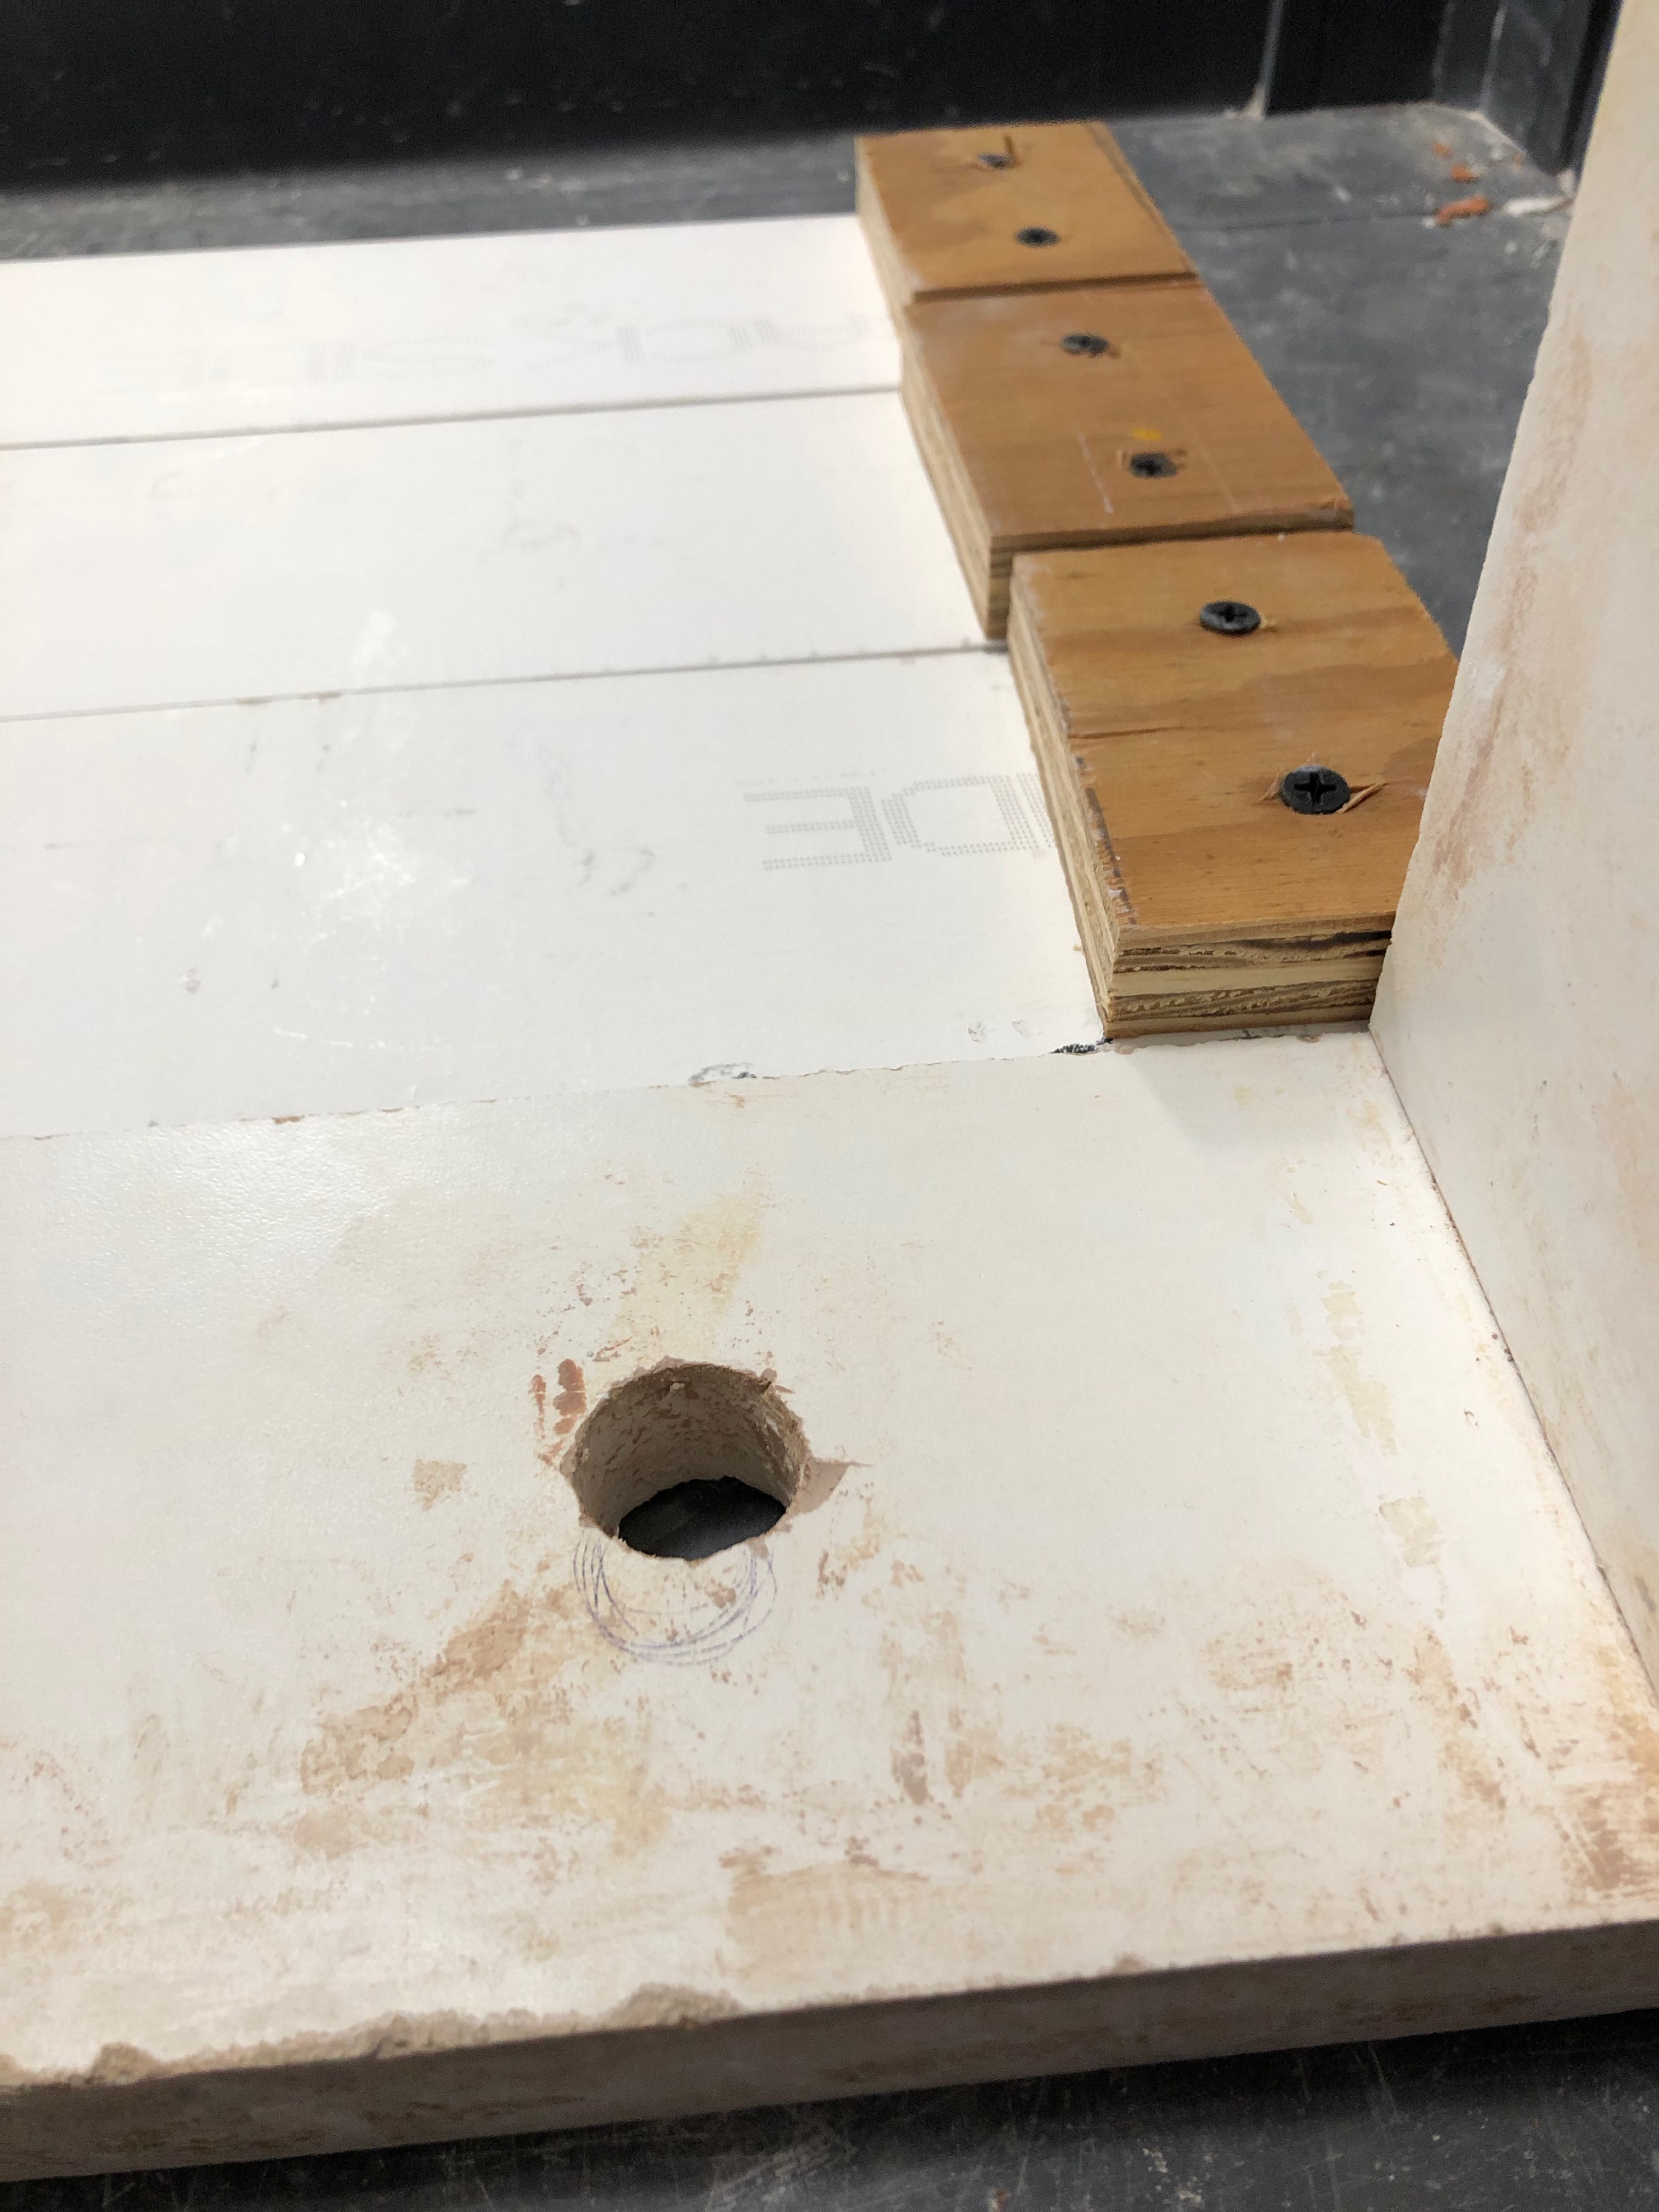
- set of 4 coddle boards (*** one of these boards must have a hole drilled out of it allowing the NPT plug to fit through. See images below.)
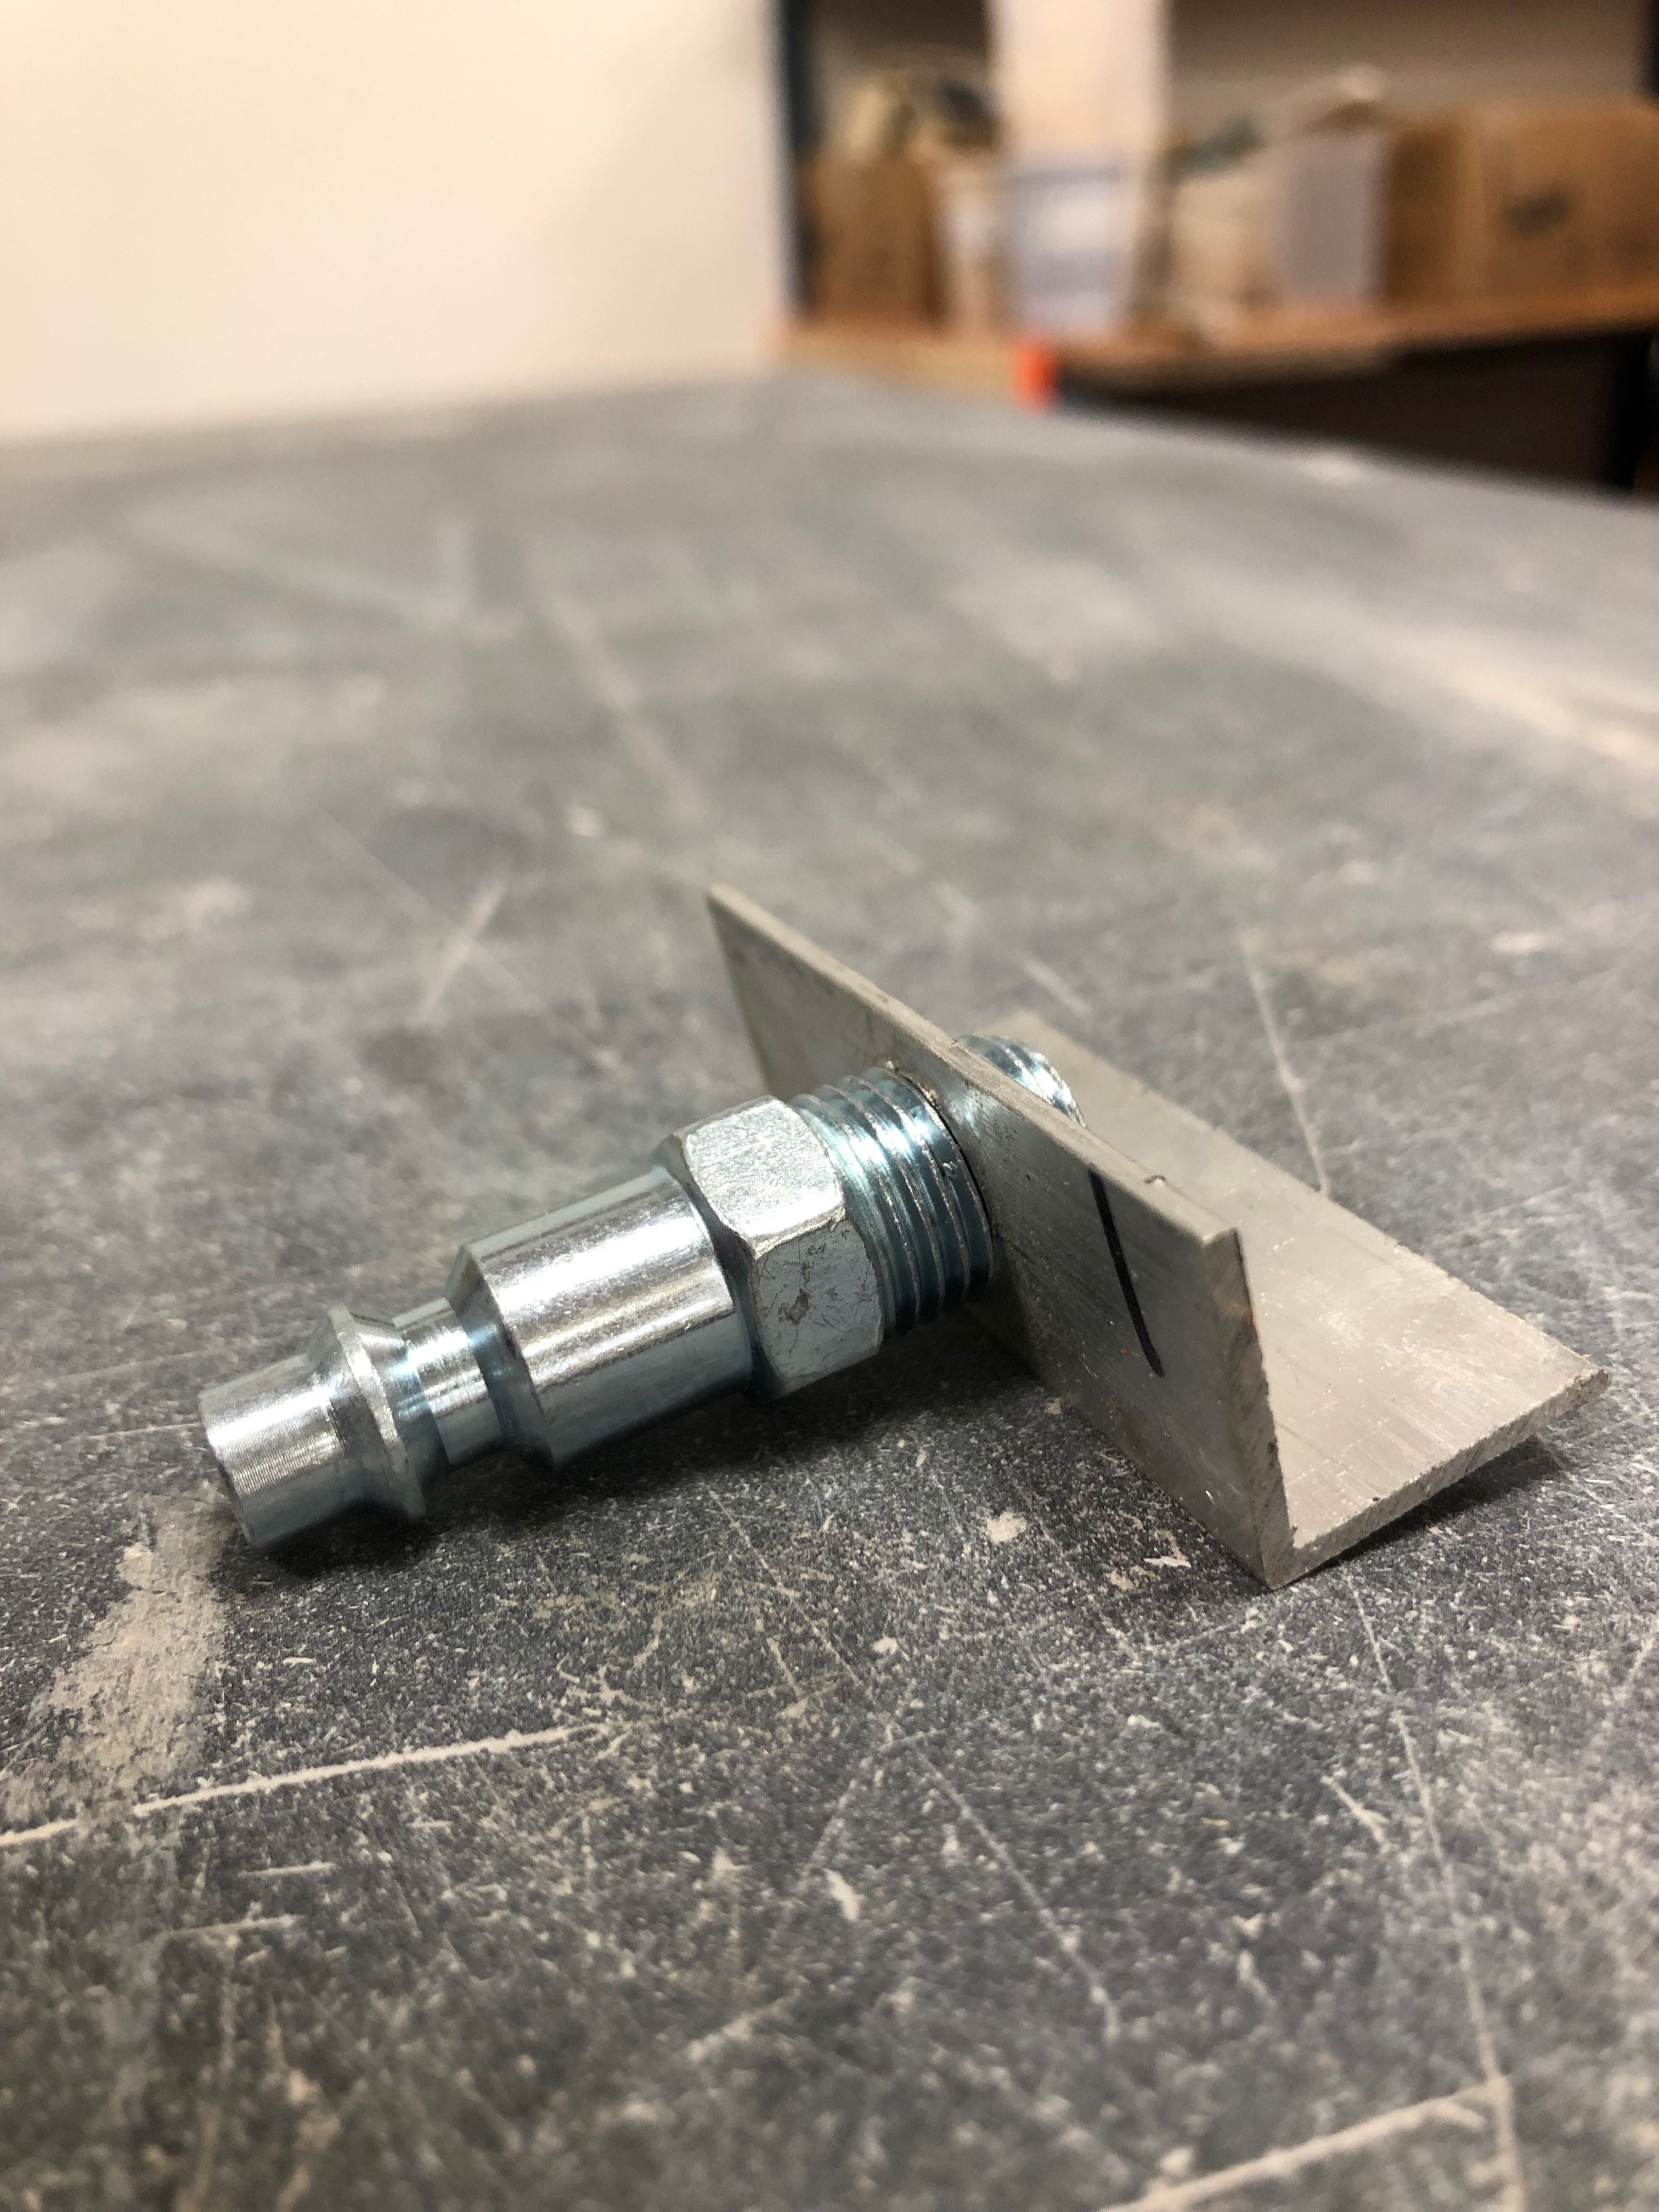
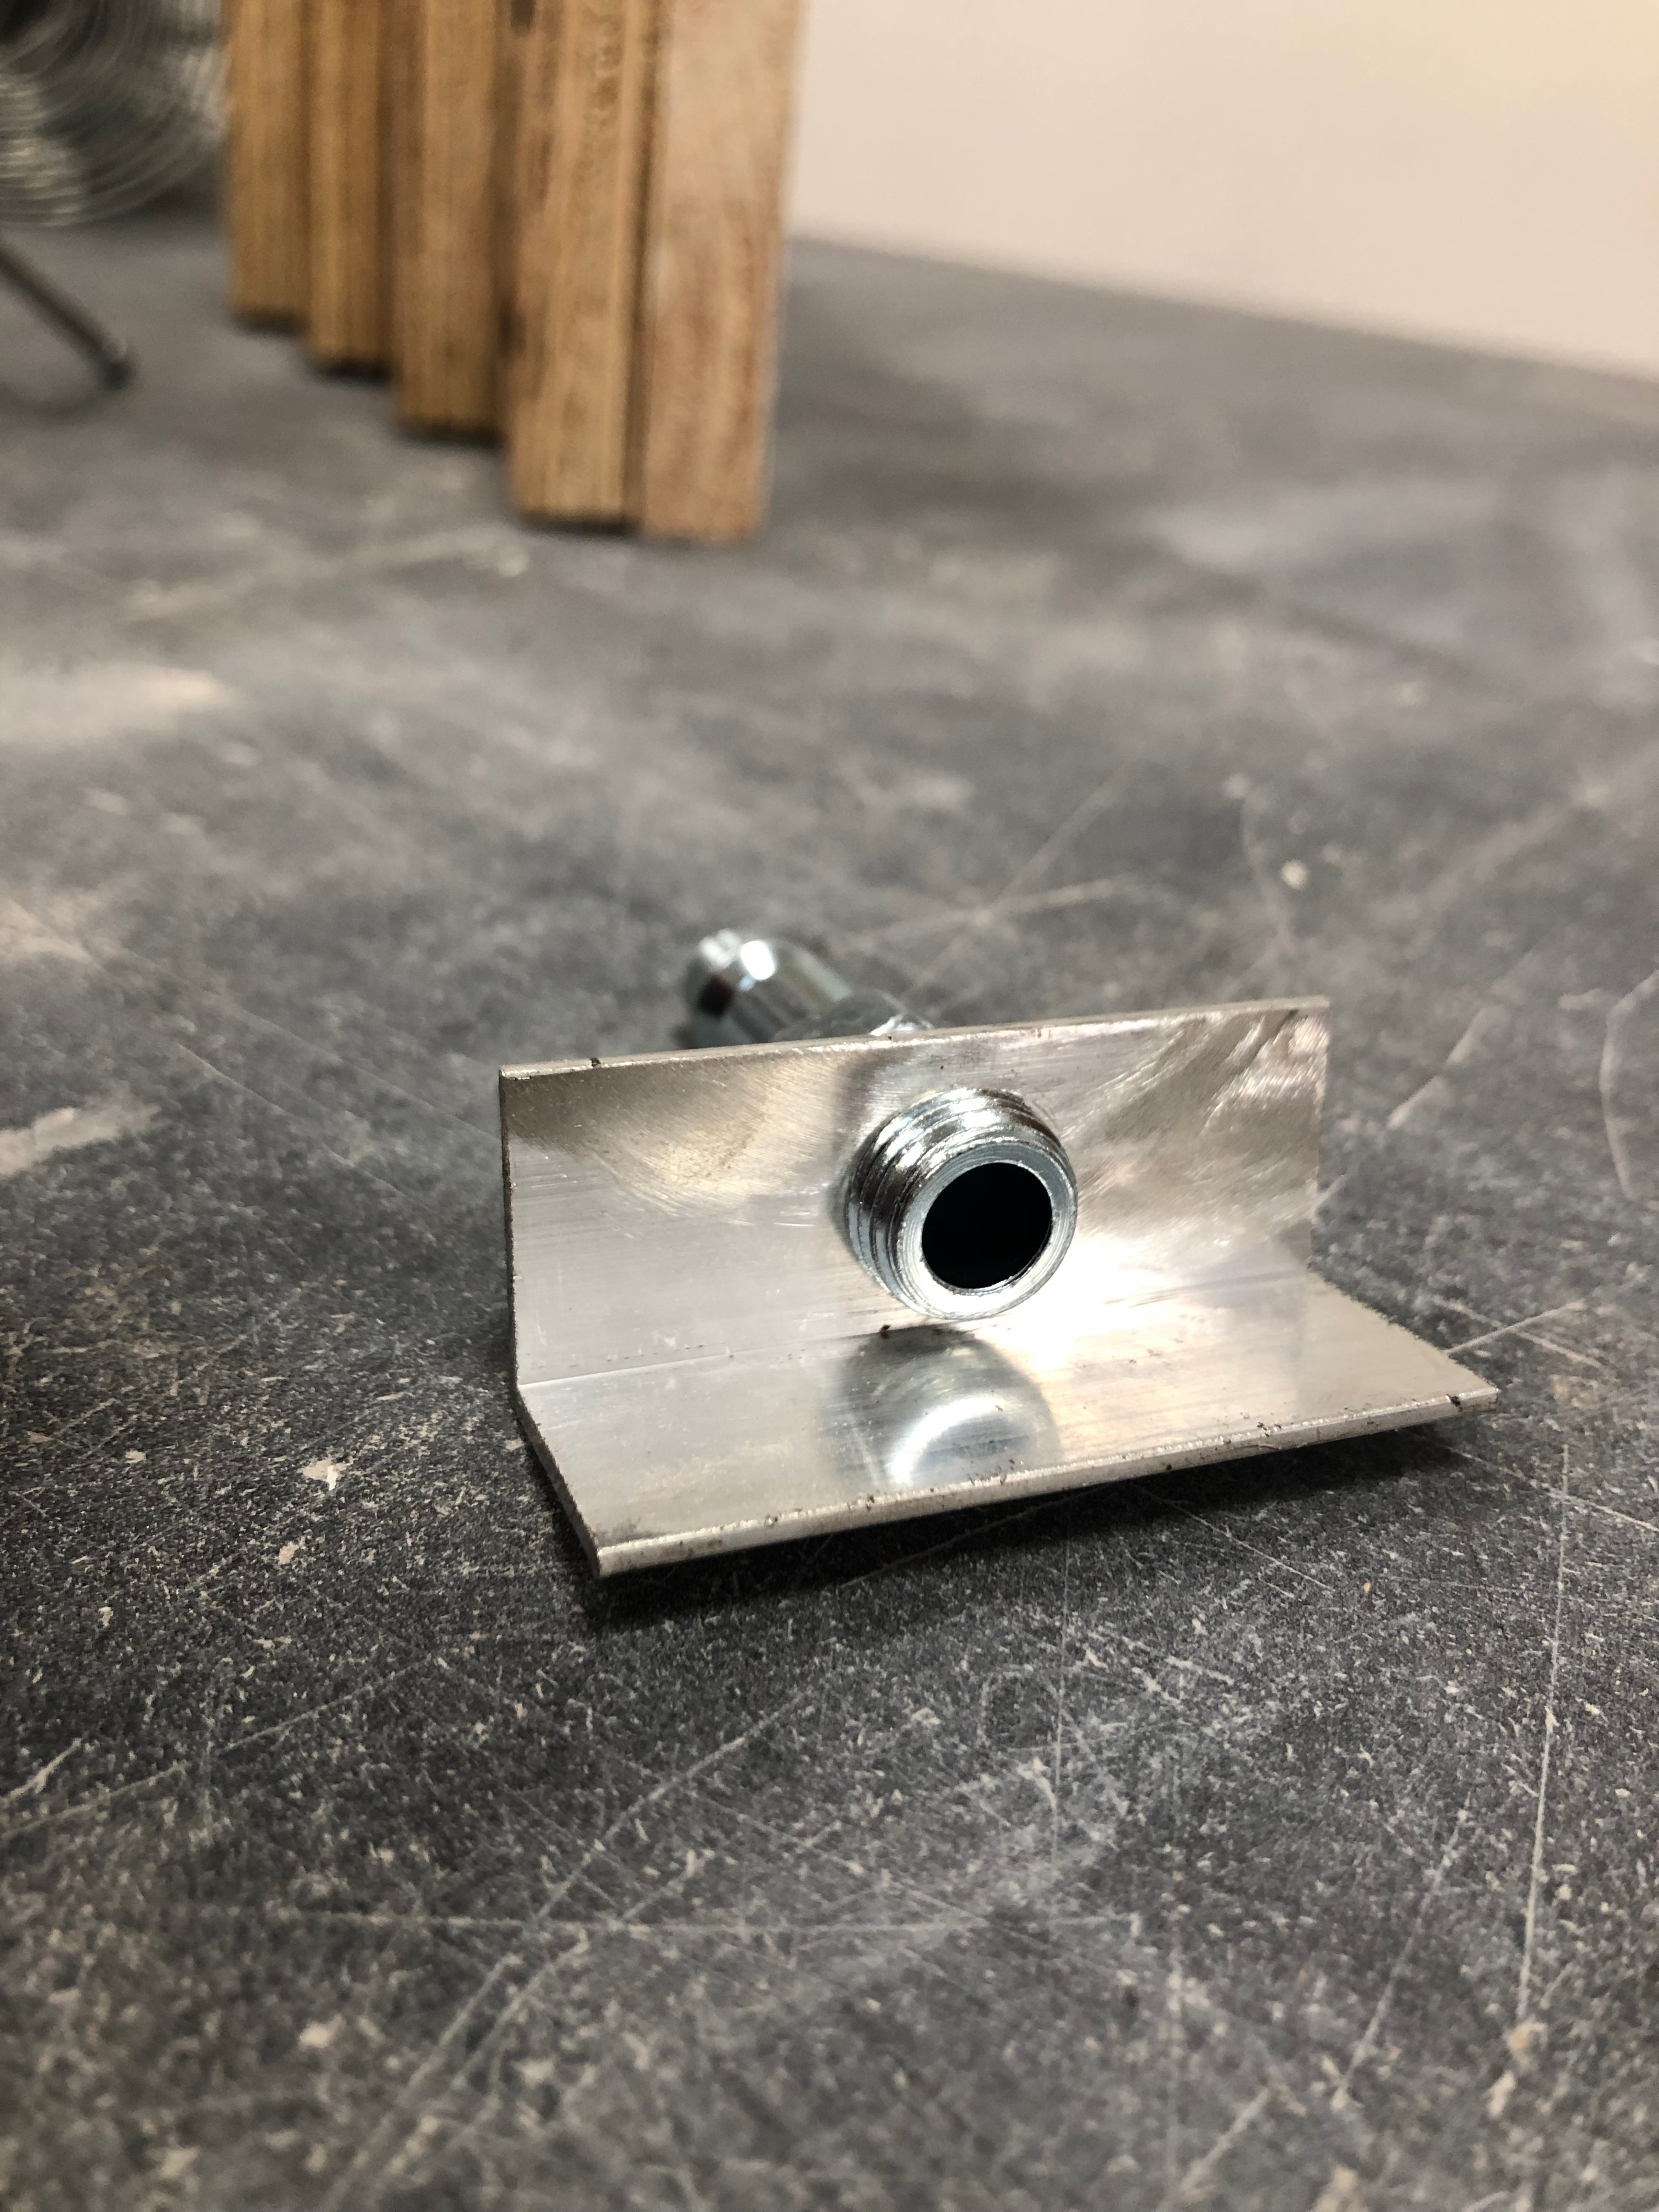
- Aluminum L bar cut to ~2 inches with 1/2 inch hole drilled through one side and tapered for NPT plug to screw into. (see images)
Building the mold around your prototype
-
It’s always best to glue down your prototype to a board or flat surface when making a mold. This will prevent it from floating into the plaster once it’s poured.
-
Using your C-clamps, set up the coddle boards around your prototype, always leaving at least one inch of space around it.
-
Screw the NPT Plug into the aluminum L-bracket and place into the hole drilled from your coddle board. Use duct-tape to hold this in place and fill any gaps between the plug and the hole with your clay/plasticine/etc. This will prevent plaster from leaking out of your mold once poured and prevent the mold from getting stuck to the coddle board.
-
Cut ~2inch of plastic tubing and slide it through the NPT plug. This will later be removed while “purging” the mold and holds the Molduct tubing to the end of the plug for smooth air input
-
Measure the area of the mold and cut a frame with the cage wire. Leave a little extra space around the edges to allow for a snug fit later on. Bend in the outer-most wires and lay the wire cage frame into the mold. Use your pliers to re-bend the outer most wires to tightly fit against the coddle board walls, keeping a distance of about a 1/2 inch above the prototype in all areas, (bending or stepping of the wire frame might be necessary to make this happen).
-
Next, slide the Molduct tubing over the end of plastic tubing that sits inside the mold. This part can be tricky to work around the wire frame so feel free to remove or adjust it when necessary. Use zip-ties to tightly hold the both tubings together keeping close the the hole of the NPT plug. Then, use silicone to seal the ends of the Molduct tubing to the NPT plug to prevent any leaking.
Your mold should begin to look something like this:
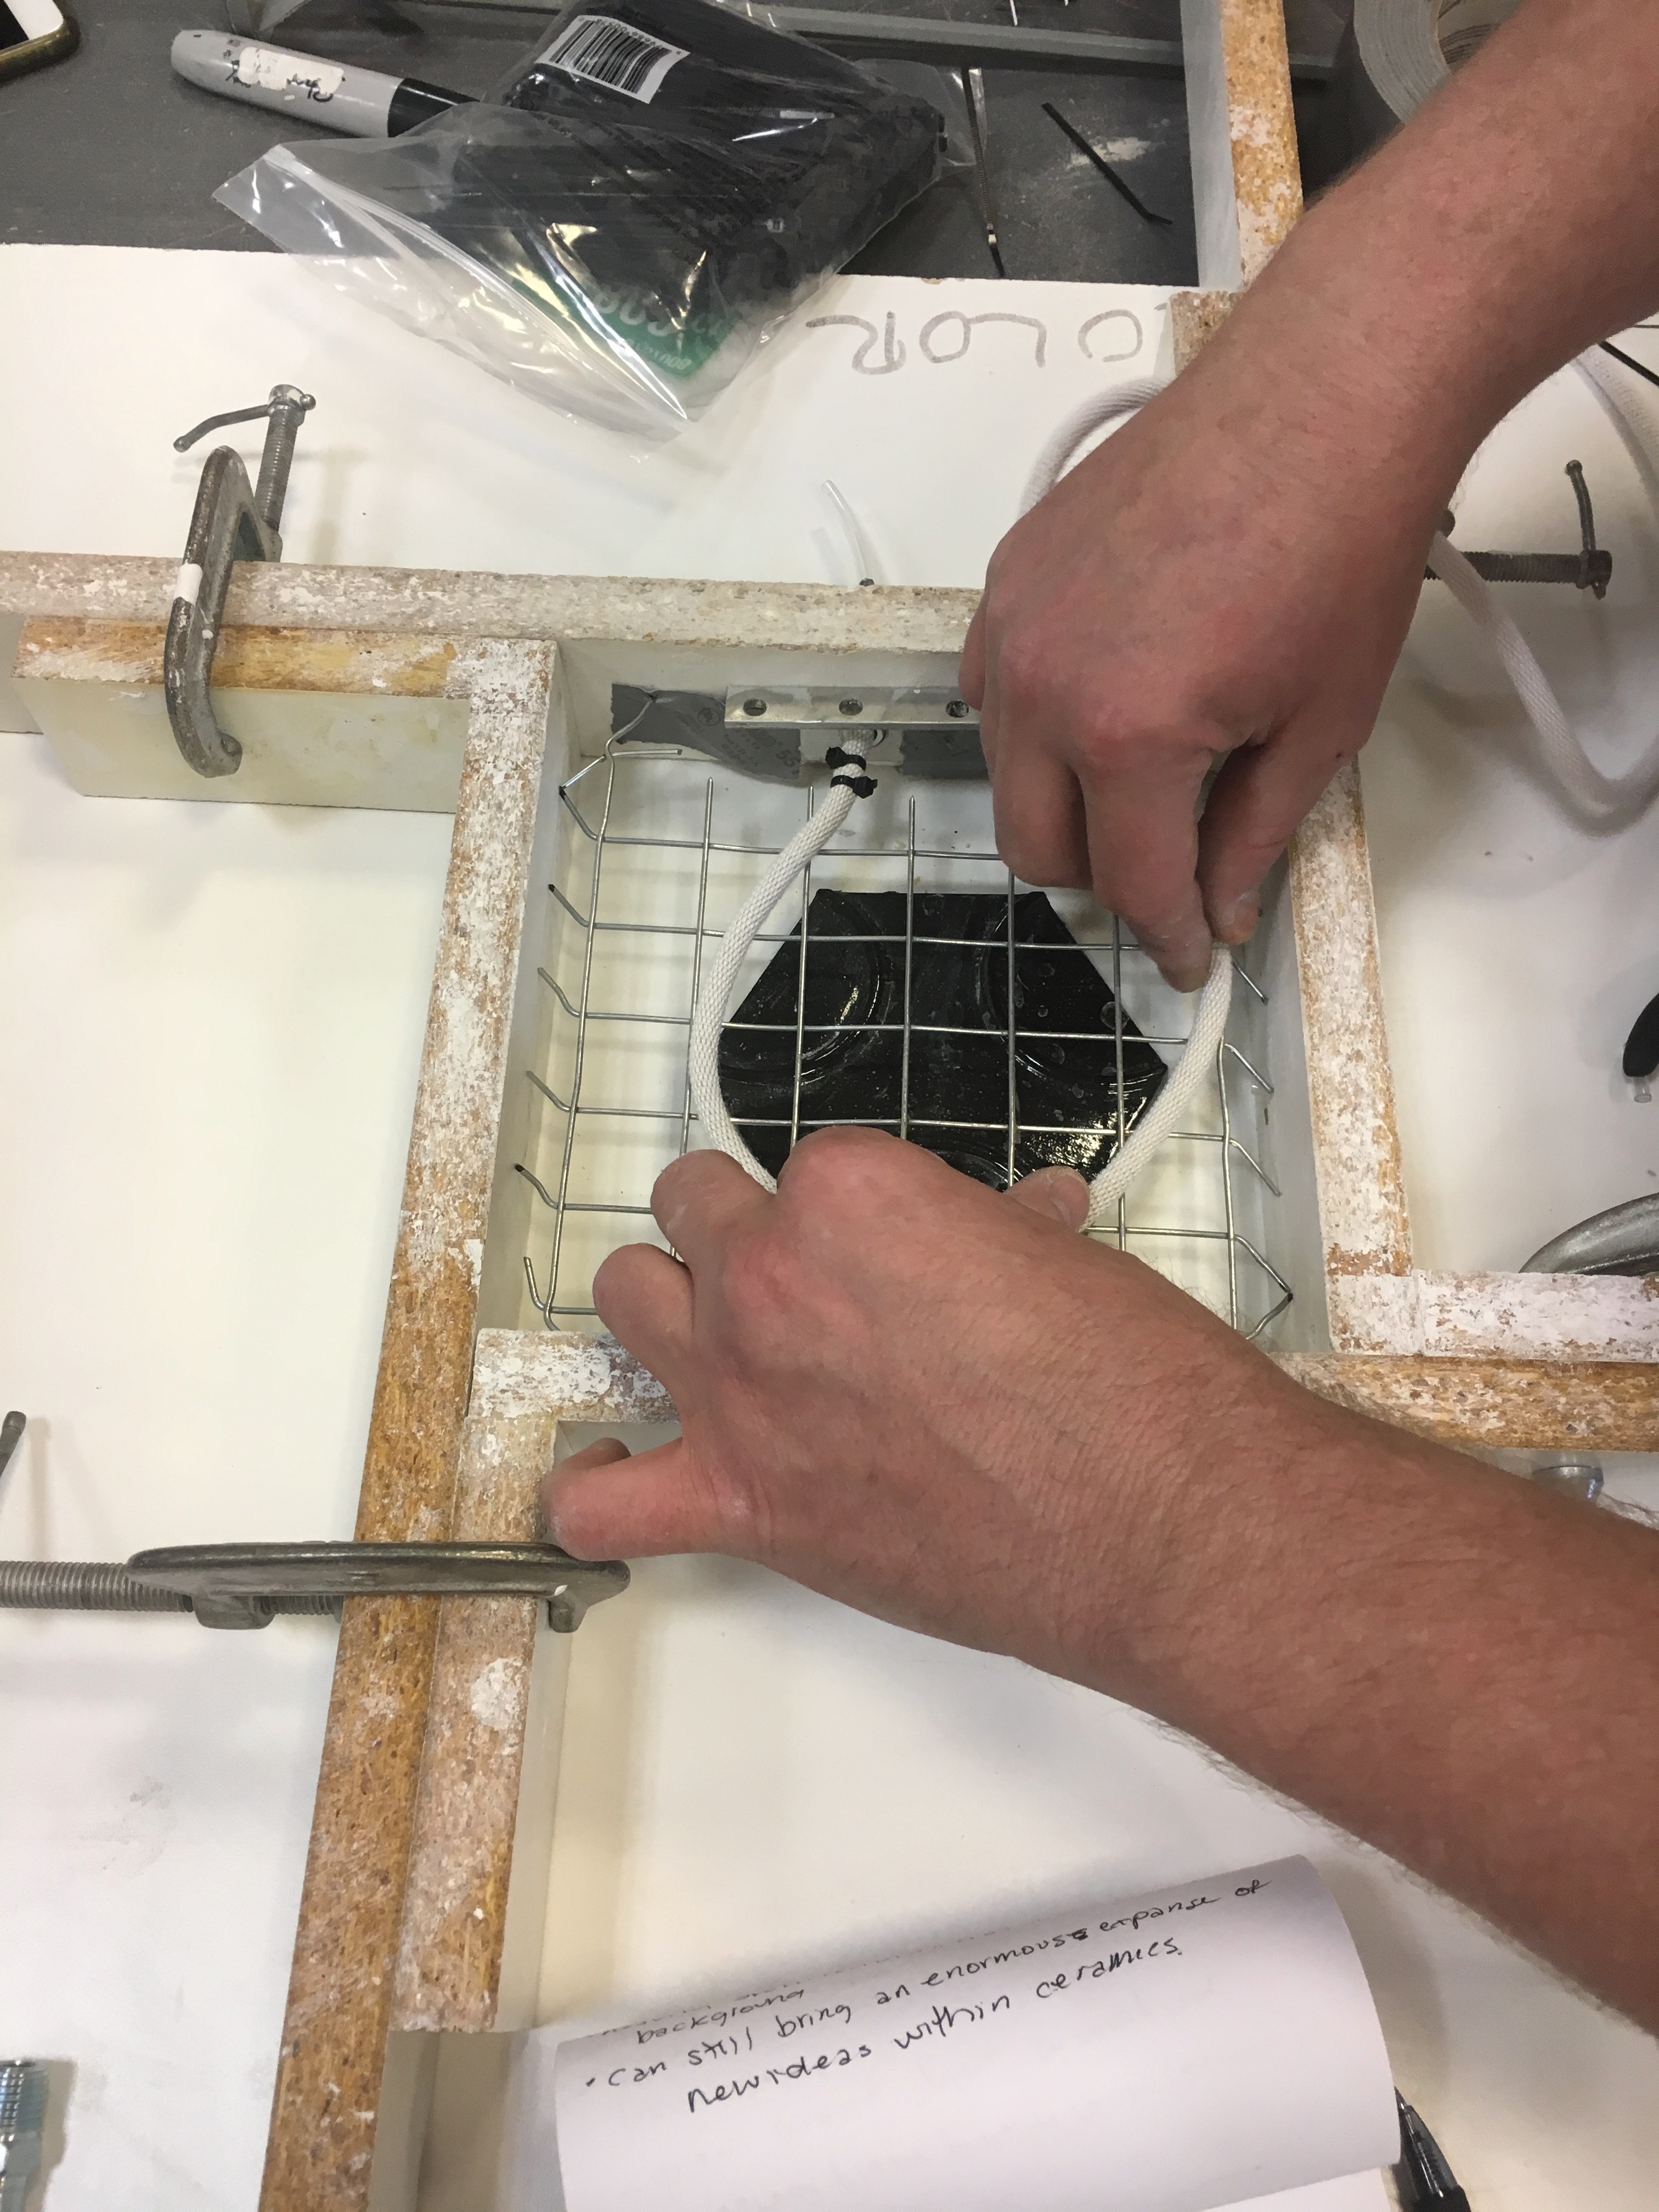
- The molduct tubing now needs to be wrapped up and down the wire frame, so get out your zip-ties and make sure that thing is sturdy in place. It’s easiest to follow the grid of the wire. For every inch, the tubing should be zip-tied onto the frame to hold it tightly in position. Be careful not to place your tubing too closely together and keep it about a 1/2 square away from all edges. Plug the end of the tubing with a screw and zip-tie to, again, prevent leaking. Once brought up and down the entire wire frame, your tubing set-up should look similar to this:

Your mold is now ready to be poured!
Before mixing, be sure to have all of your mixing tools:
- Buckets
- Power drill
- Mixer (a metal one works great)
- Thermal Temperature reader
- Air Compressor
- Timer
-
You may want to seal any cracks of your mold with clay to prevent the plaster from leaking out once its poured.
-
It’s also best to have the air compressor set-up and ready to go so it’s not a worry when the mold it ready to be purged. I begin my air pressure at 20 dpi.
The mixing ratio for Ceramicale is different than the typical Pottery Plaster No.1 so be cautious! Always look to the distributor for proper mixing instructions. For my mixing, I use the ratio of 100 Ceramicale plaster to 40 water.
-
When weighing out your parts, always use cool water and sieve or use your hand to ensure there are no clumps in the plaster. Pour the plaster into the water bucket and try to get as much of it submerged under the water without having to touch it. I’ve found that walking around the bucket while dumping is pretty successful. Let the plaster slake for about 3 minutes.
-
After slaking, the plaster must be mixed with a power drill for 12 minutes. Yes that’s right, 12 whole minutes.
-
After mixing, carefully pour the plaster into the mold. If your prototype is highly detailed, a “print coat” might be a good idea to do first. To do this, dunk your hand into the plaster and flick it onto the prototype. Repeat this until the prototype is completely covered with a thin layer of plaster. Then, while pouring the remaining plaster, hold your pour steady over one spot of your prototype to prevent excess air bubbles. Bumping yourself up against the table can shake out some of those bubbles too.
-
Quickly get out that temperature reader and record the just-poured temperature of the plaster. Purging must begin once the temperature has increased another 28 degrees. This typically ends up being about 90 degrees F. It may take a while to begin increasing (roughly 20 minutes) but once it starts, it goes pretty fast so keep a good eye on it and have your air compressor ready to go.
-
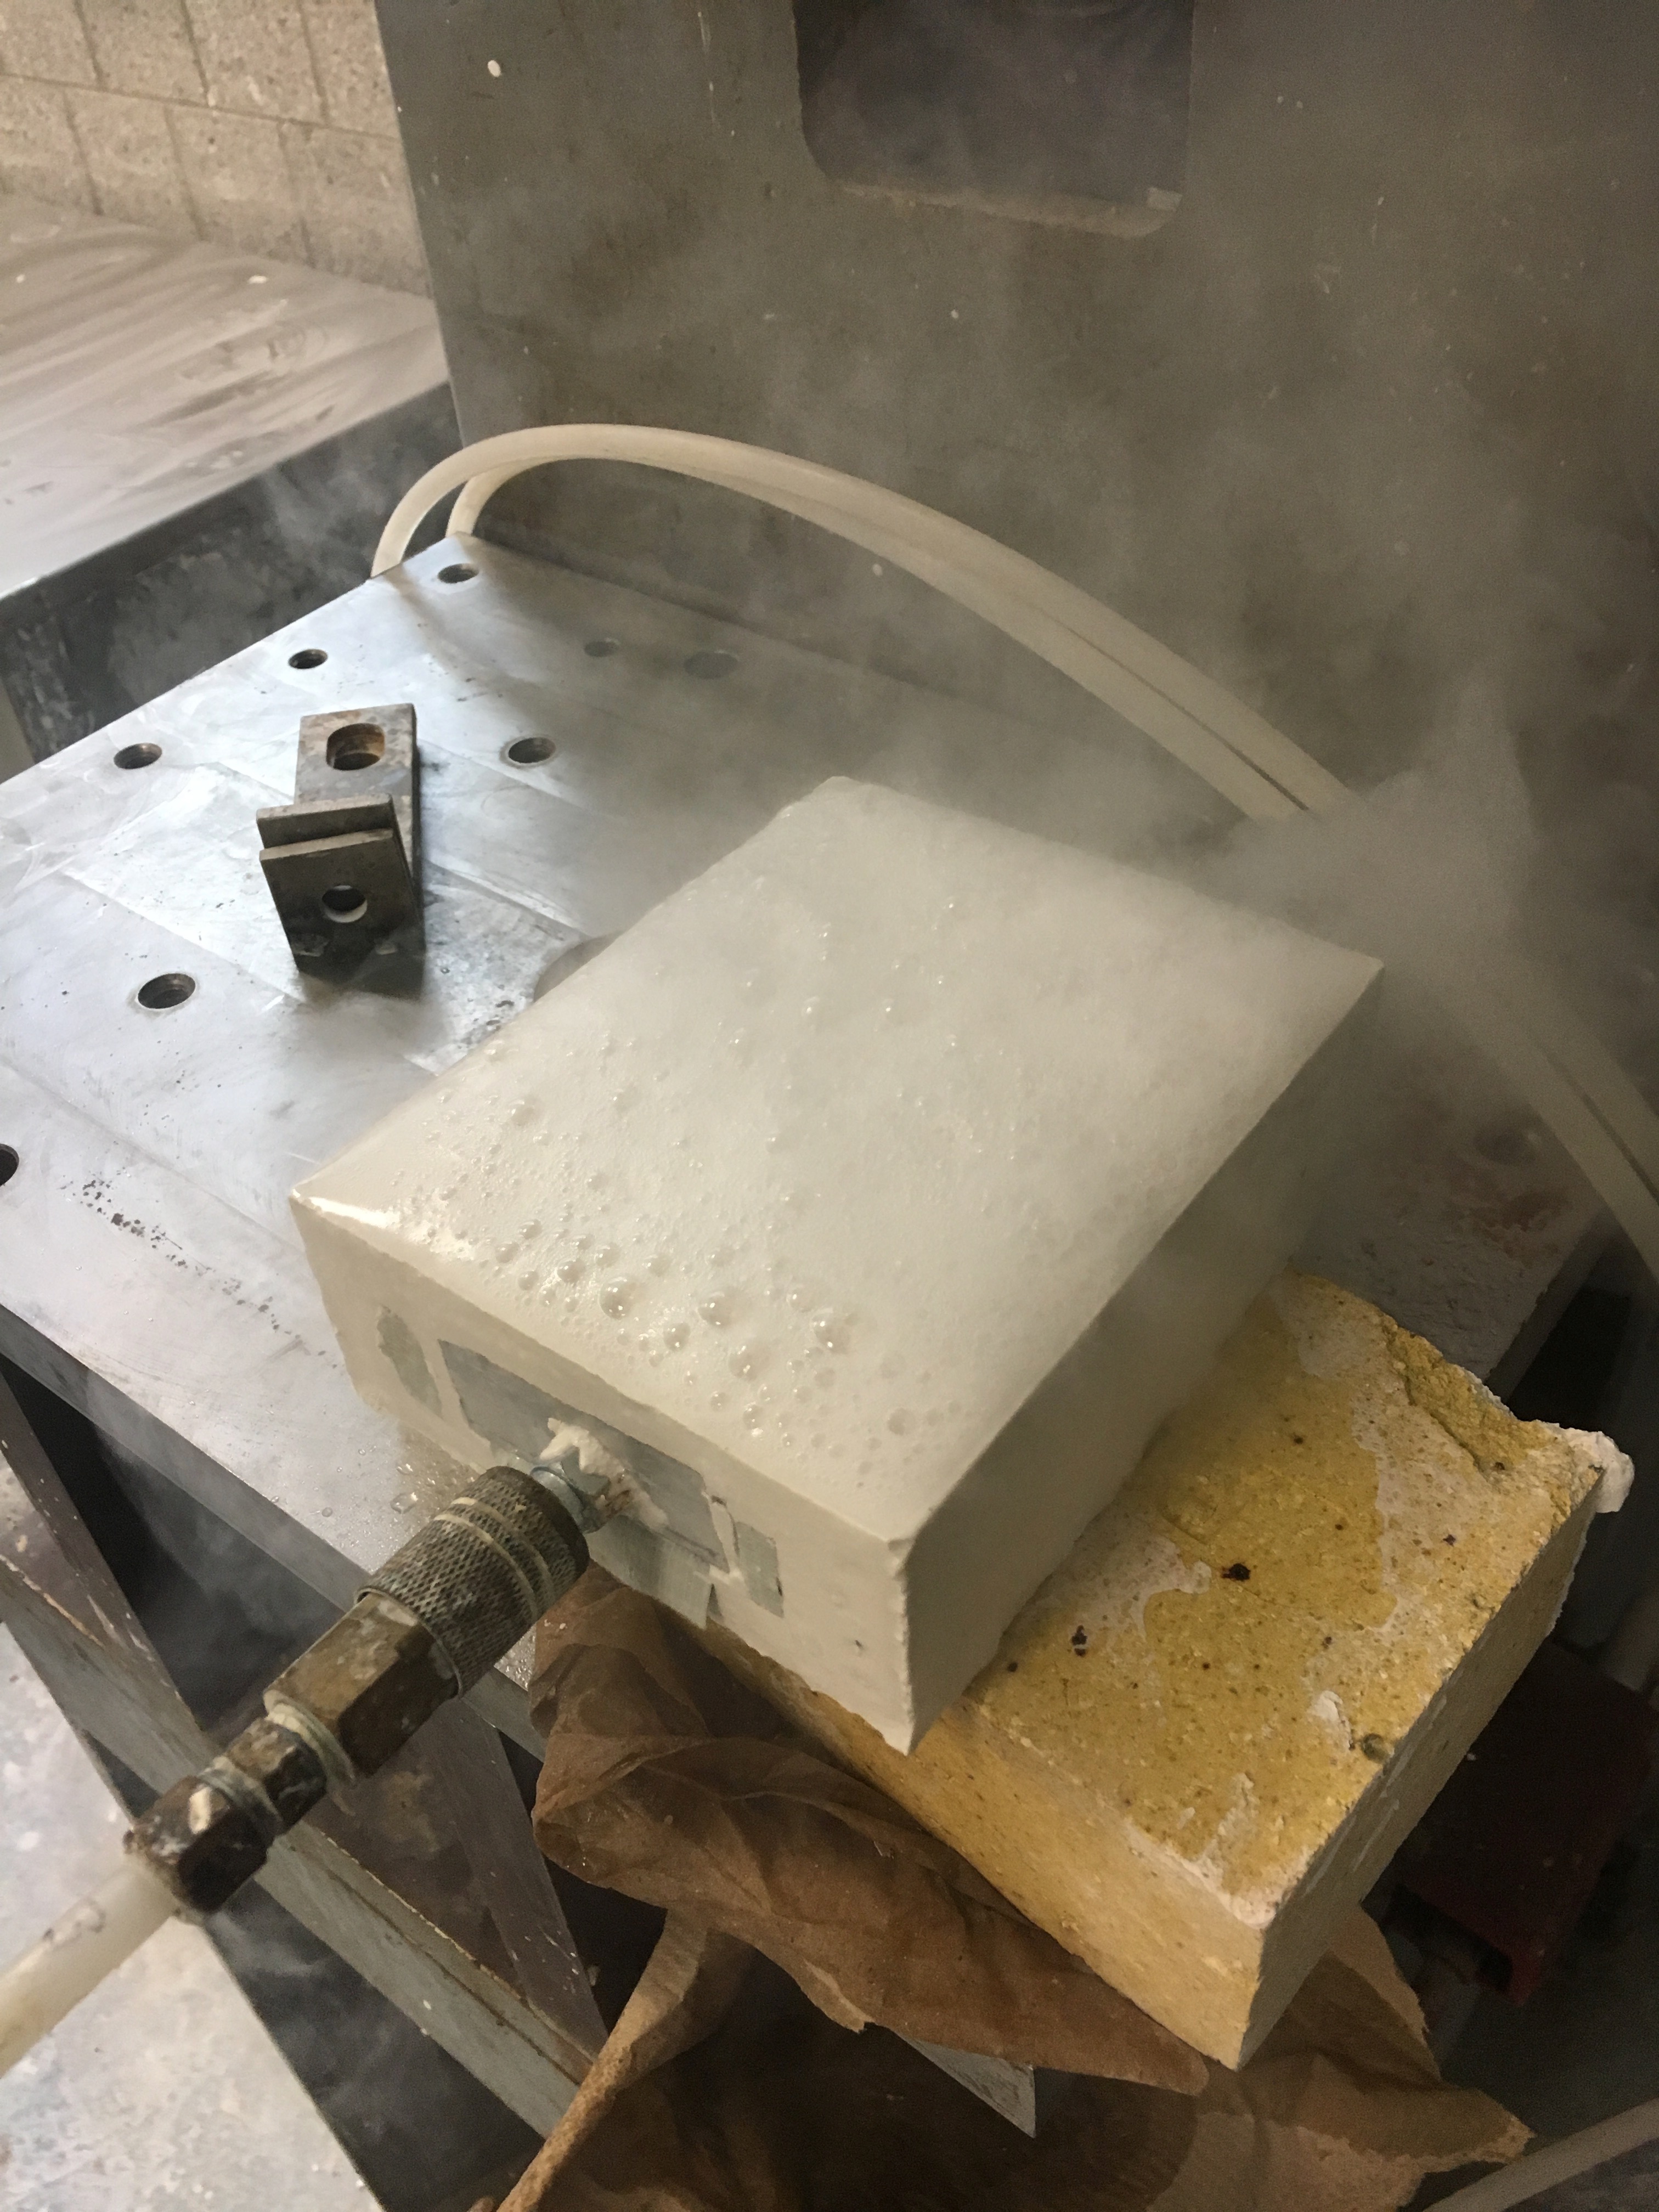
Once the temperature is close to the +28 degrees mark, the coddle boards can be removed. Be cautious around the NPT plug as it can get a little stuck. Be sure to have your timer ready. Plug your mold up into the air-compressor and get ready for the purging to begin!
-
This part is always fun to watch. For every 30 seconds, the air pressure should be turned up 5dpi. This may take 9-10 minutes and should take you up to 120dpi. If your air compressor won’t allow that much, just bring it as high as possible. Be sure to take a cool video and some pictures of all the action that occurs. (P.S. its bound to get a little wet so try setting it up over a bucket or something)
-
Once the air-pressure is brought all the way up, it’s alright to leave it there for a minute or two. Hopefully by now your prototype has popped out on its own, otherwise find a way to carefully dig it out while doing the least amount of damage to your mold. Take my advice that it’s best to have a perfect mold so you don’t have to go back and clean up every individual piece later on…
Your new air-release mold is ready to use immediately upon finishing its purge! Be sure to run your mold under water to give it a little soak before every use. Have fun and get making!