Introduction to Meatball
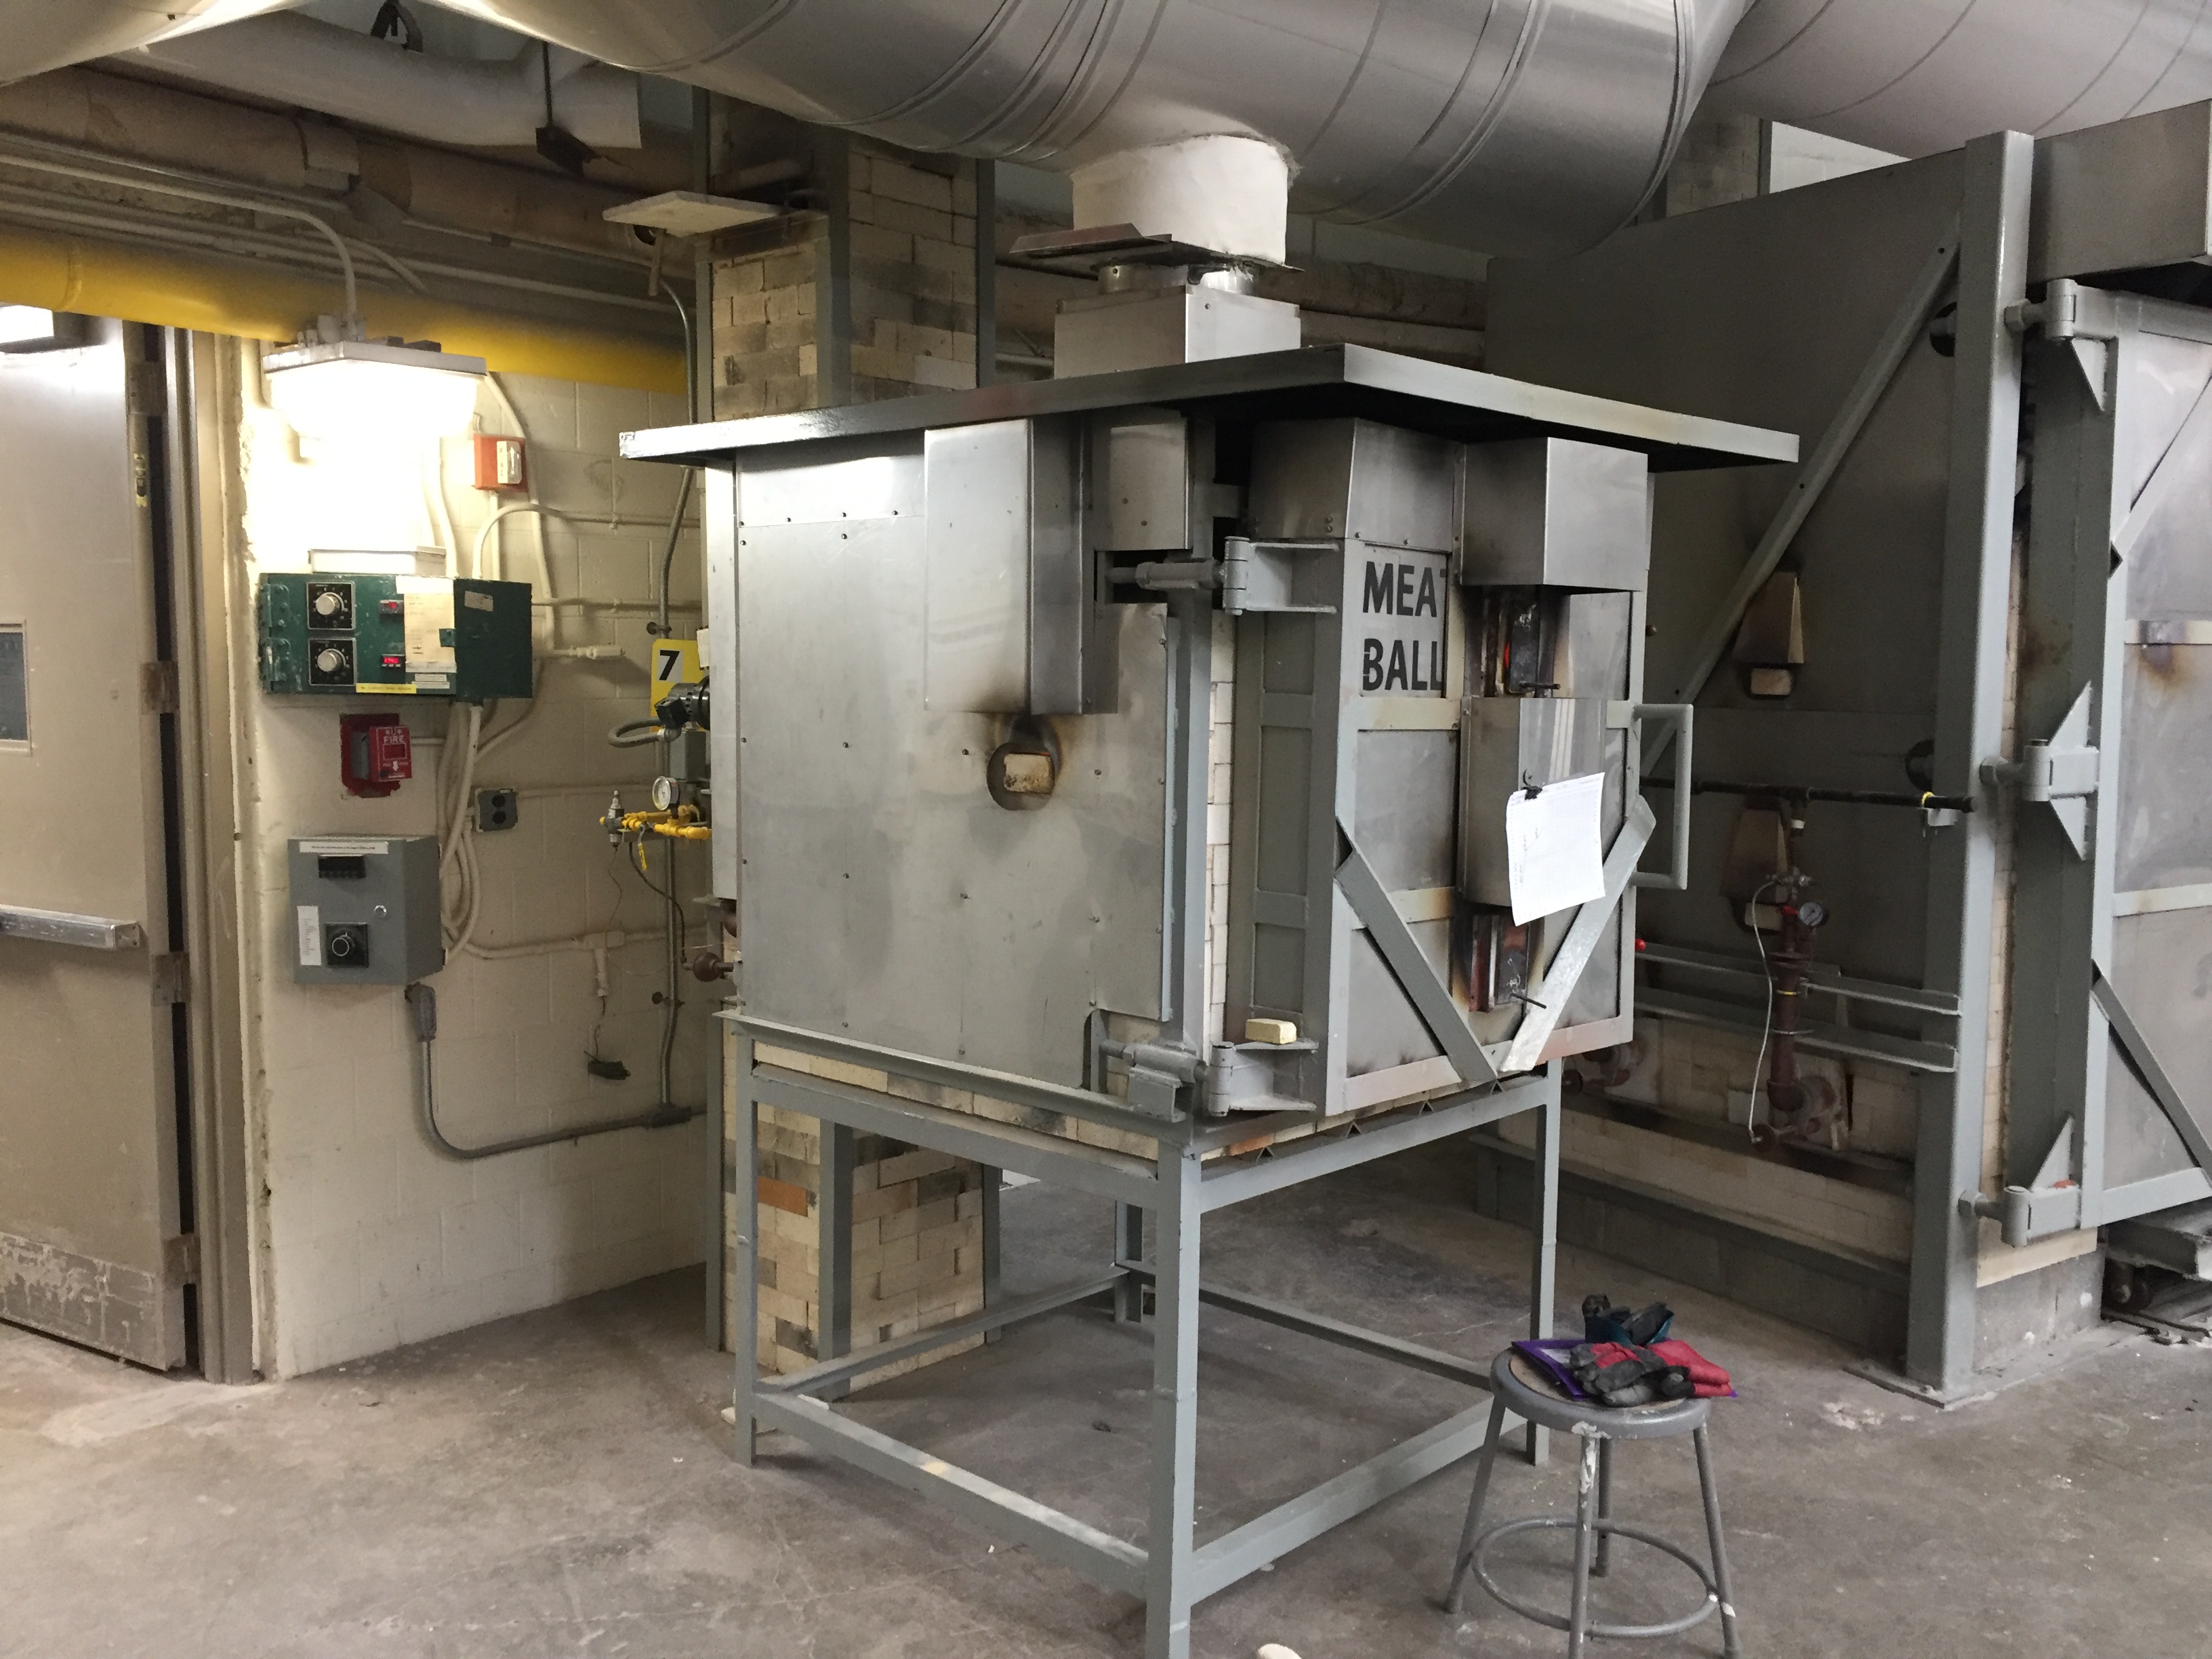
Meatball is a small gas-fired downdraft kiln. In downdraft kilns, burners force in flame through the bottom of the kiln, after which the flame travels upward and then circulates back downward, exiting through the exit flue at the bottom of the kiln.
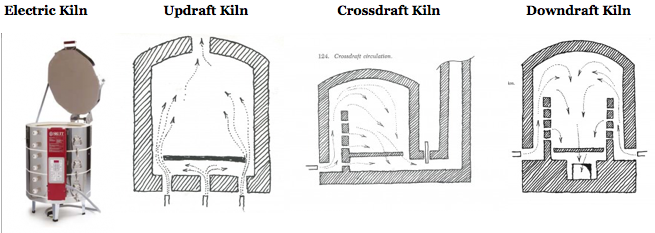
(From https://www.colorado.edu/classics/2018/06/14/ancient-greek-ceramic-kilns)
The Burners
Meatball has 2 forced air burners, paired with 2 small venturi burners which serve as safety pilot lights. The pilots include a thermocouple which detects heat. If the pilots go out, the thermocouples will detect the temperature change and the safety Baso valve will automatically shut off the gas. The pilot lights are also used to initially warm up the kiln slowly when starting the firing.
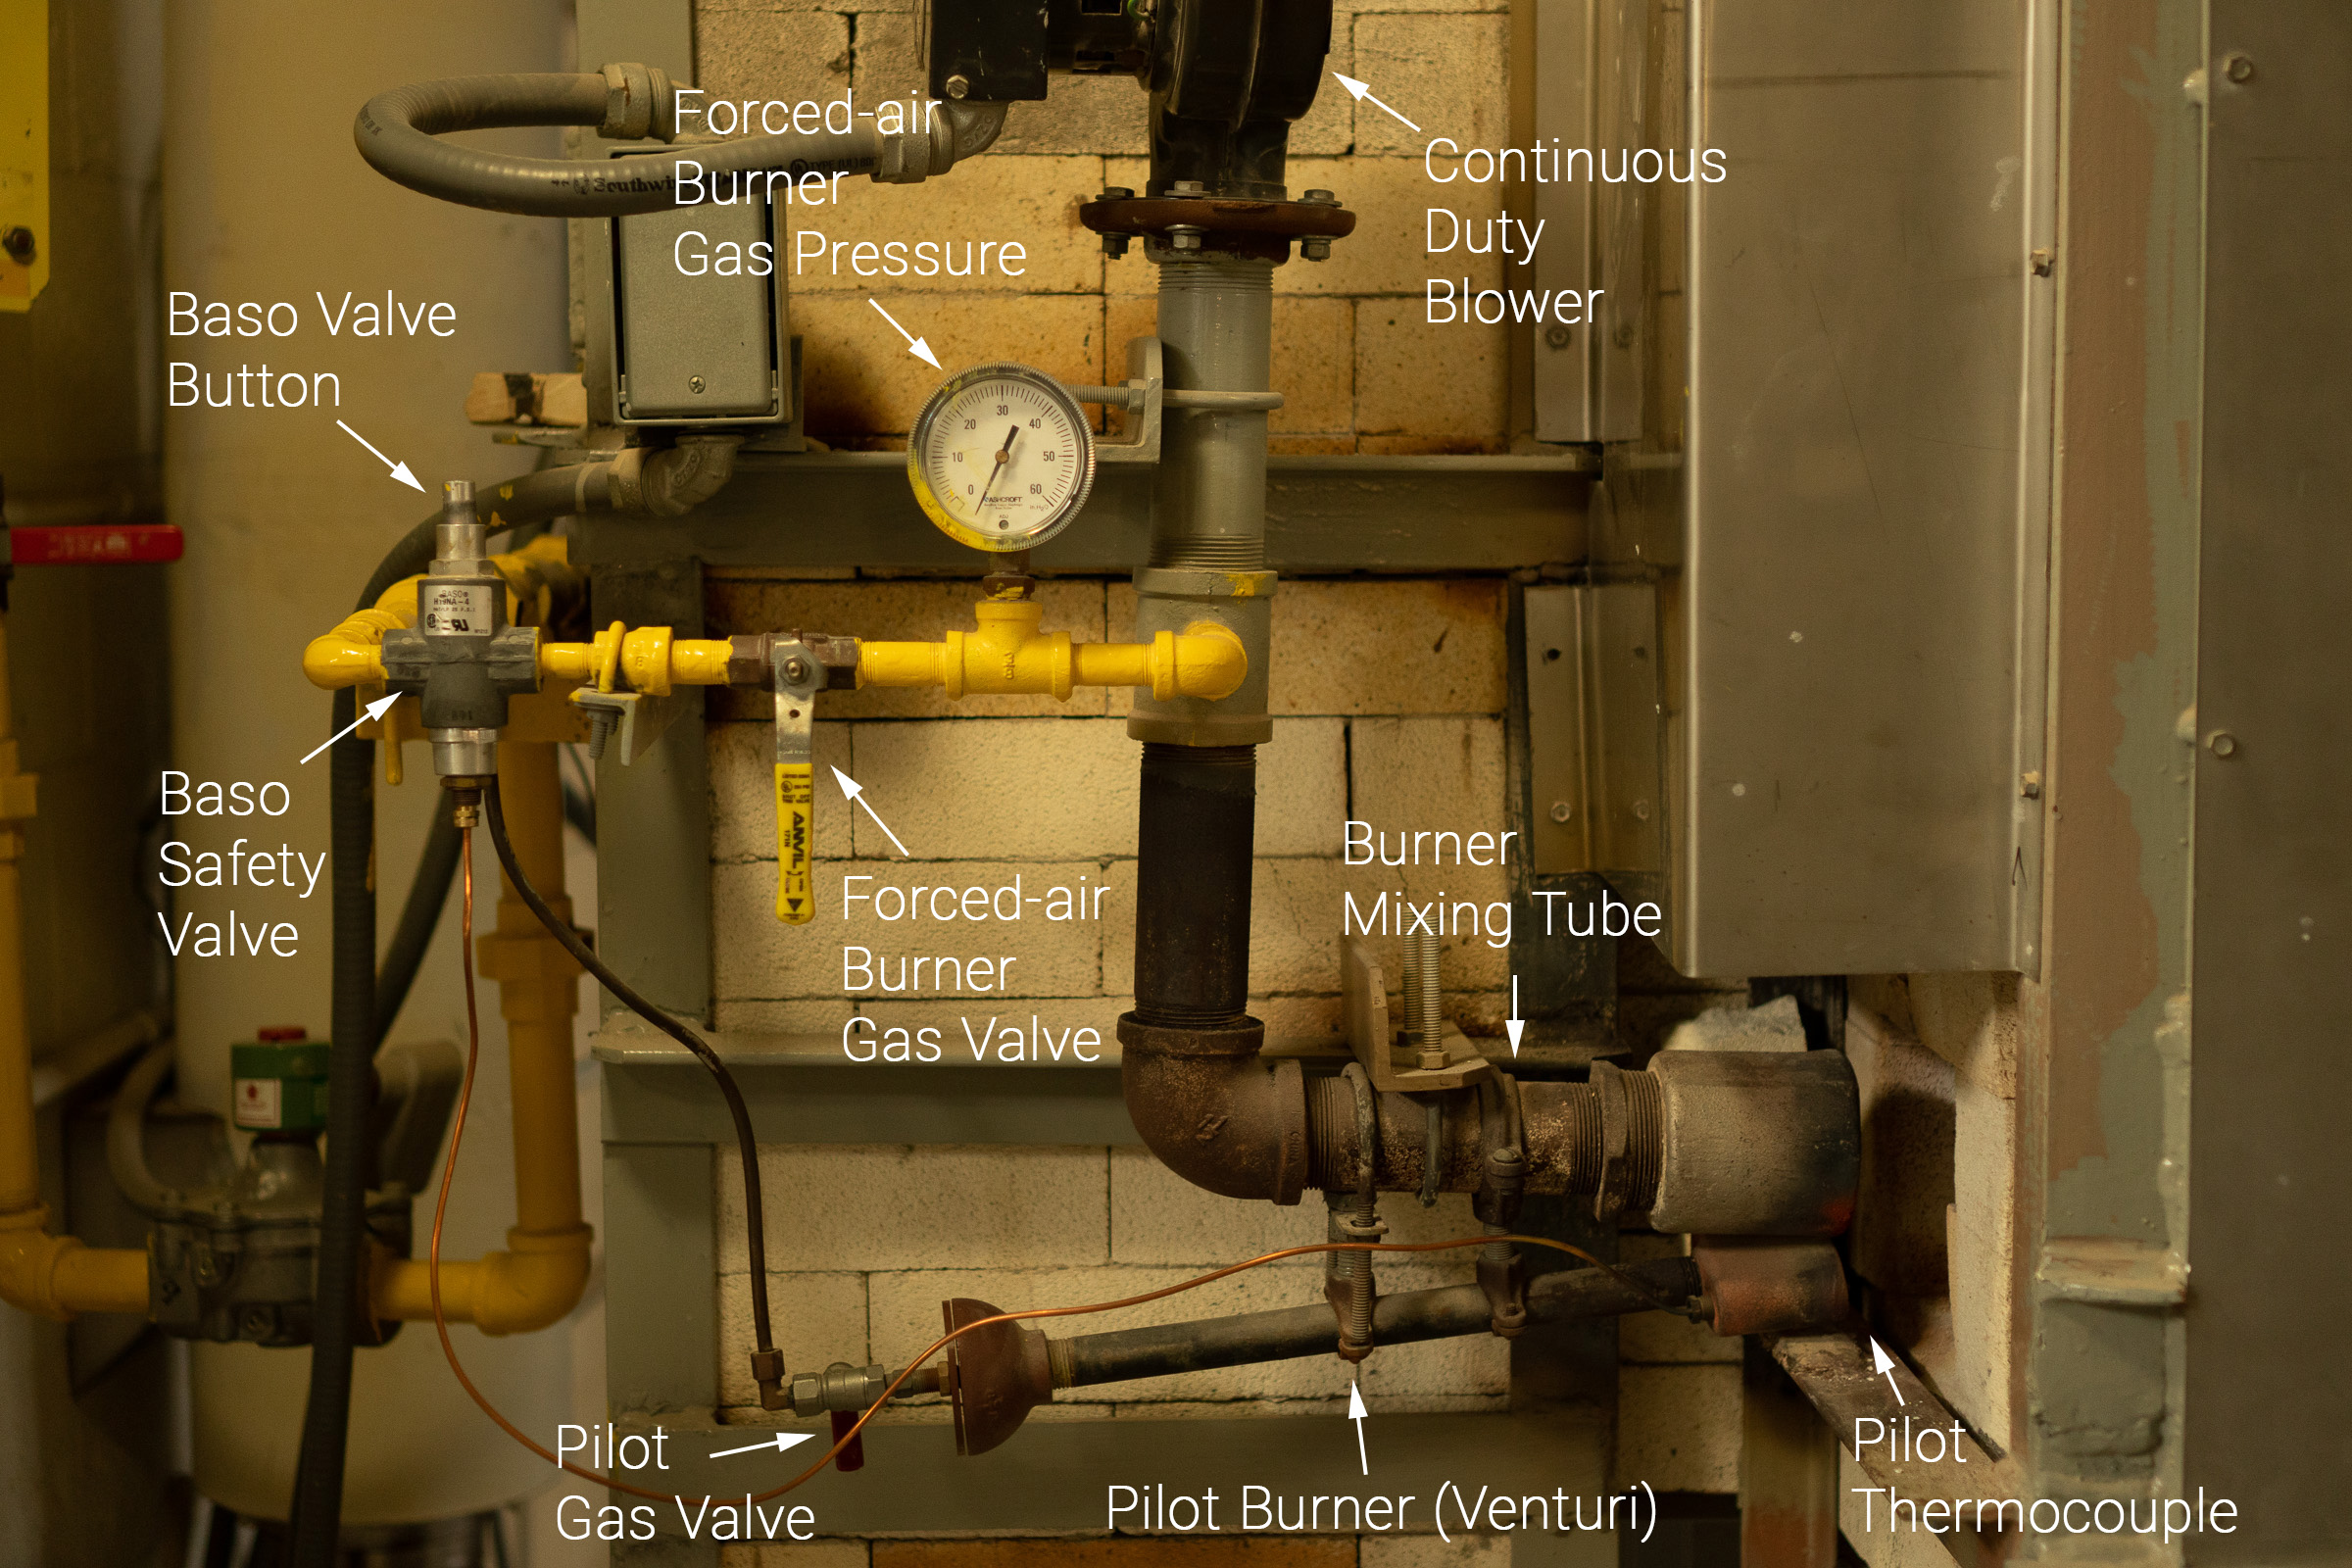
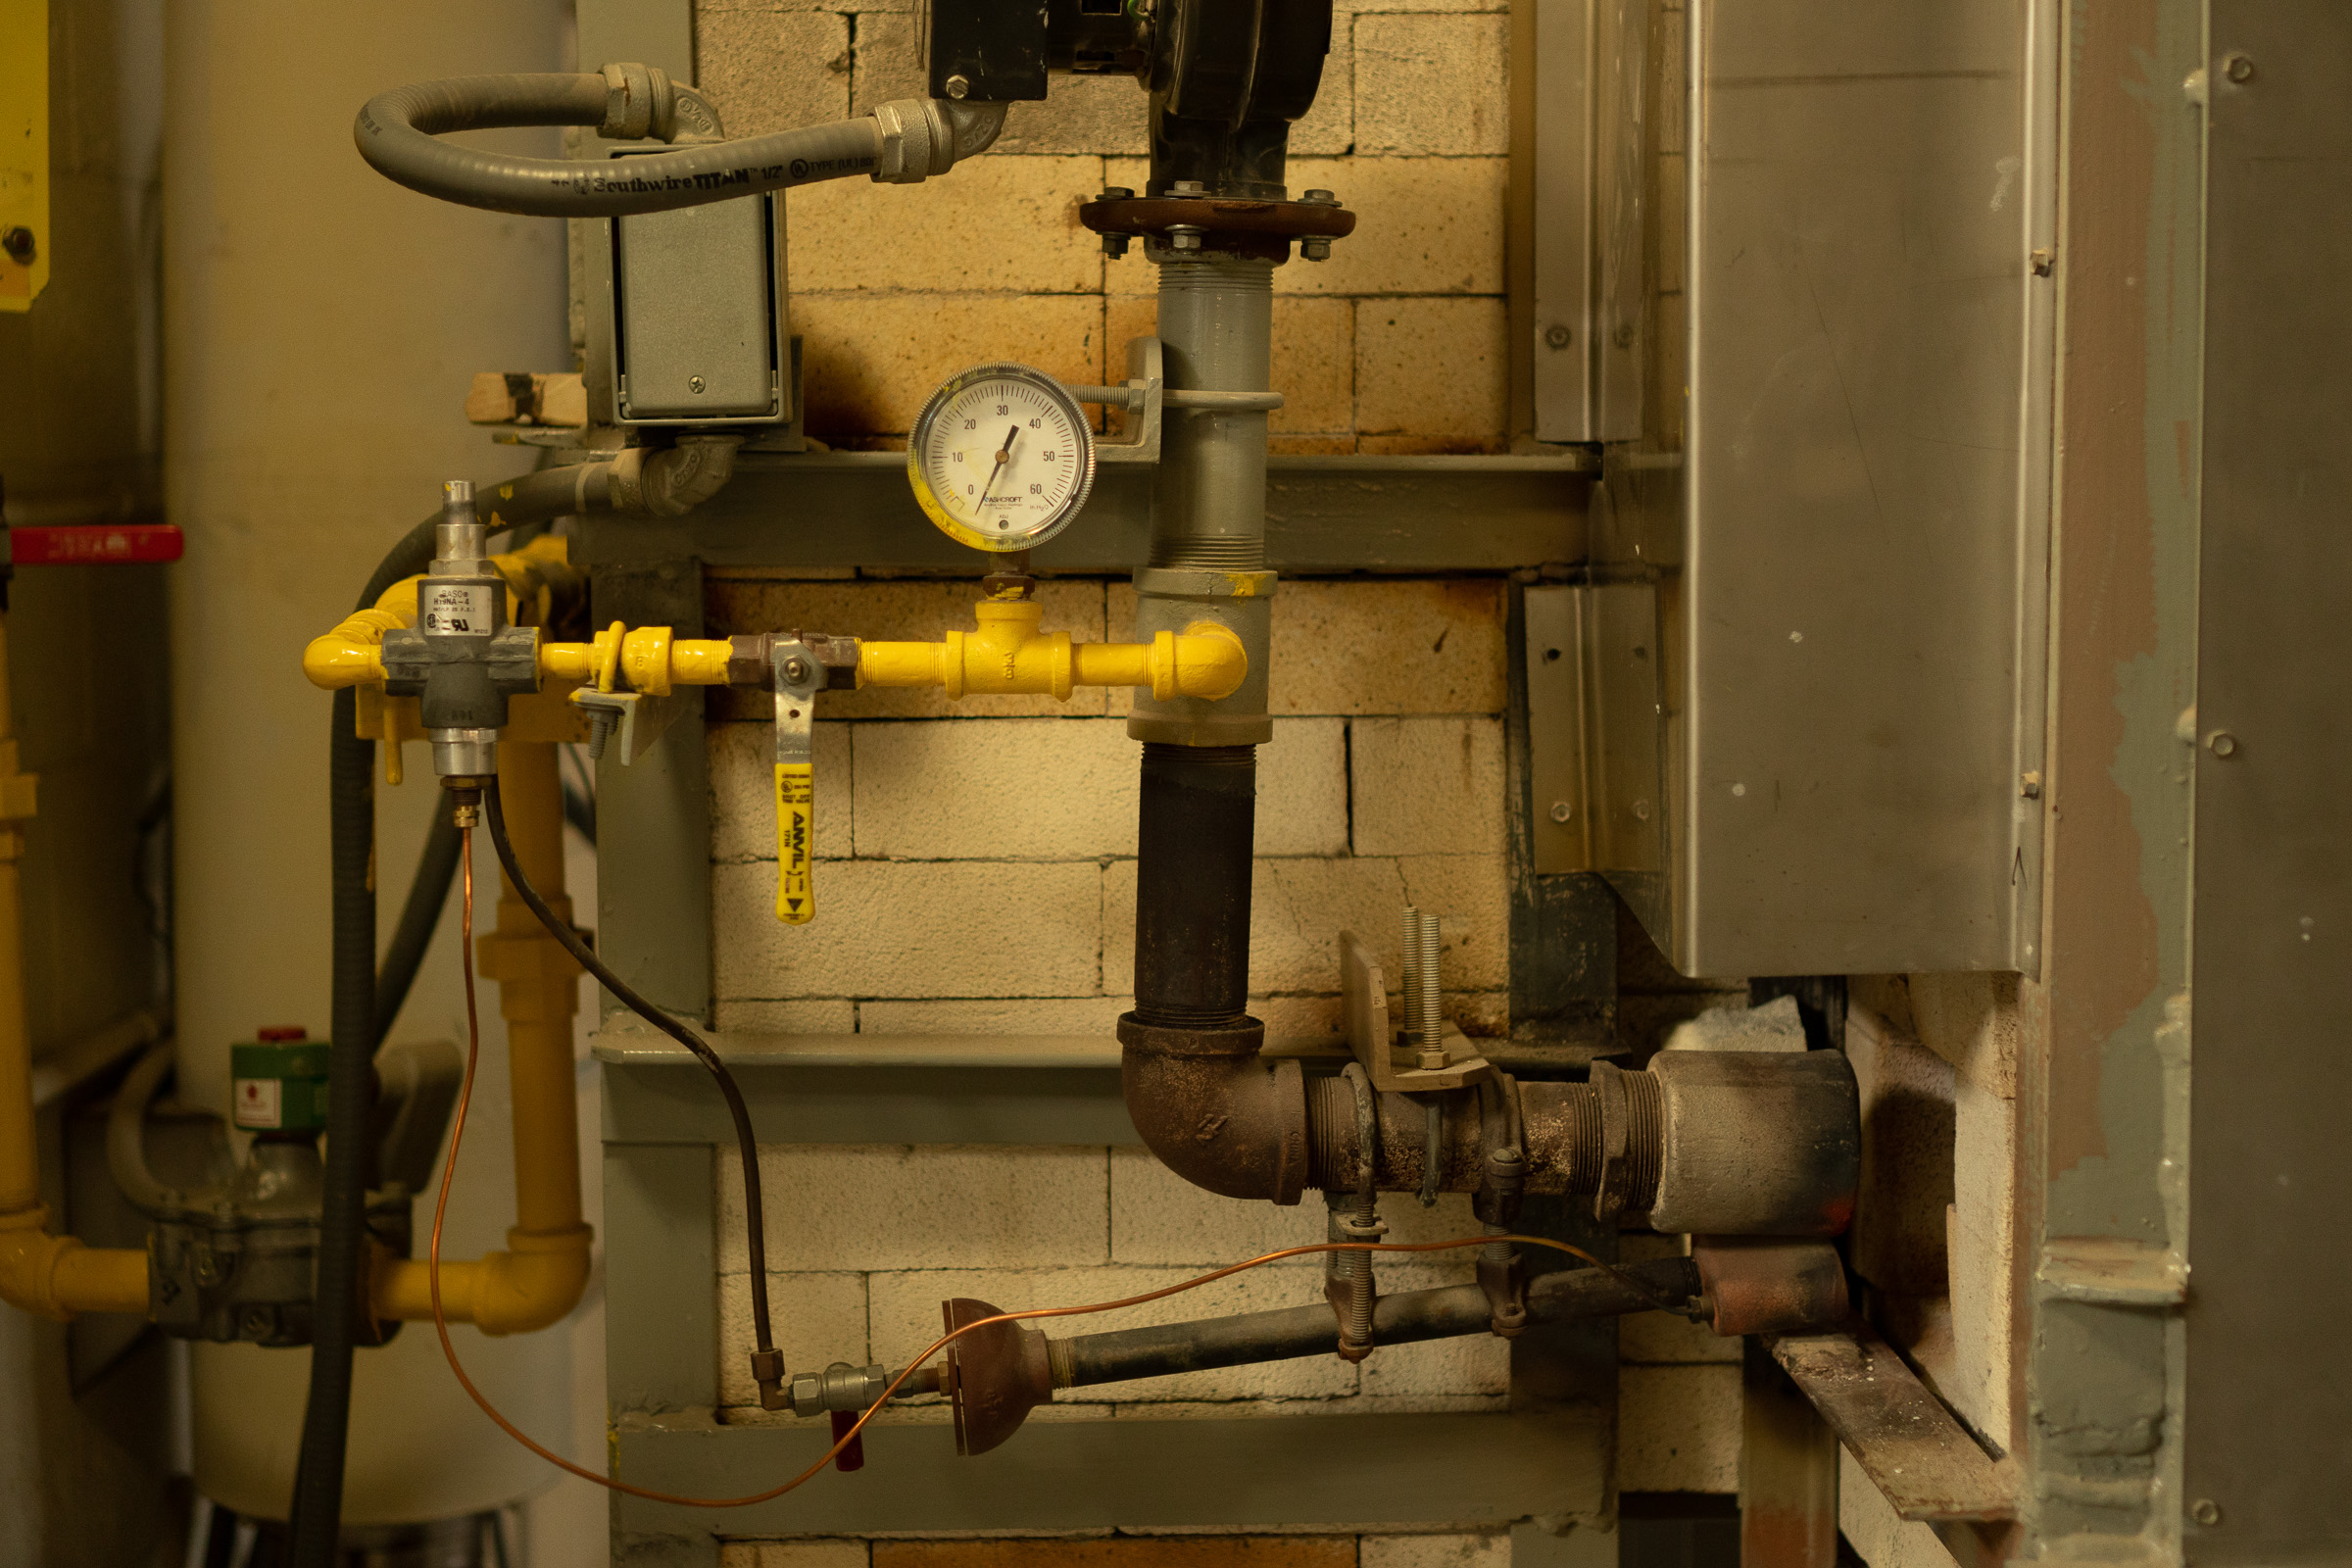
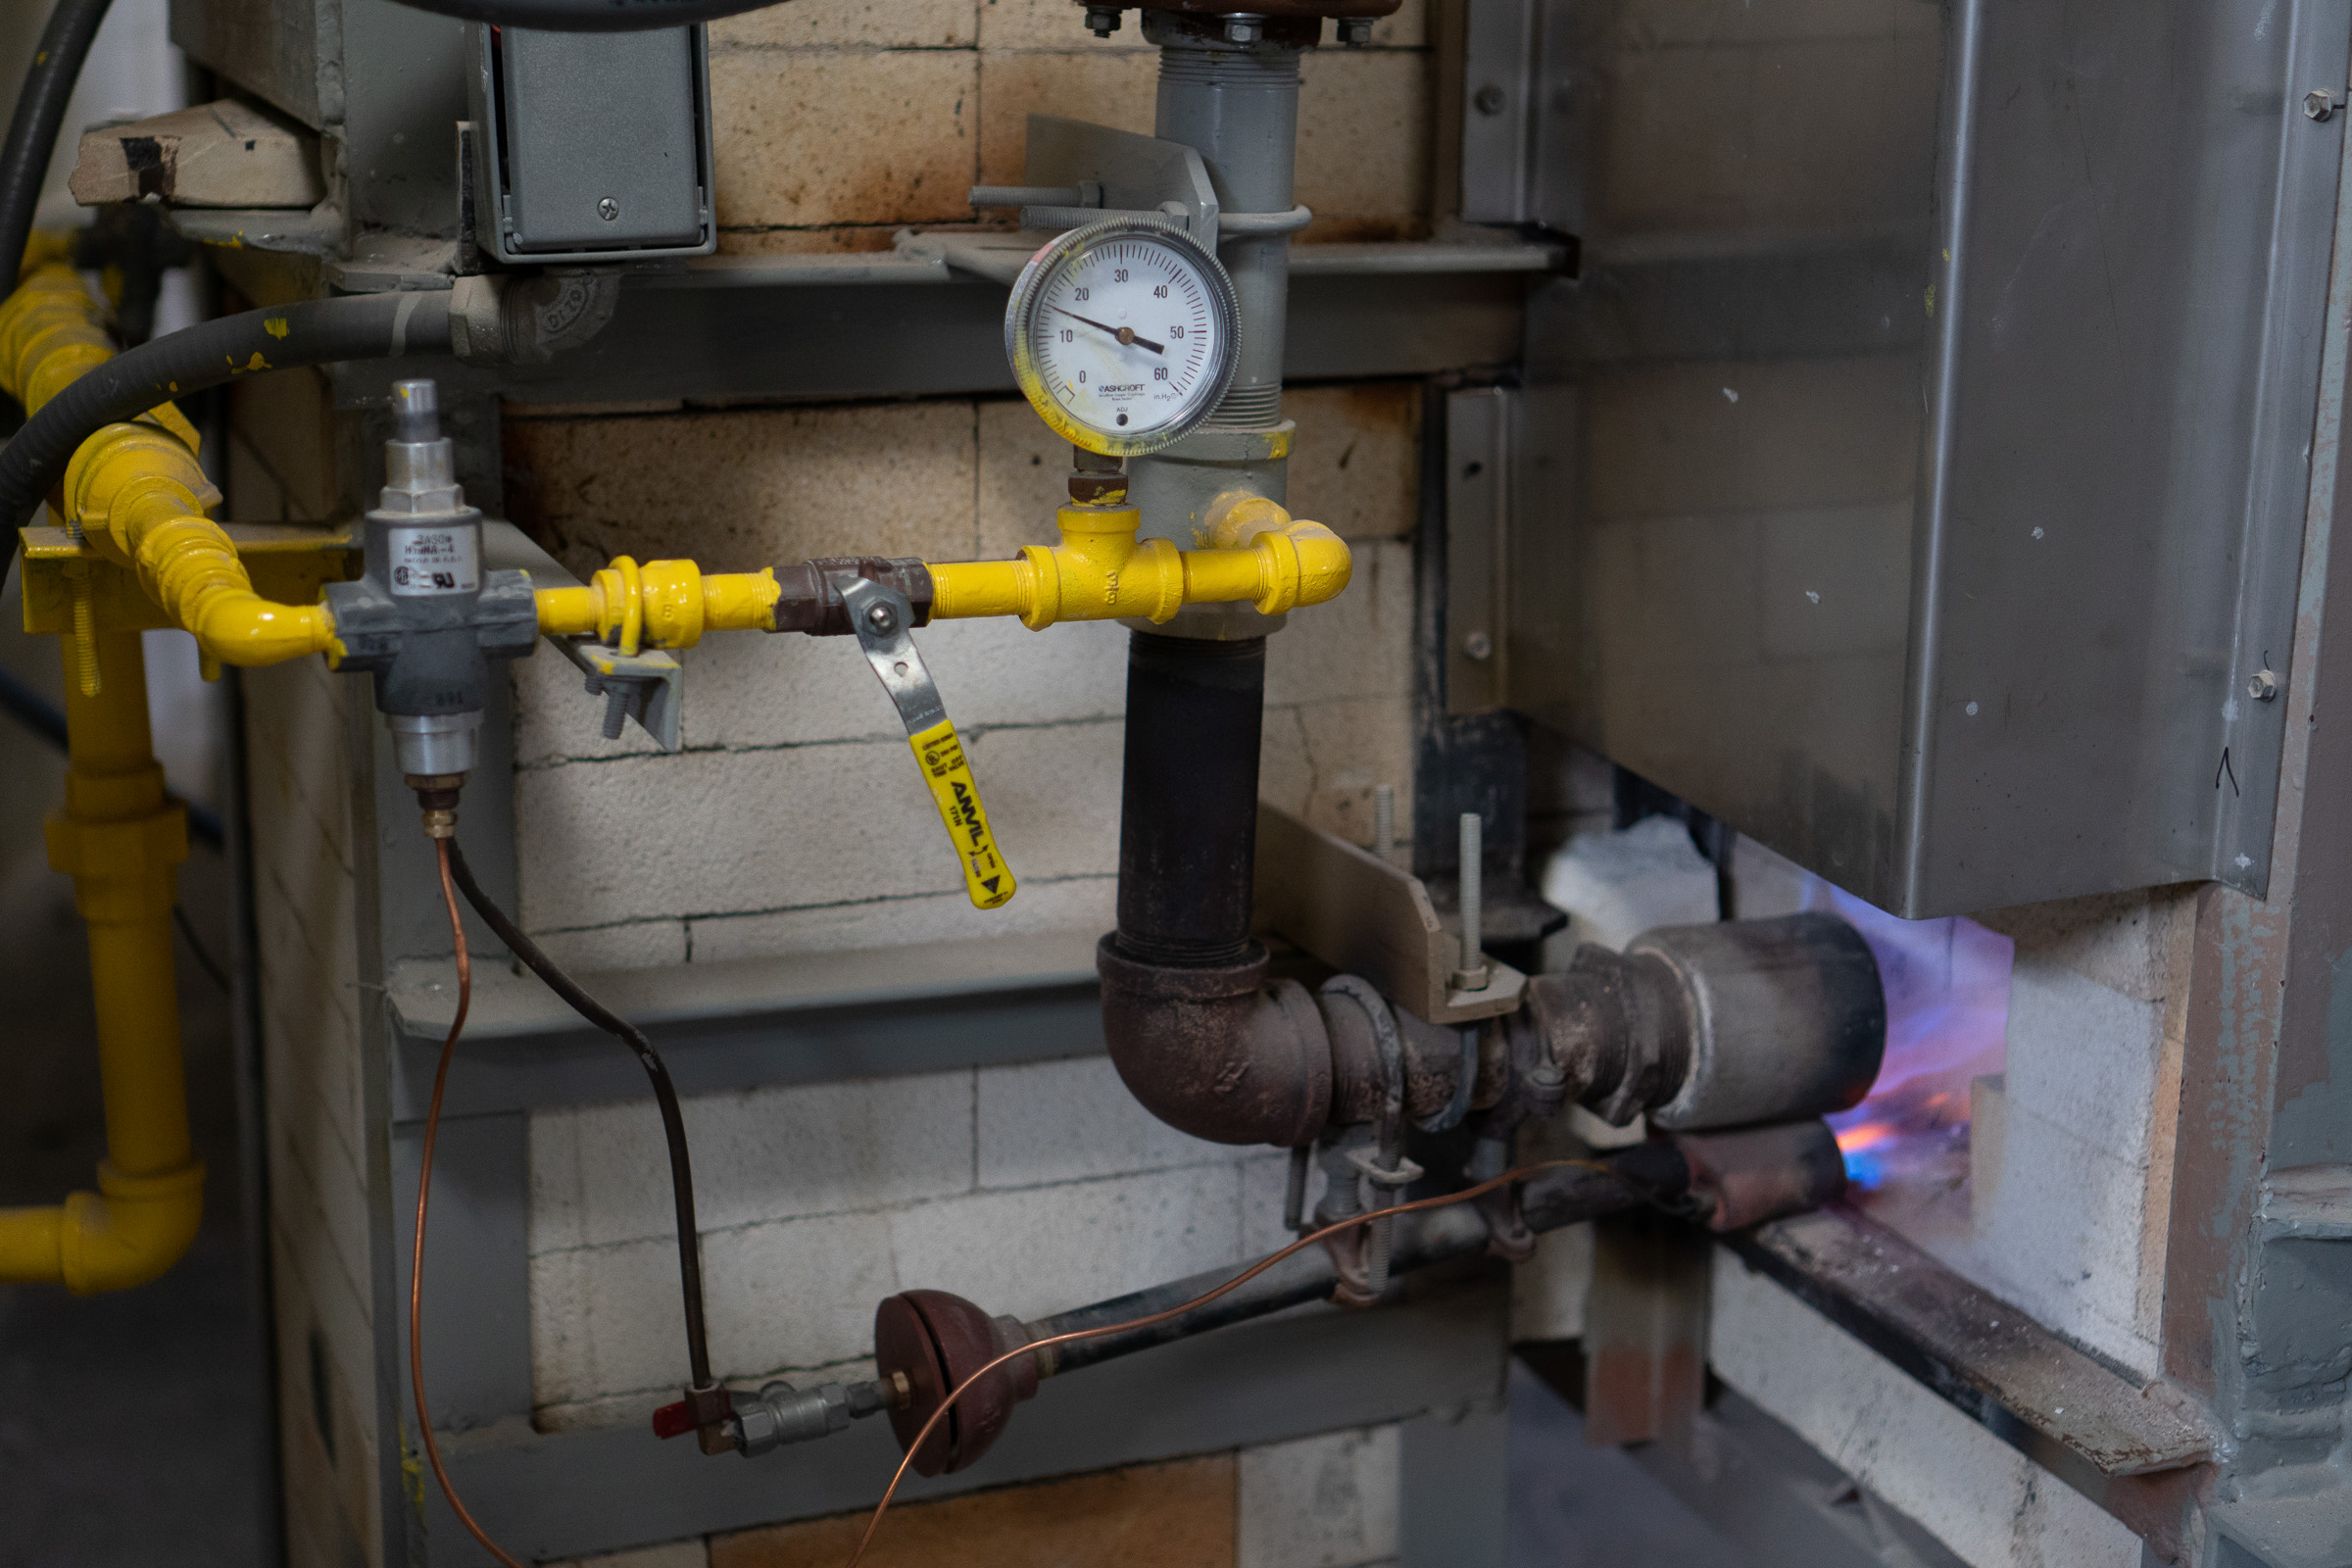
Forced Air Burners.
These are the powerful burners that are used to fire the kiln. They are two ways to control them: By adjusting the gas or by adjusting the air.
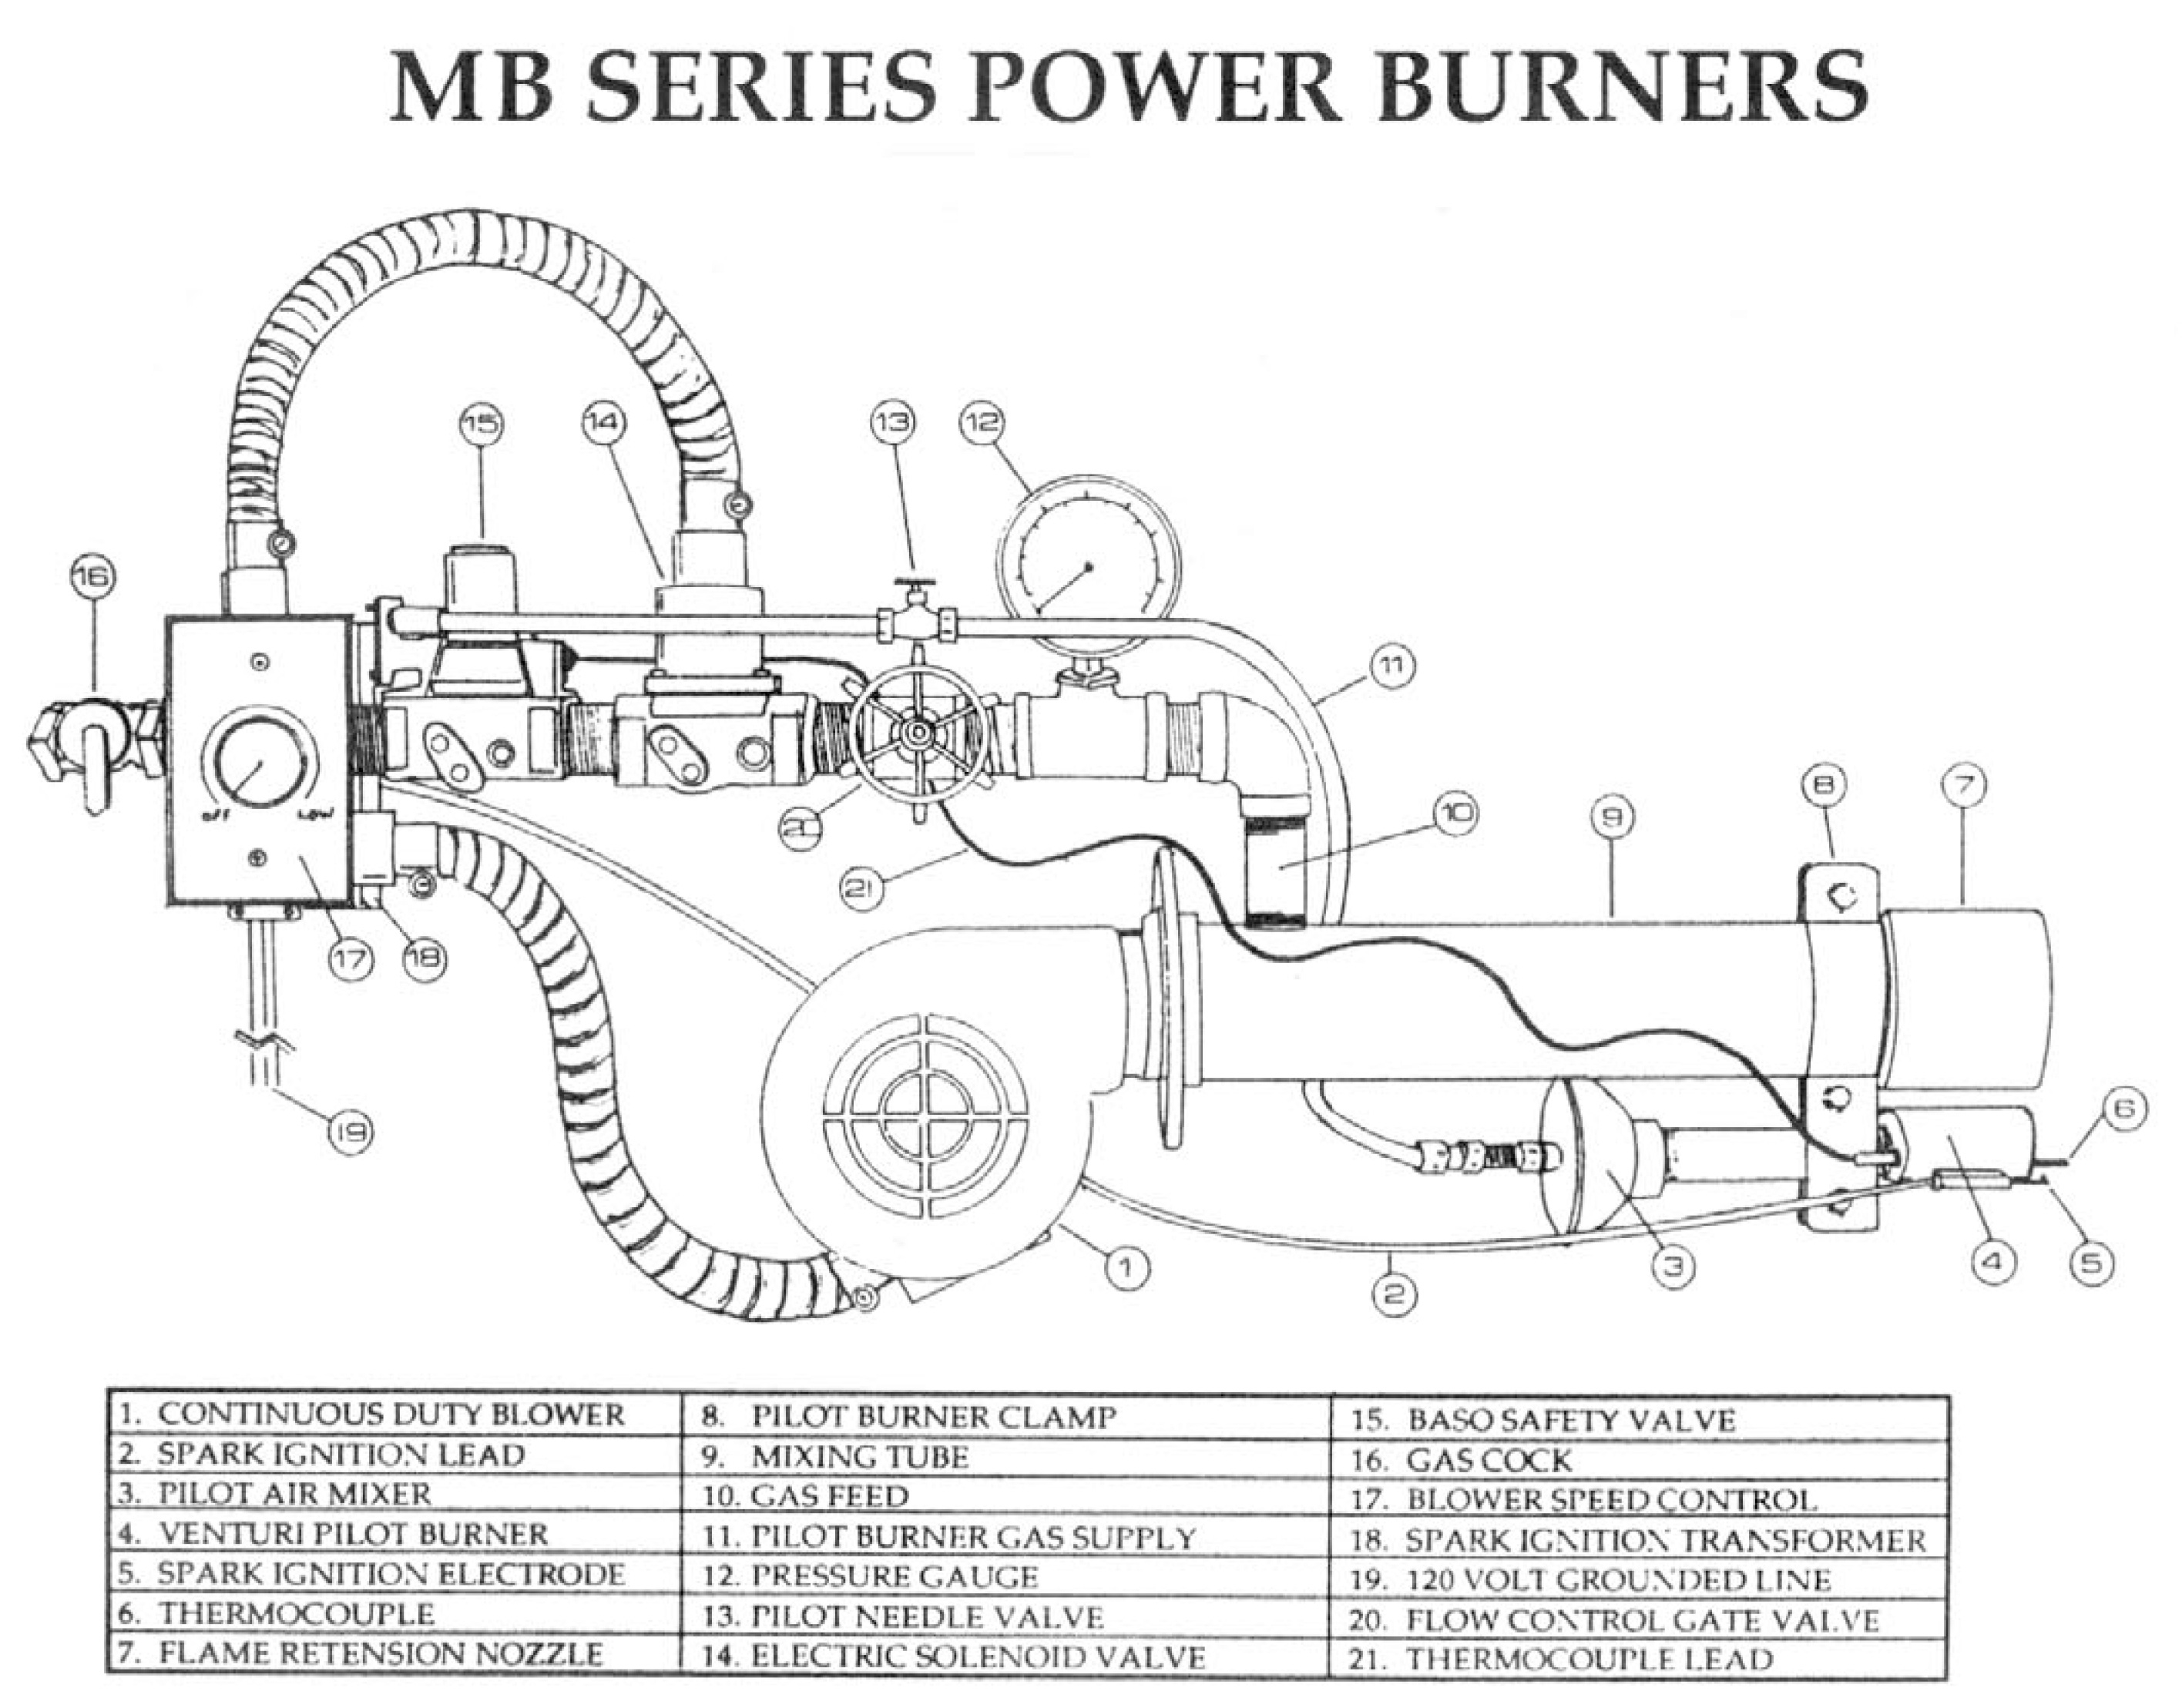
(Image from Ward Burner http://www.wardburner.com)
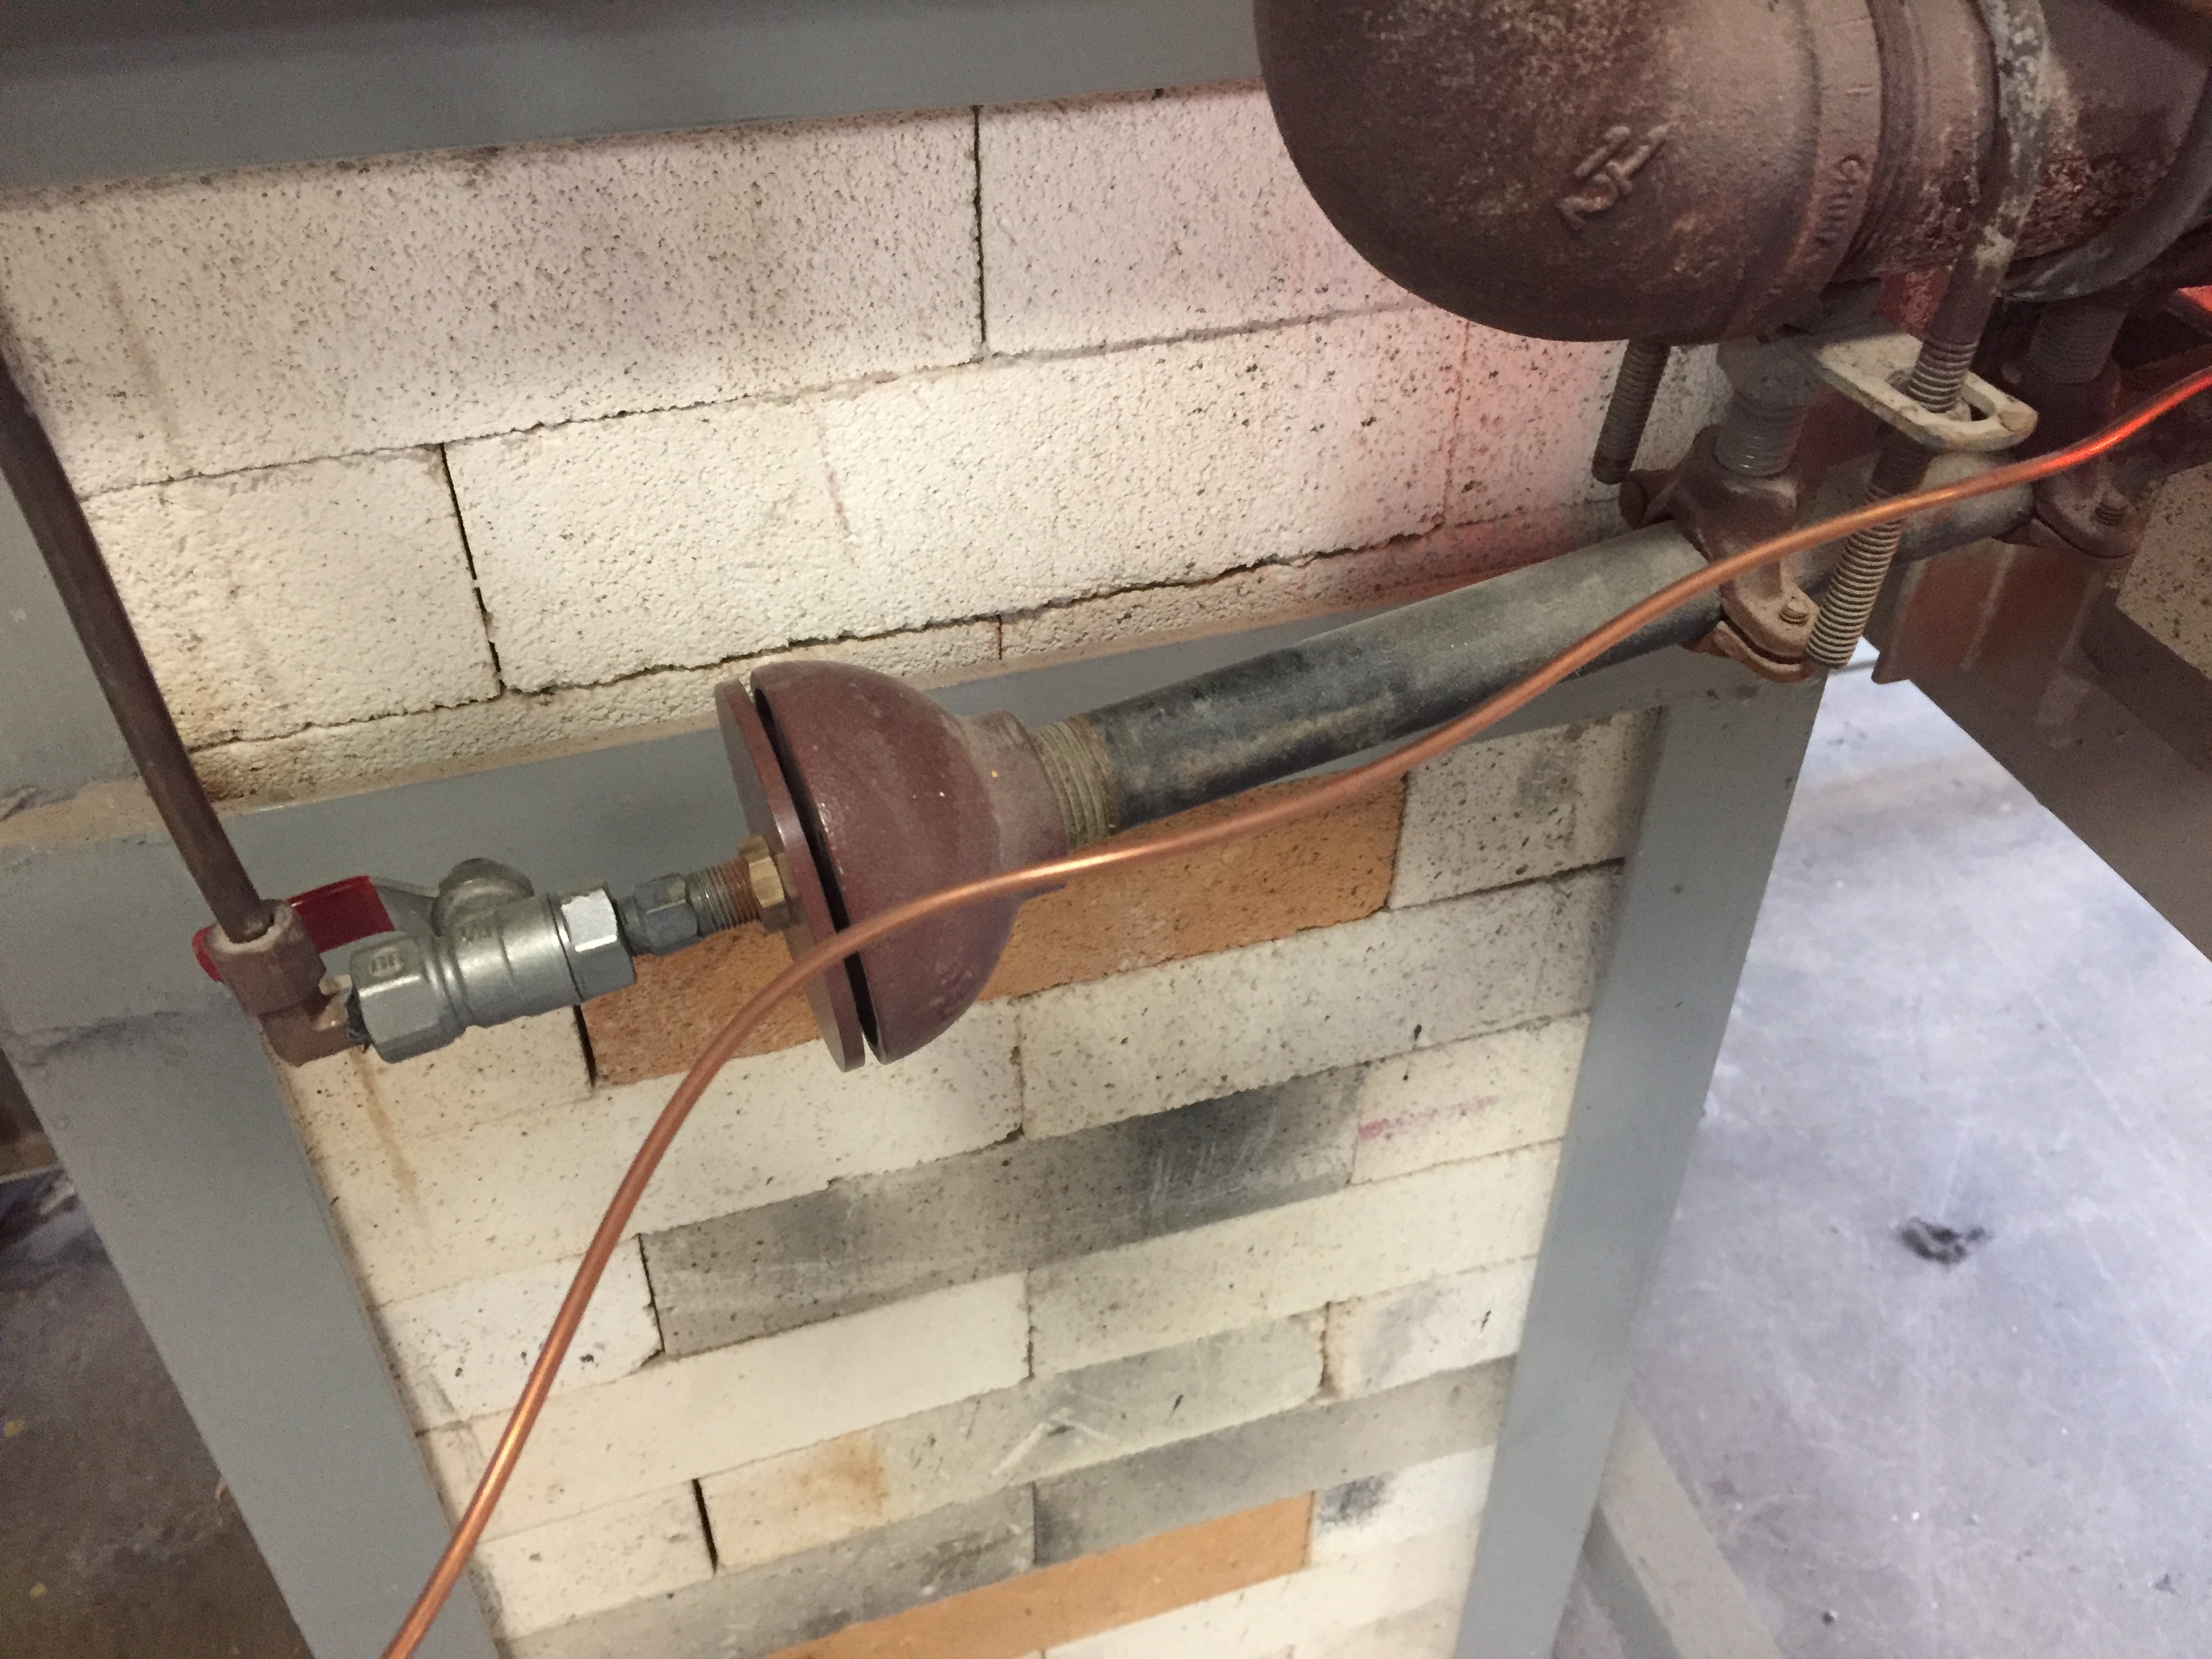
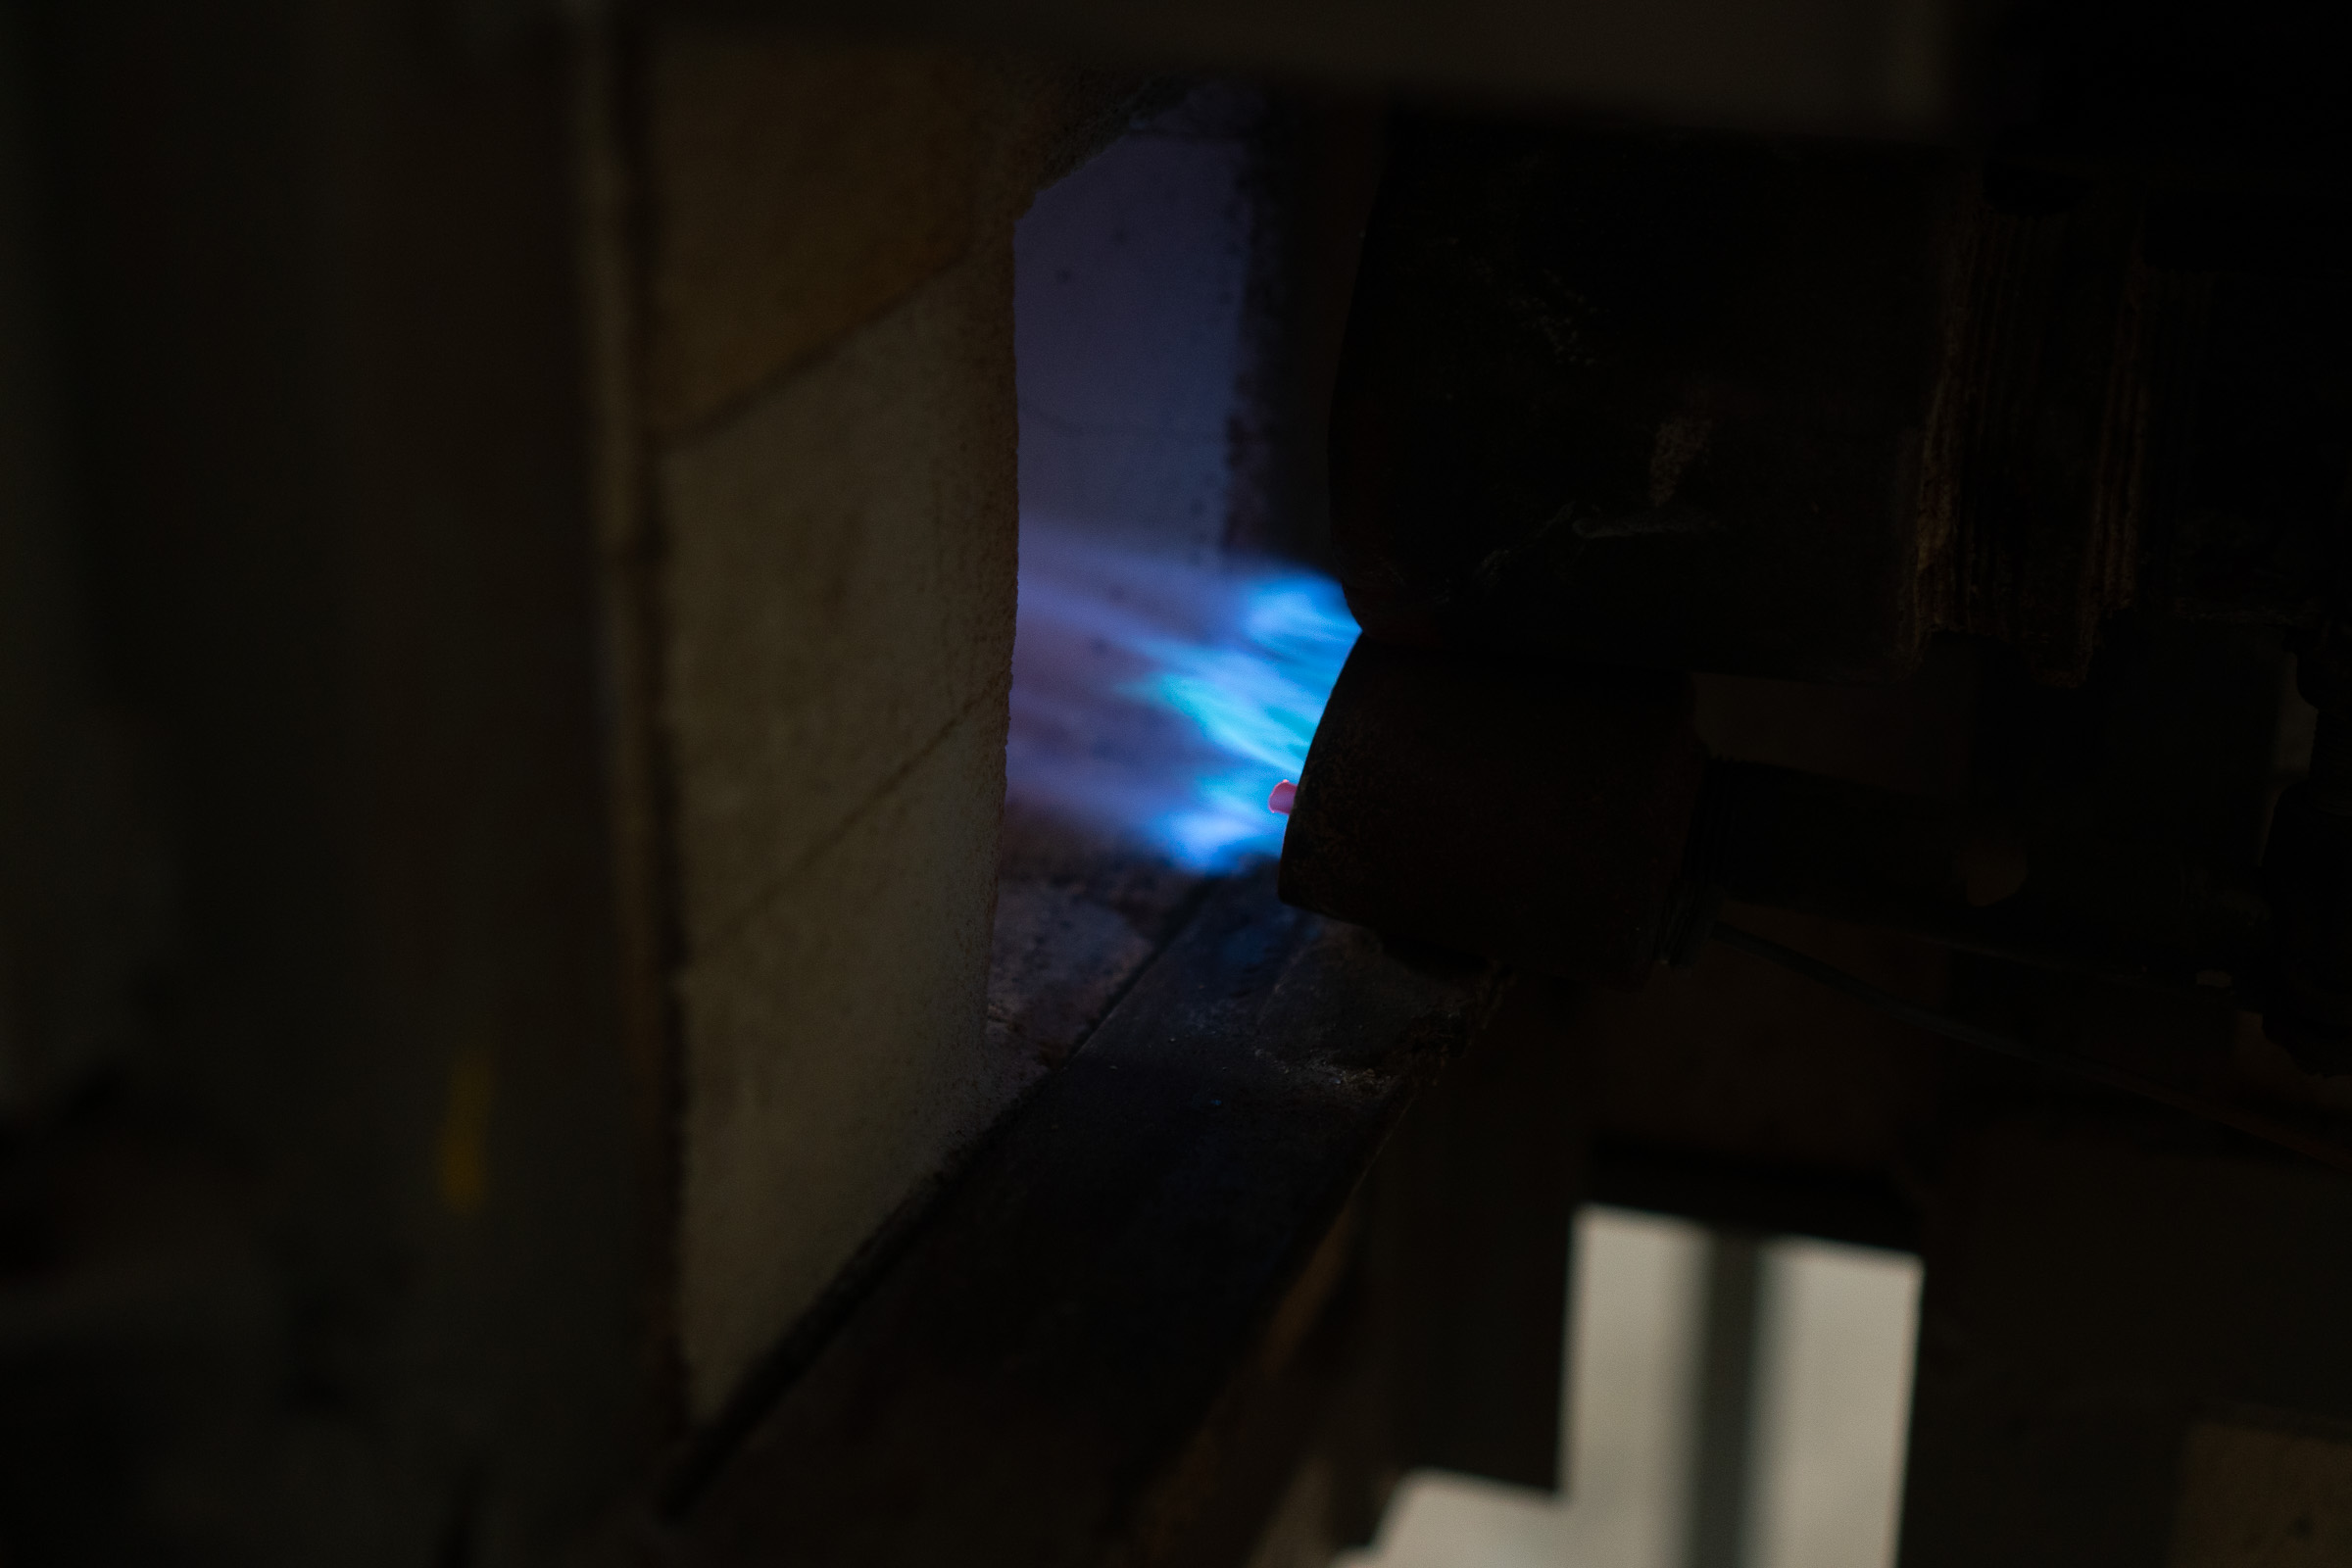
Safety Pilot Lights (Small Venturi Burners)
In this kiln, 2 small venturi burners are used as “pilot” burners. These burners include a thermocouple. If the pilots go out, the thermocouple will detect the temperature change and shut off the gas.

Loading the Kiln
-
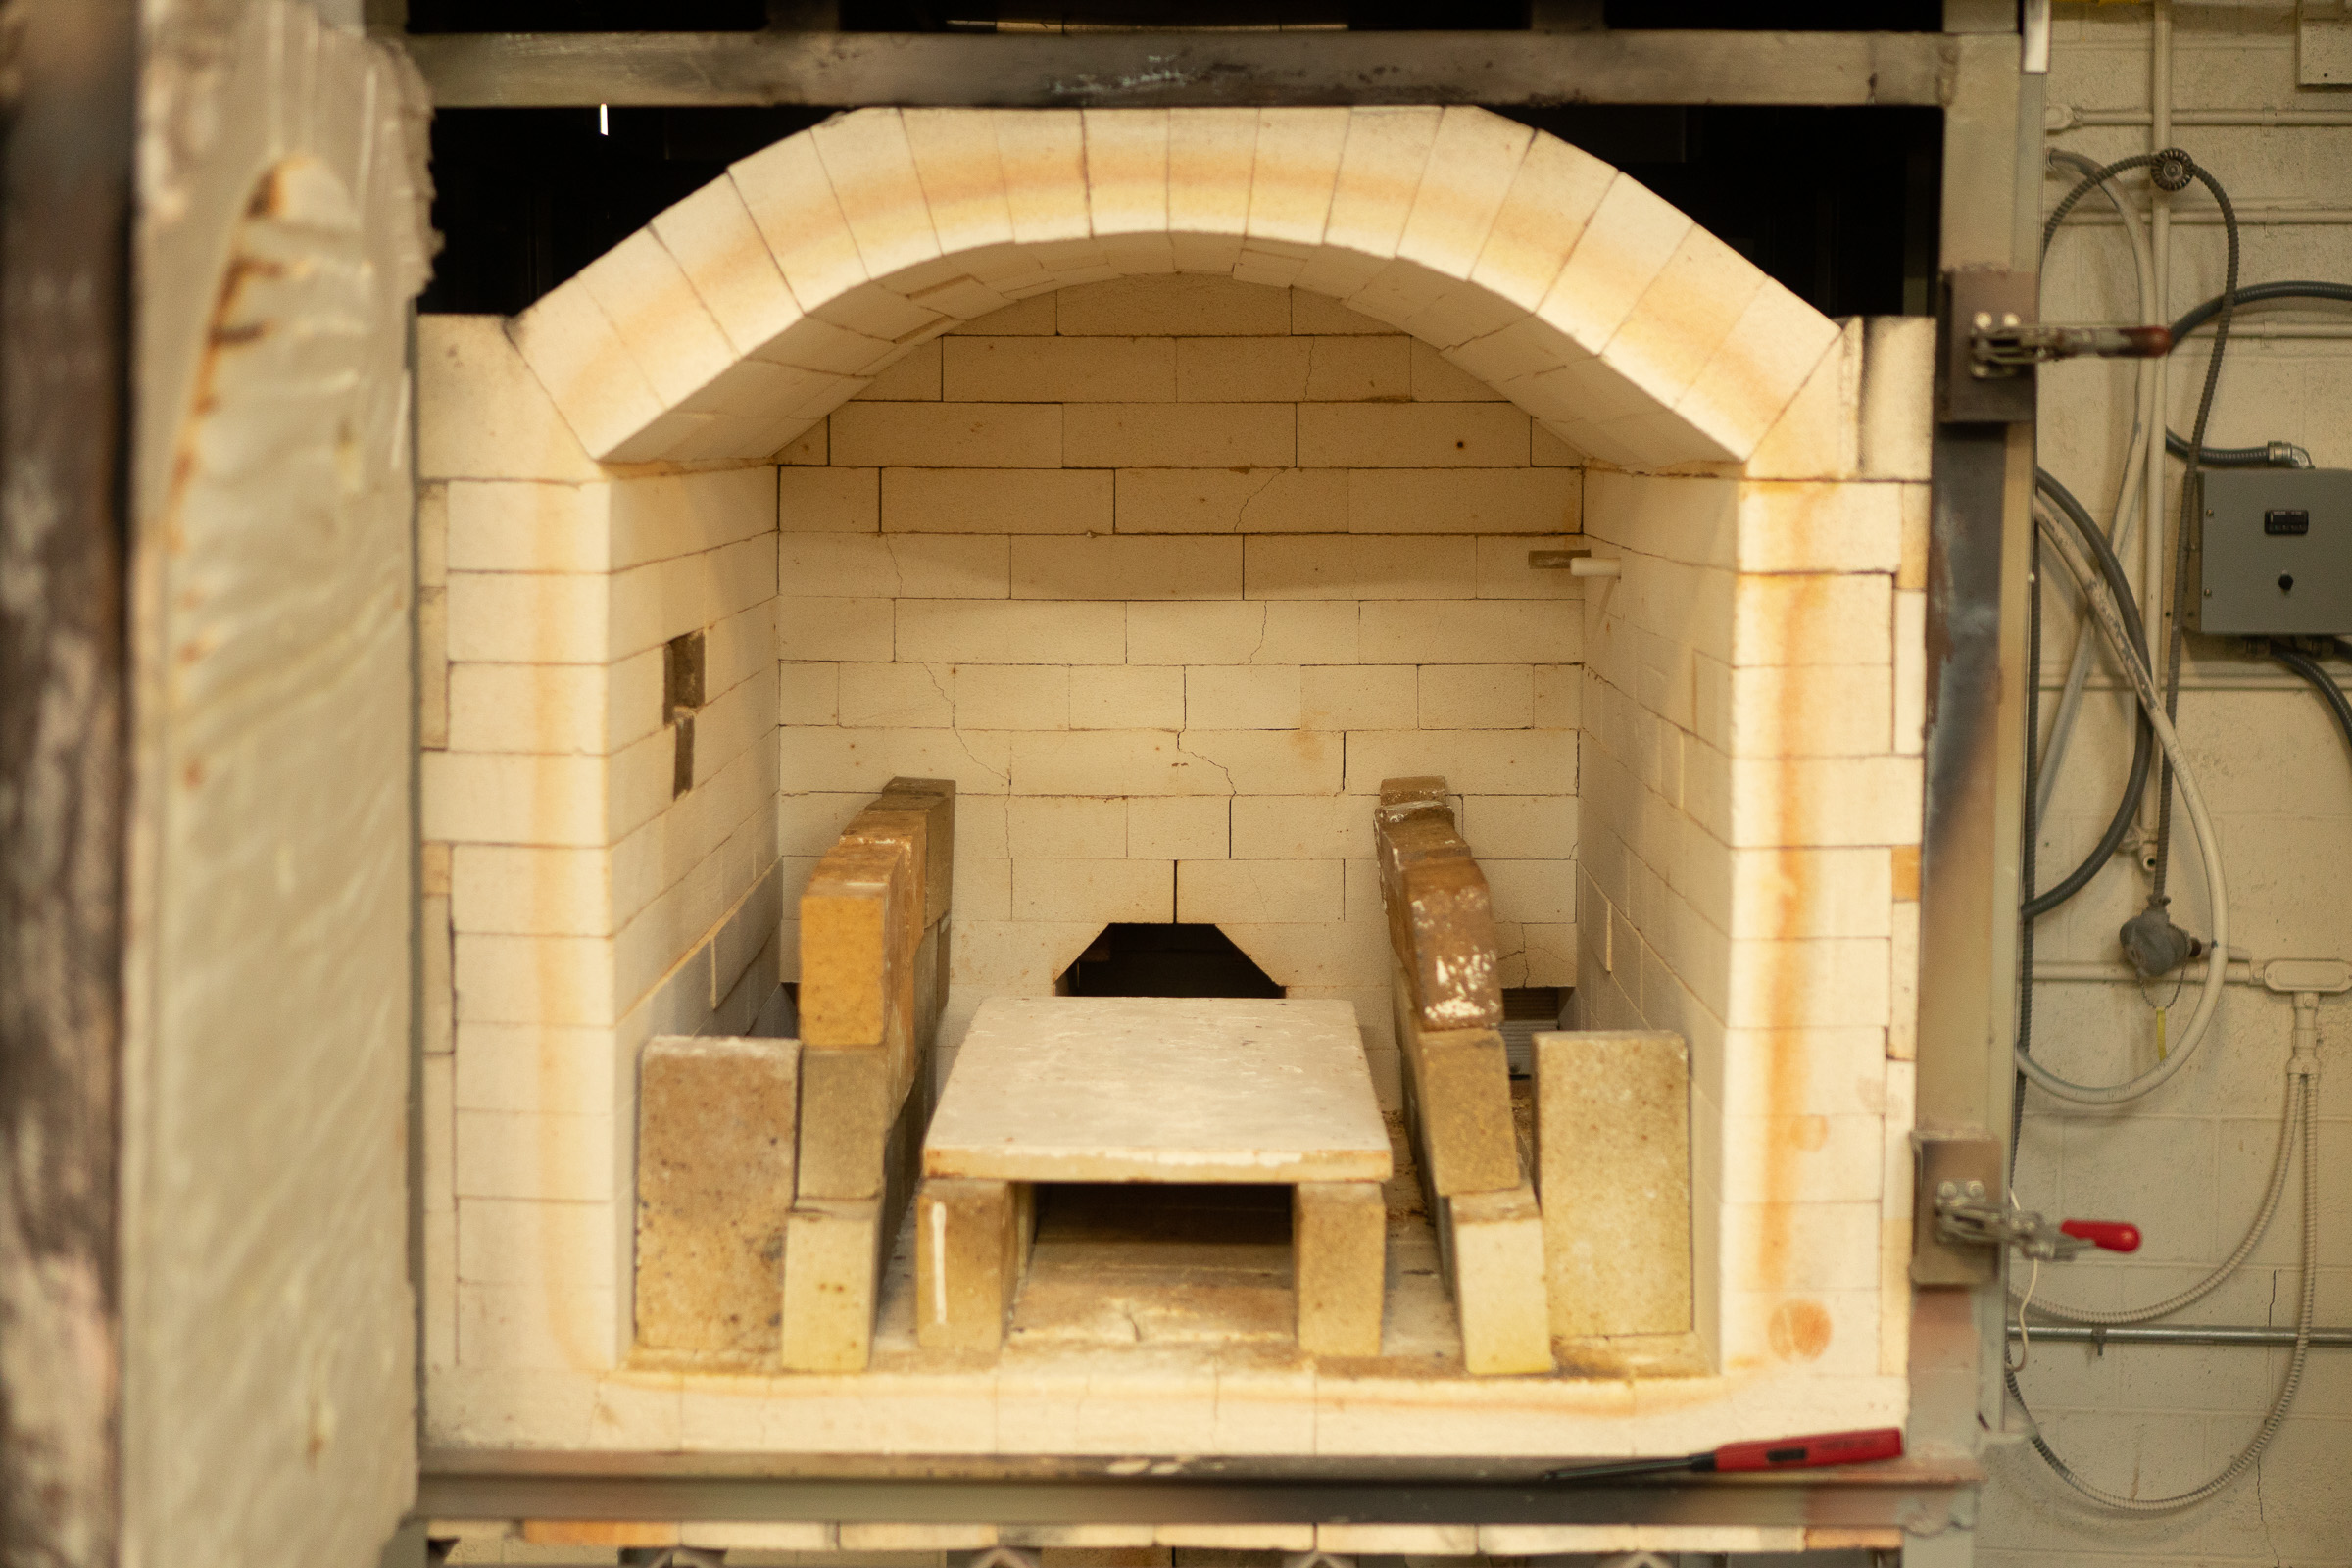
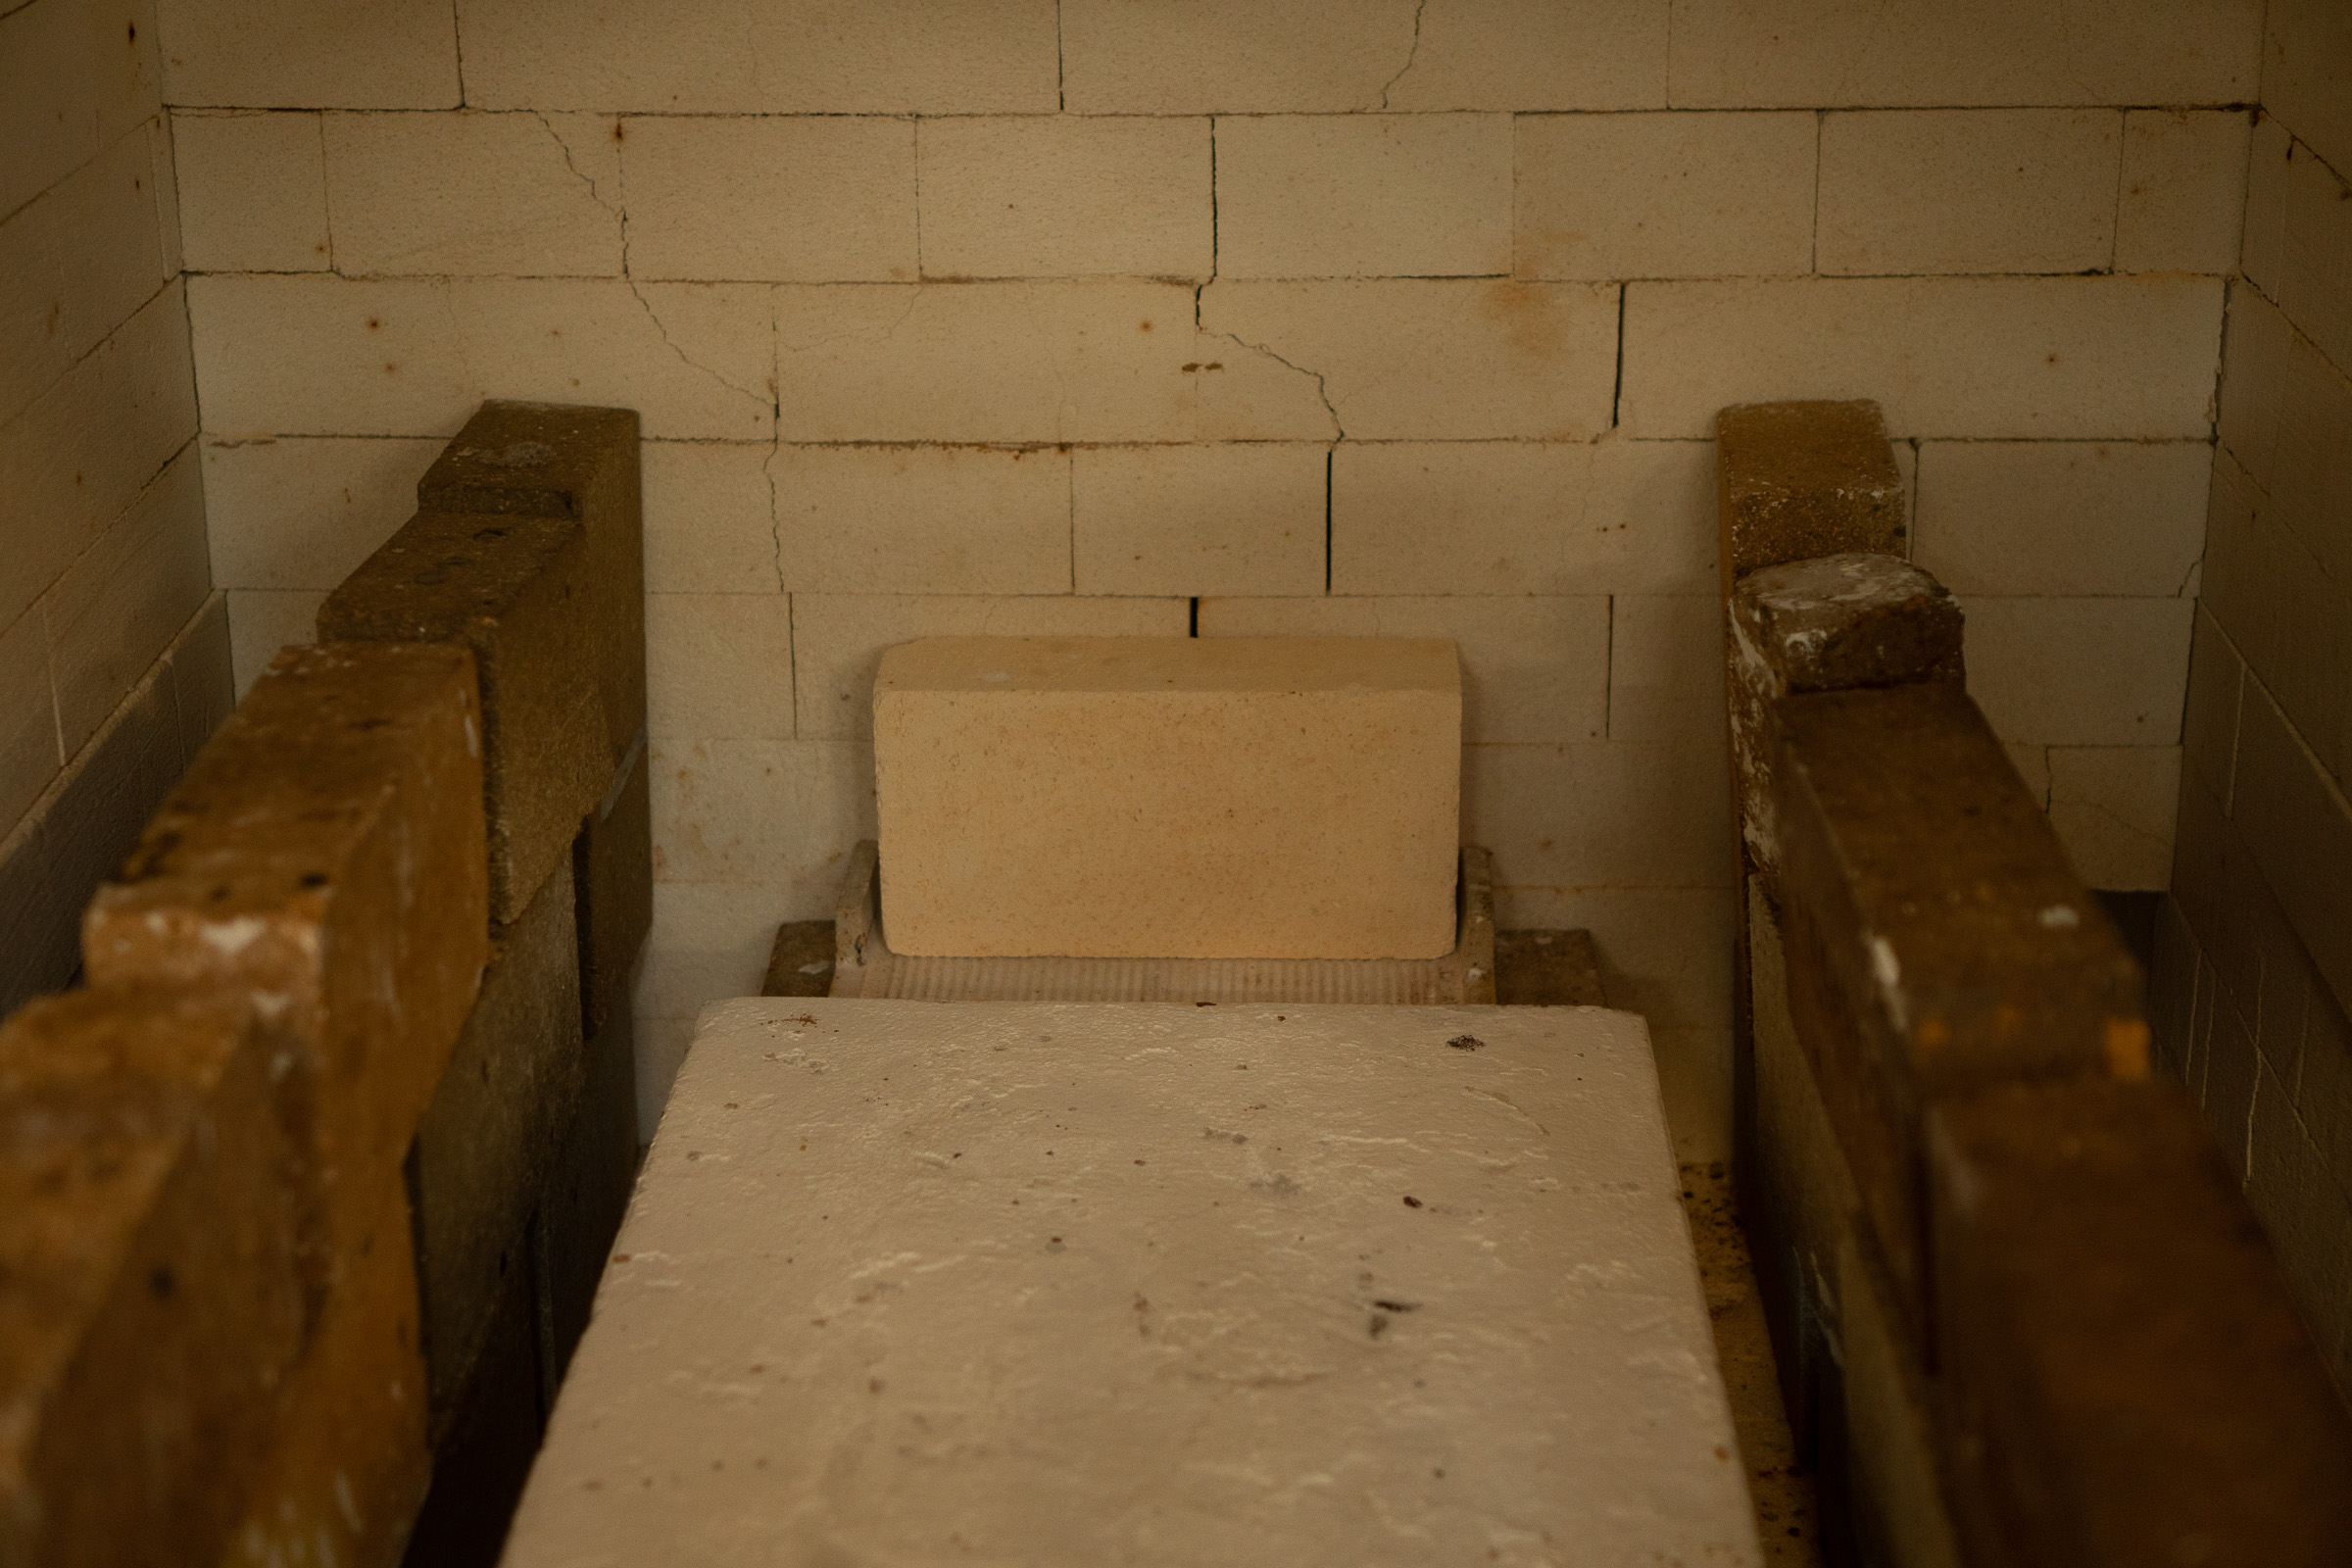
Adjust the kiln bagwall and target bricks if necessary. Record the arrangement of the bagwall and target bricks for later firings.
-
I’ve been placing a brick over the top half of the exit flue, which seems to work well but is just my “hunch” and not backed by a good comparison test.
-
Ideally, put two sets of cone packs in the kiln, one at the bottom and one at the top.
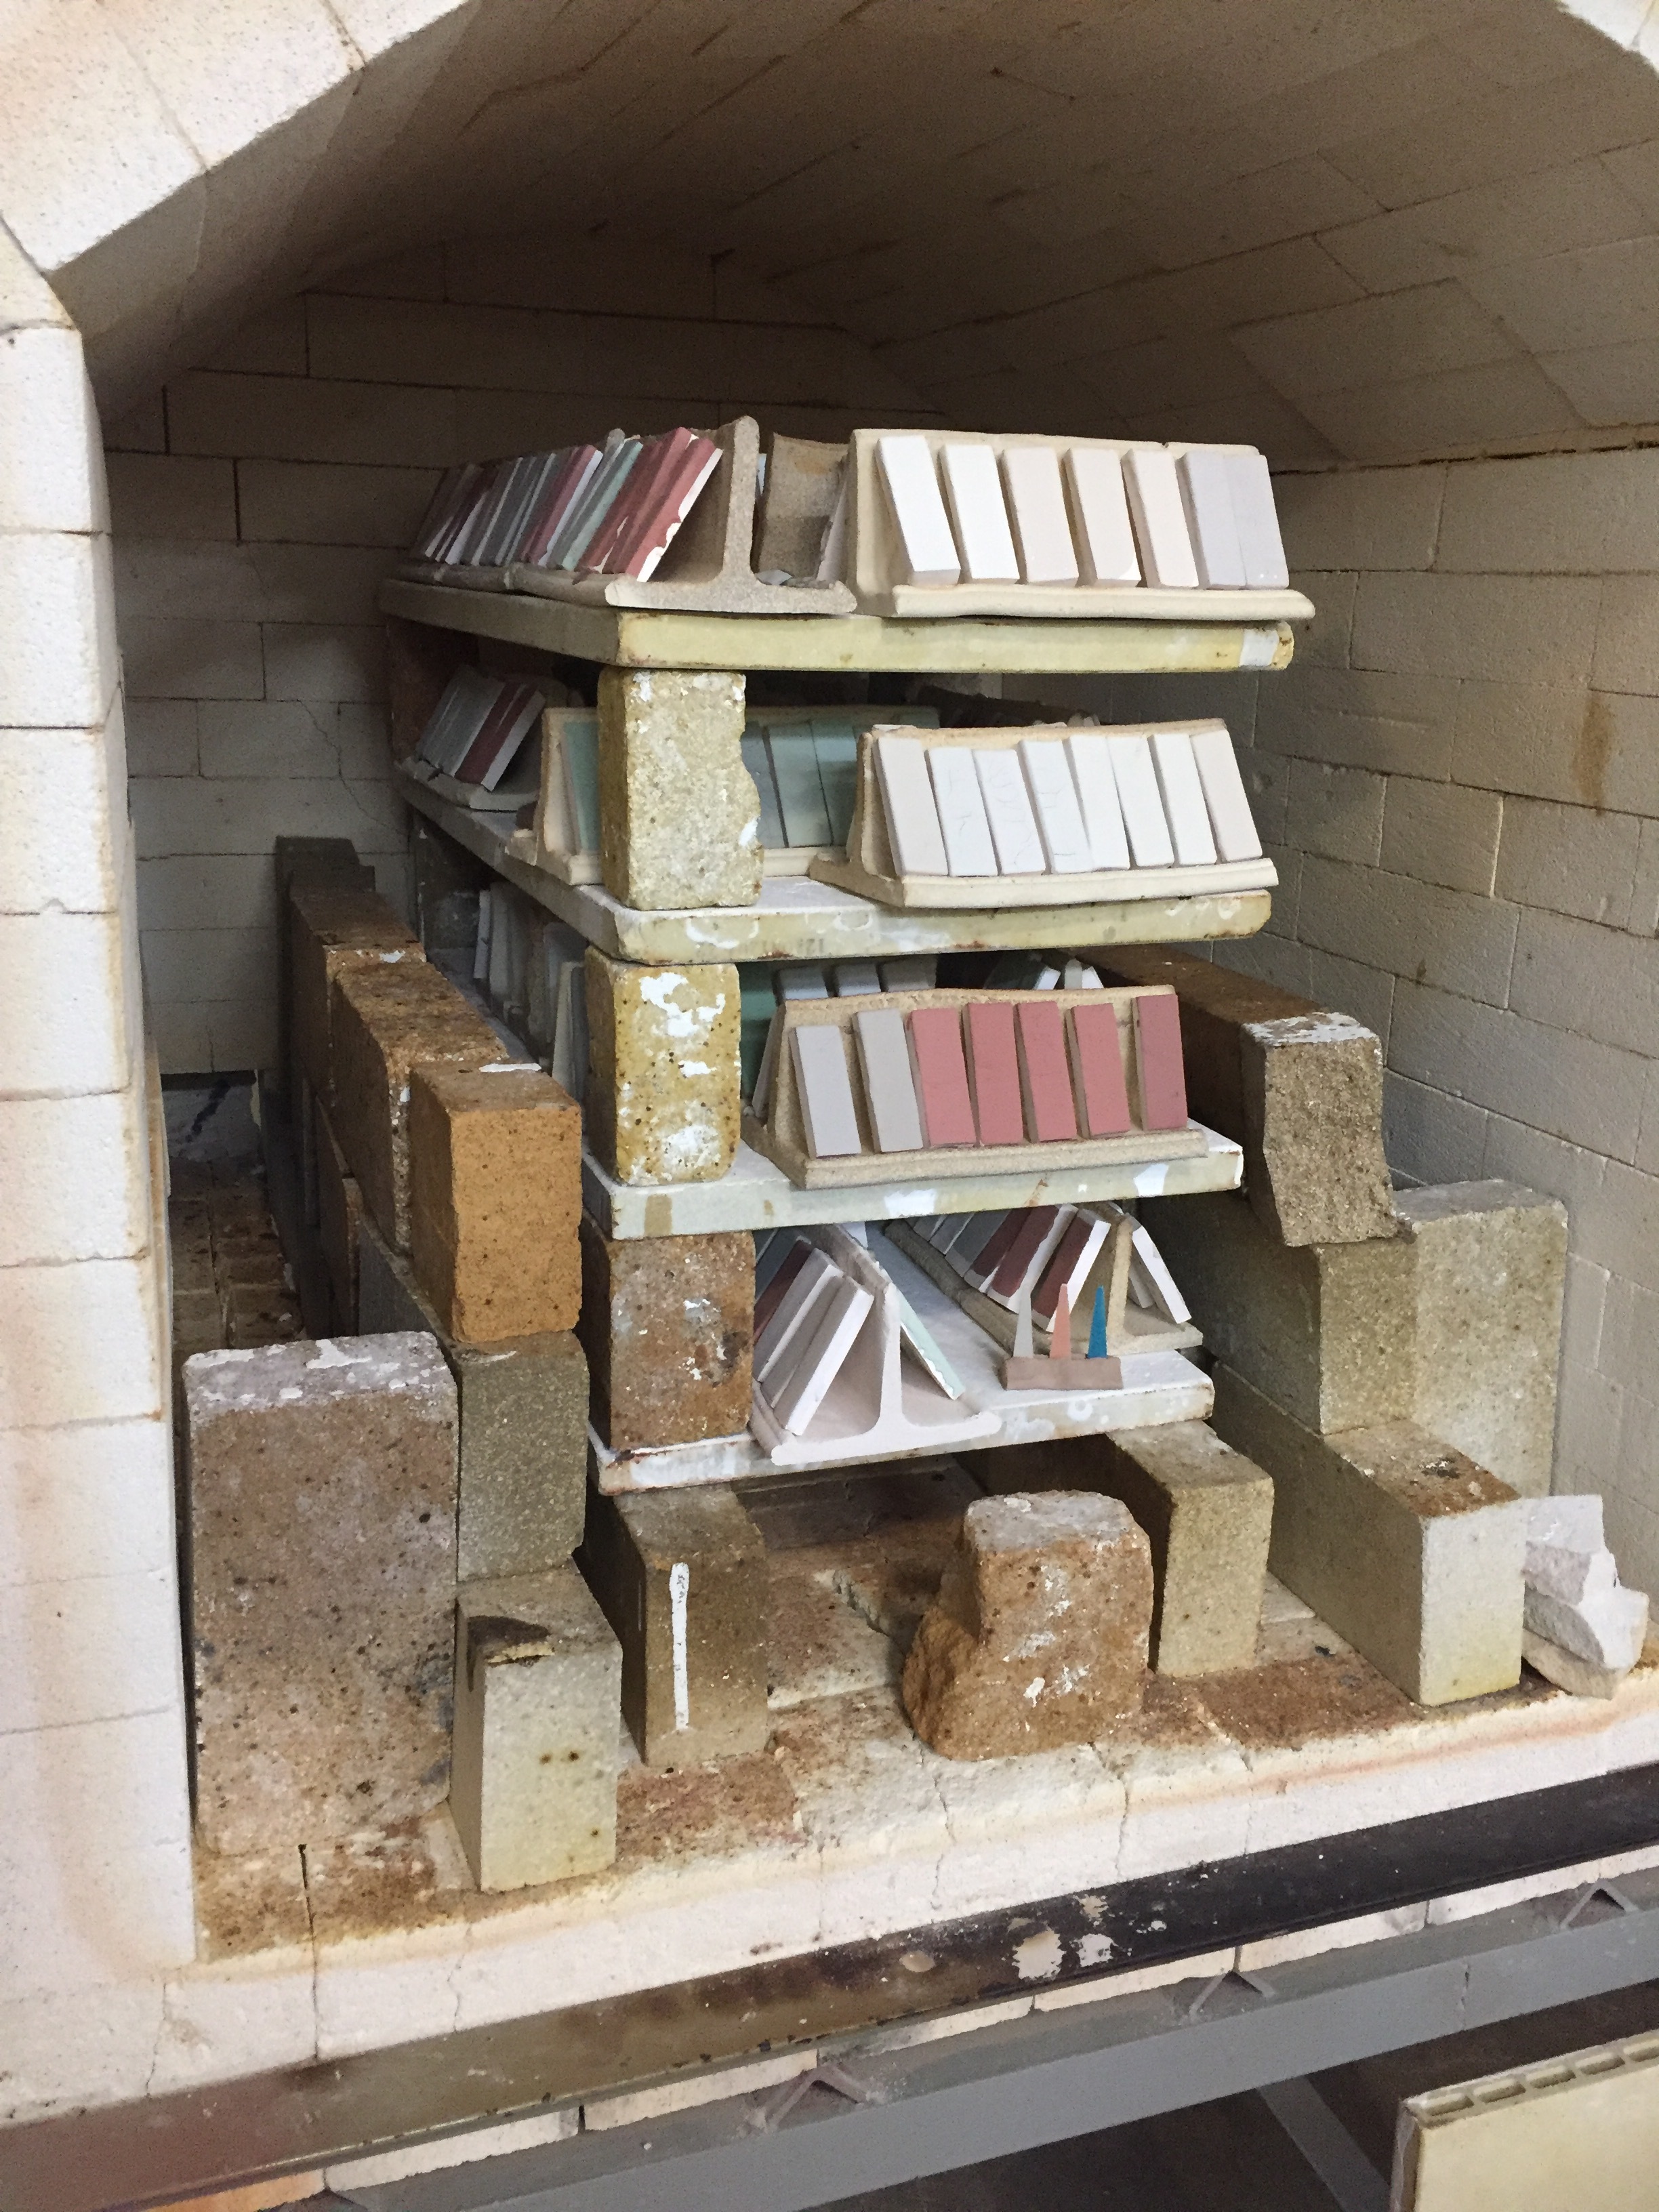
-
Here is a fully-loaded kiln. 3 bricks are used per level.
Overnight Preheat (Candle)
-
Make sure all gas valves are closed in off position. Off position is 90 degrees.
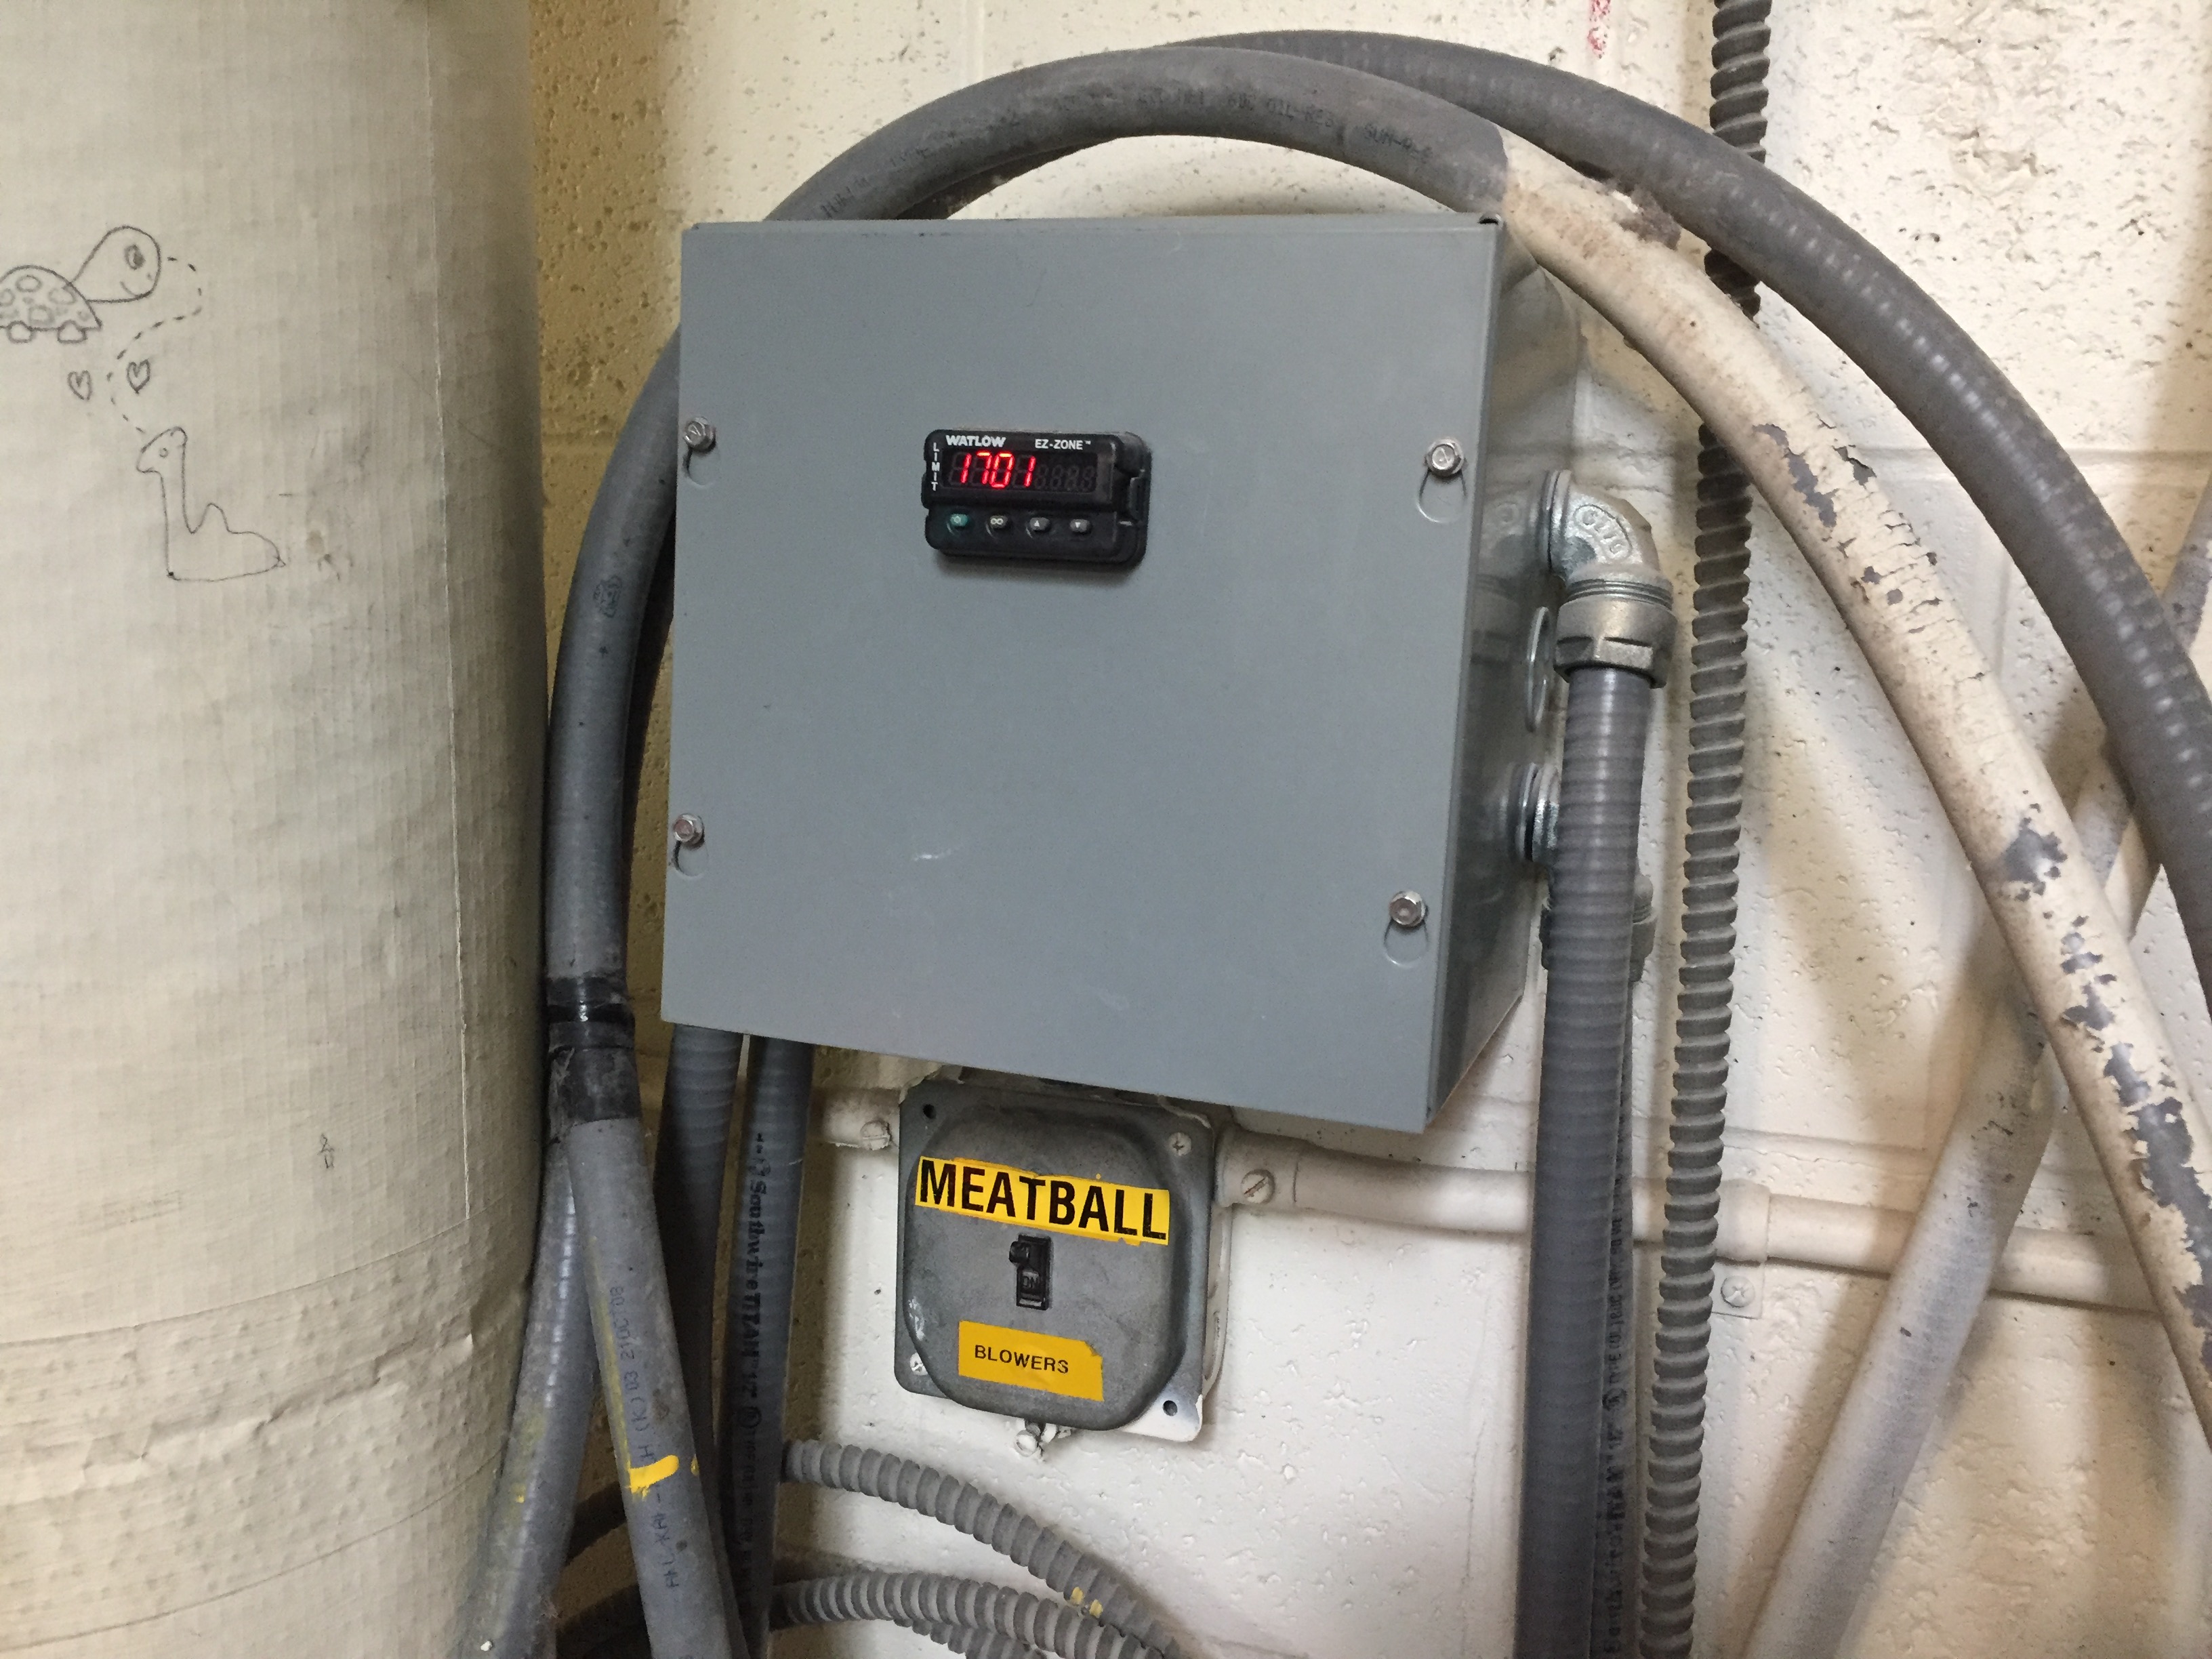
-
We use a magnet to cover the blower fans, adjusting their power. For the candle, just cover the fans completely.
-
Open the damper to 3/4" or 1".
-
Turn on the blower fan.
-
The pilot lights are Venturi burners. The oxygen to these burners is controlled by the air baffle. Open the air baffles to about 1/8".
-
Open the pilot light small gas valve halfway. While pressing the Baso safety valve button, light the pilot. Keep the Baso button held until the thermocouple is warmed up and the gas does not automatically shut off. This make take 30-60 seconds.
-
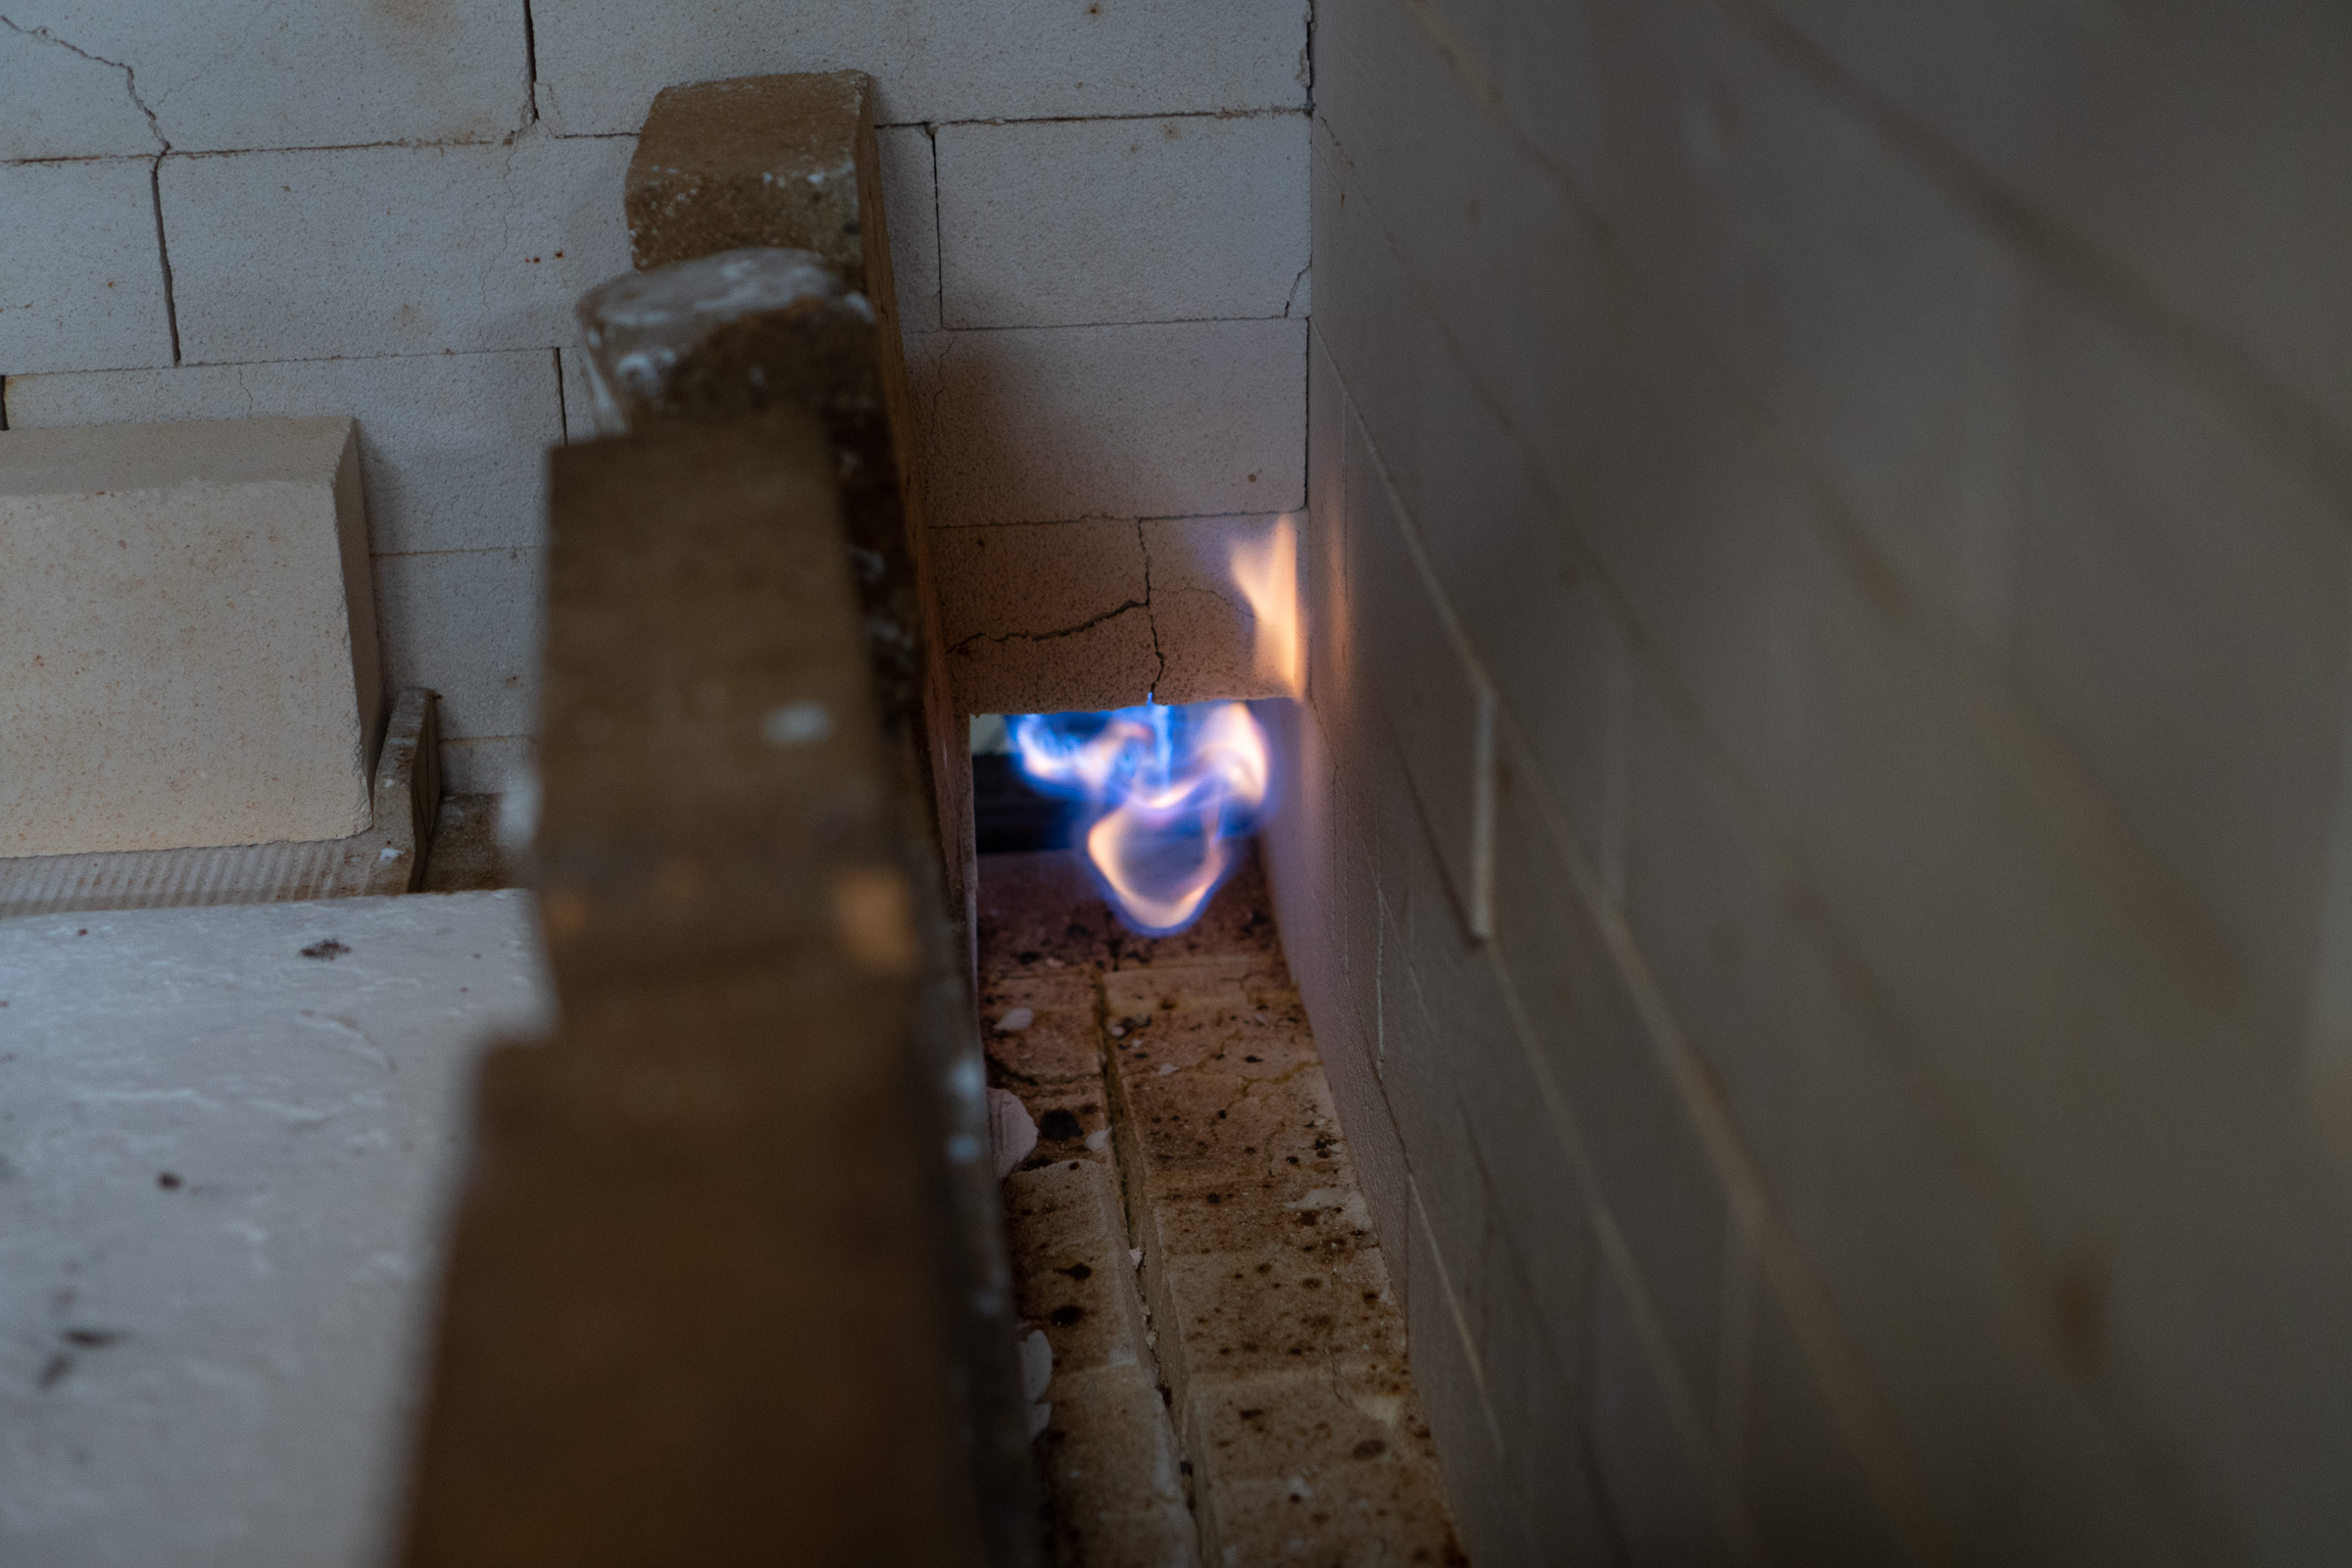
Using the air baffle, adjust the oxygen intake until the flame is blue and gentle. Too much air = bright, noisy and short flame. Too little air = yellow, smokey, silent long flame.
-
Ideally you will slowly heat the kiln with only the pilots for a few hours until 400-500 degrees F. After this time you can light the forced-air burners as well. To light the forced-air burners, just open the burner gas valve until the burner lights. Then, adjust the gas back down to about 5 on the gas gauge. Finally, adjust the air by moving the magnet on the air blower.

Firing (the next day)
As early as possible on the next morning, increase gas to 10-15, and then adjust the air accordingly. Ideally the kiln will already be 1300-1400 degrees at this point. You will need to keep increasing the gas pressure each hour until it’s around 25. This amount of gas should get you to cone 08.
Reduction
-
Starting reduction. At around 1700-1750, cone 08 should go down. At this point we will start reduction. Close the damper to the “BR” line (about 1/2") and increase the gas on both burners to 55. Adjust the forced air until the burner is no longer noisy (oxygen-rich).
-
A few minutes after starting reduction you should definitely notice flame coming out of the top peep hole. Then you will notice the flame from the side peep hole, and finally you should see a small flame from the bottom peep hole. While it is not imperative that the bottom peep has a flame, a small flame there will signify that you are definitely getting reduction throughout the entire kiln.
-
After one hour of body reduction, you can ease off on the kiln pressure in order to maintain a climbing reduction. To lower pressure, either back off on the gas (from 55 to 50), or open the damper slightly (from 1/2" to 5/8"). After easing off pressure, make sure that you still see a flame coming from the peeps. If there is no longer a flame at the peeps, it’s possible you have gone into a neutral to oxidizing atmosphere. If this is the case, you will need to add more pressure by either increasing the gas or closing the damper slightly.
-
After about 2050 degrees you shouldn’t need to touch the kiln. Just let it fire with the same input settings (gas at about 54, damper at 3/8"). The rate of temperature rise will start to slow down, which is good. At this point we want it to take at least an hour between cones.
-
At around 2250 degrees as indicated by the thermocouple, cone 10 should bend to about 4 o’clock. At this point we are basically done with our firing.
Oxidation hold
Many potters end a reduction firing with an oxidation hold. An oxidation hold is simply a period of oxidation firing. In order to do this, slowly back off on the gas until the temperature is no longer rising. Maintain this temperature at the lowest possible gas setting (usually around 25 for Meatball). After 15-30 minutes, you should notice that cone 10 has completely dropped. You can now stop the kiln.
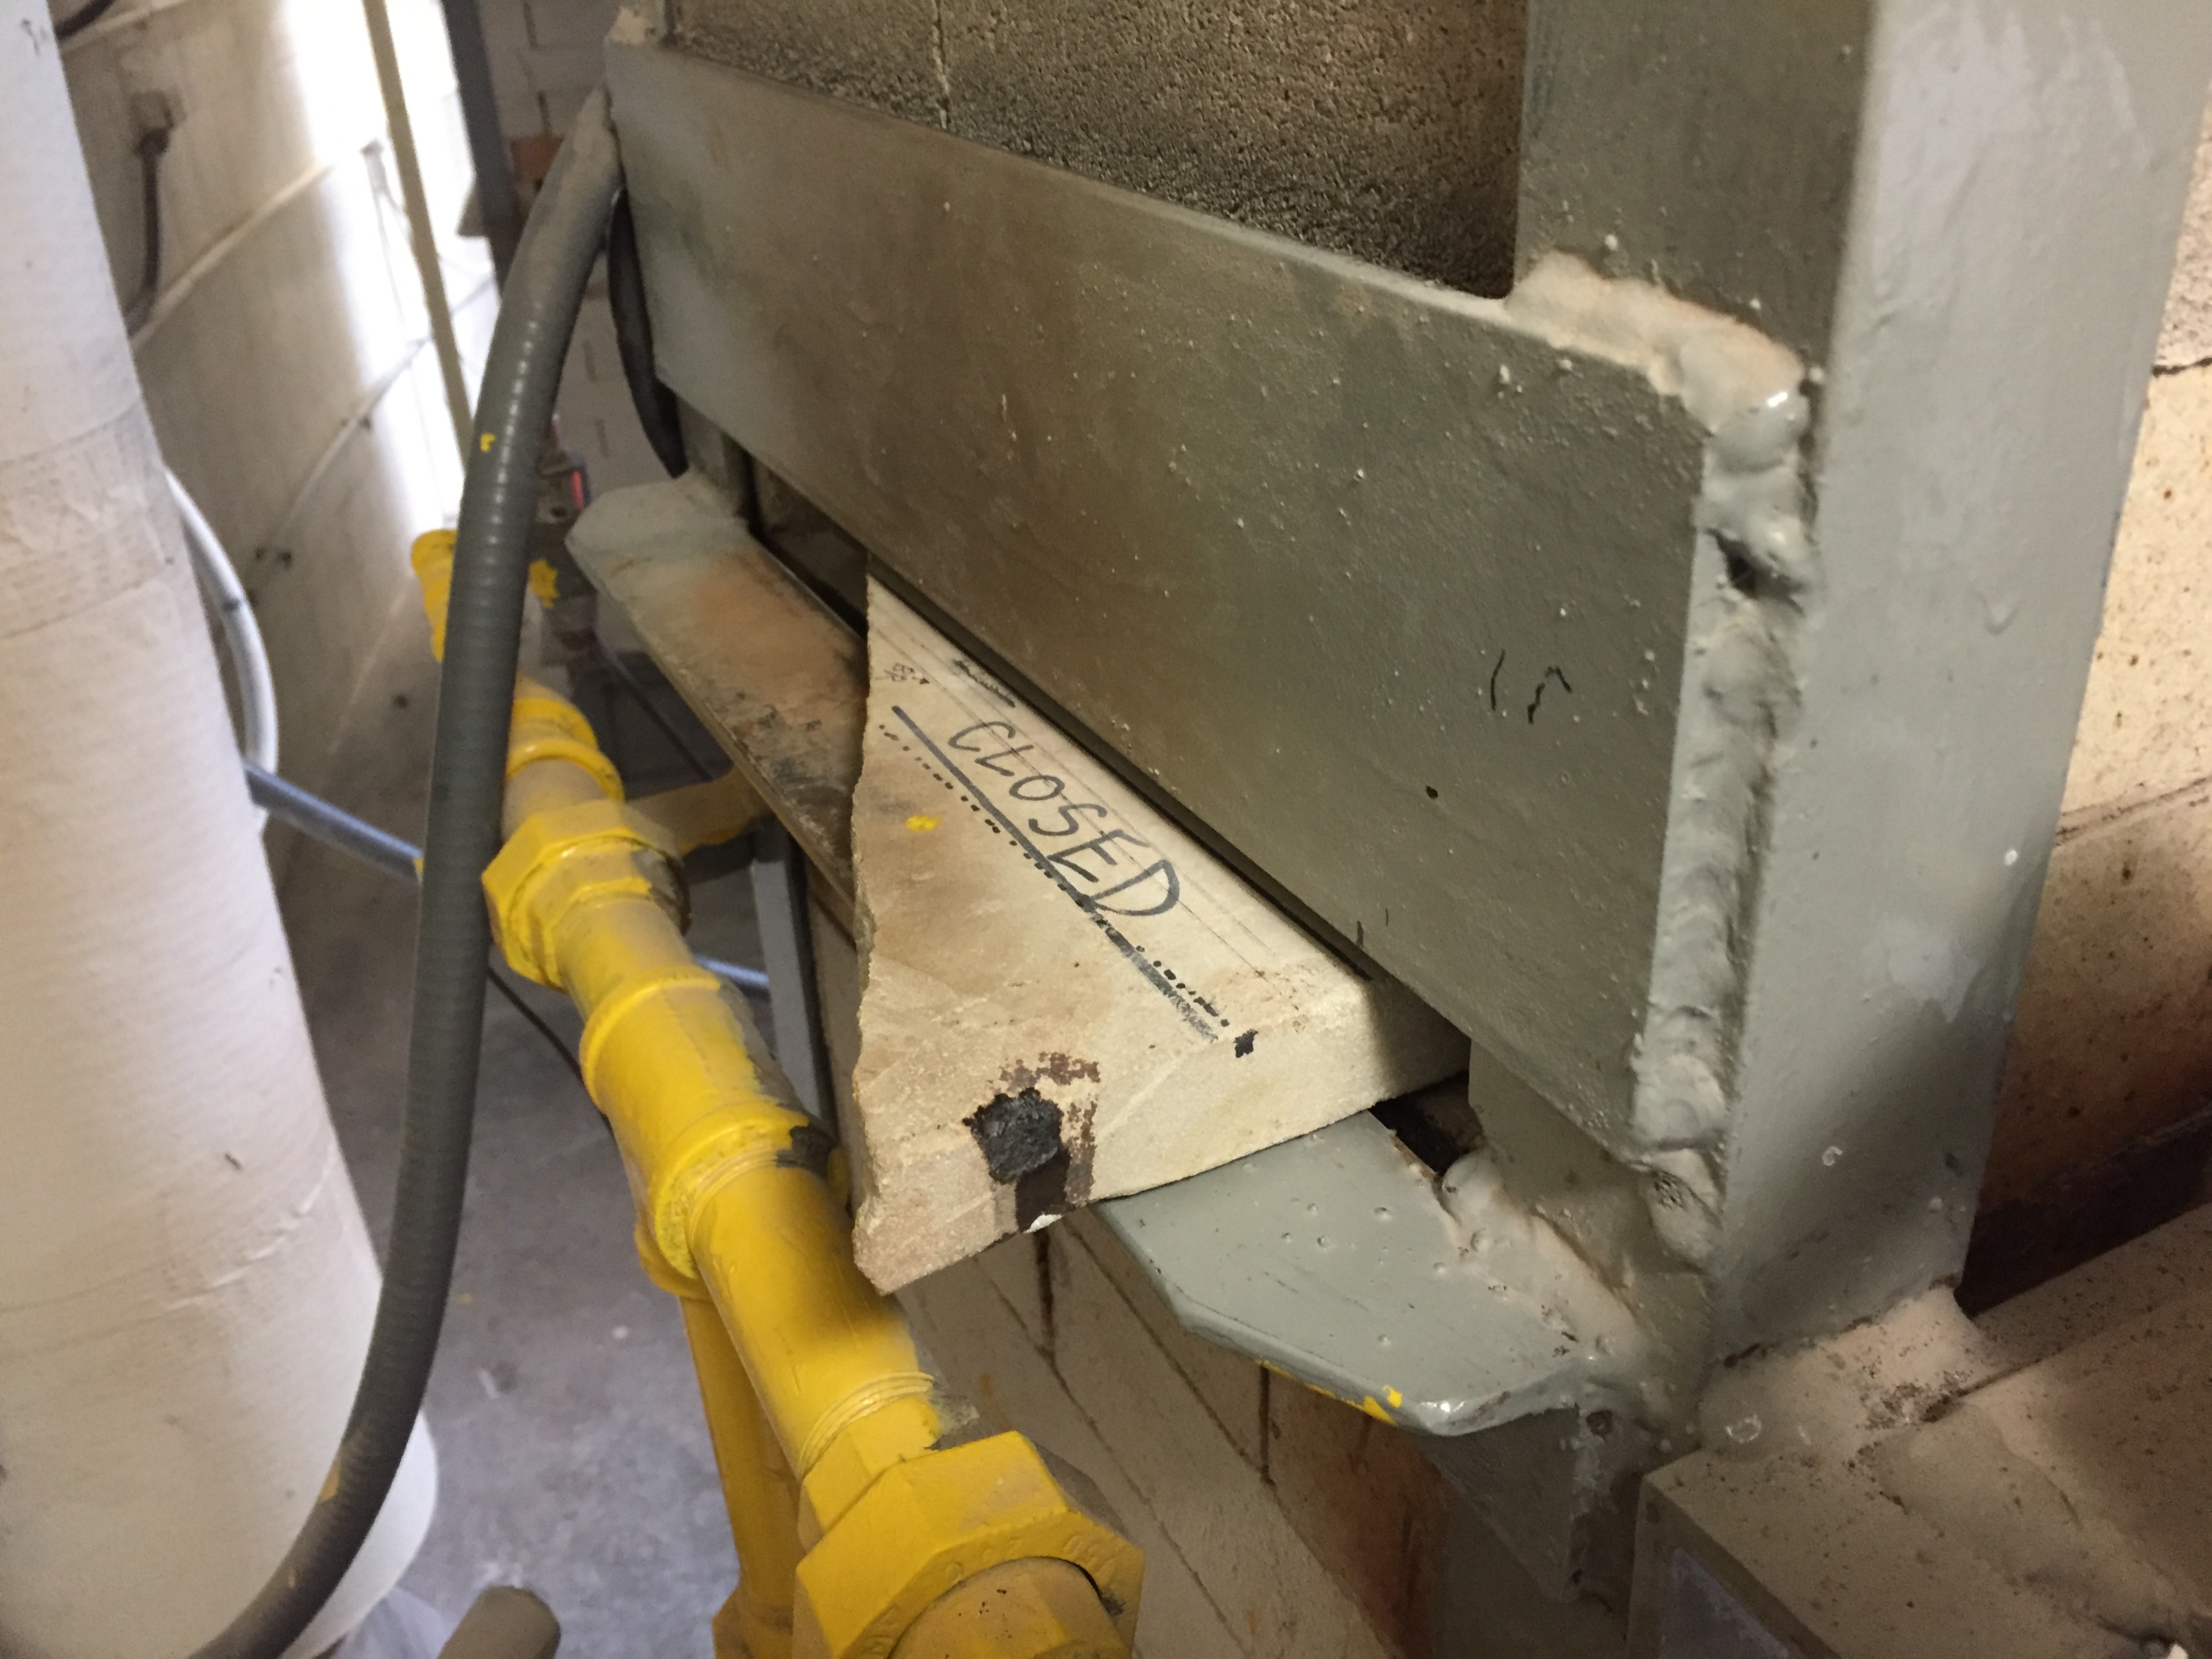
End of firing
The end of the firing is very important:
- Turn off all gas valves.
- Close damper.
- Block off burner ports with a piece of kiln shelf.
Logging and Charting the Firing
It’s very important to keep accurate logs of a kiln firing so that you understand how a kiln is behaving, and so that you can create firing profiles for kilns that, when followed, lead to consistent, repeatable results.
First, I suggest using a time-series kiln chart. You can download and print out the charts that I use here: Kiln Charts

Because this is a time-series chart, the columns represent time in 15-minute segments. At the bottom of this sheet you can write the time- every four columns is one hour.
After a number of firings, you should be able to compare results and develop a firing profile. For example, here are 7 firings stacked on top of one another:
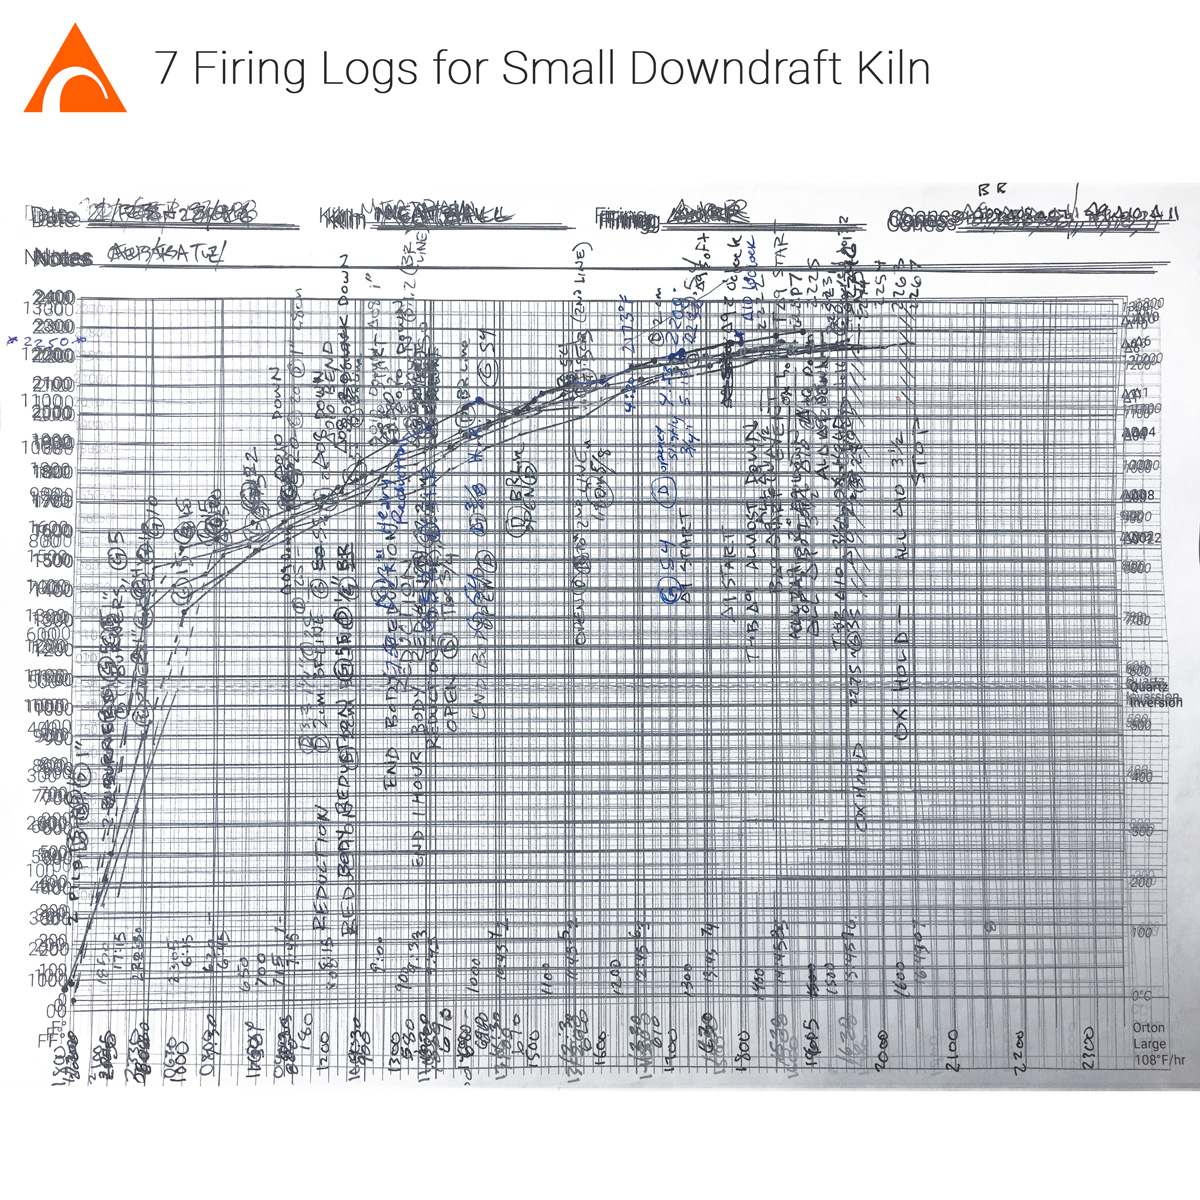
From these 7 firings we can develop a firing profile for this kiln:
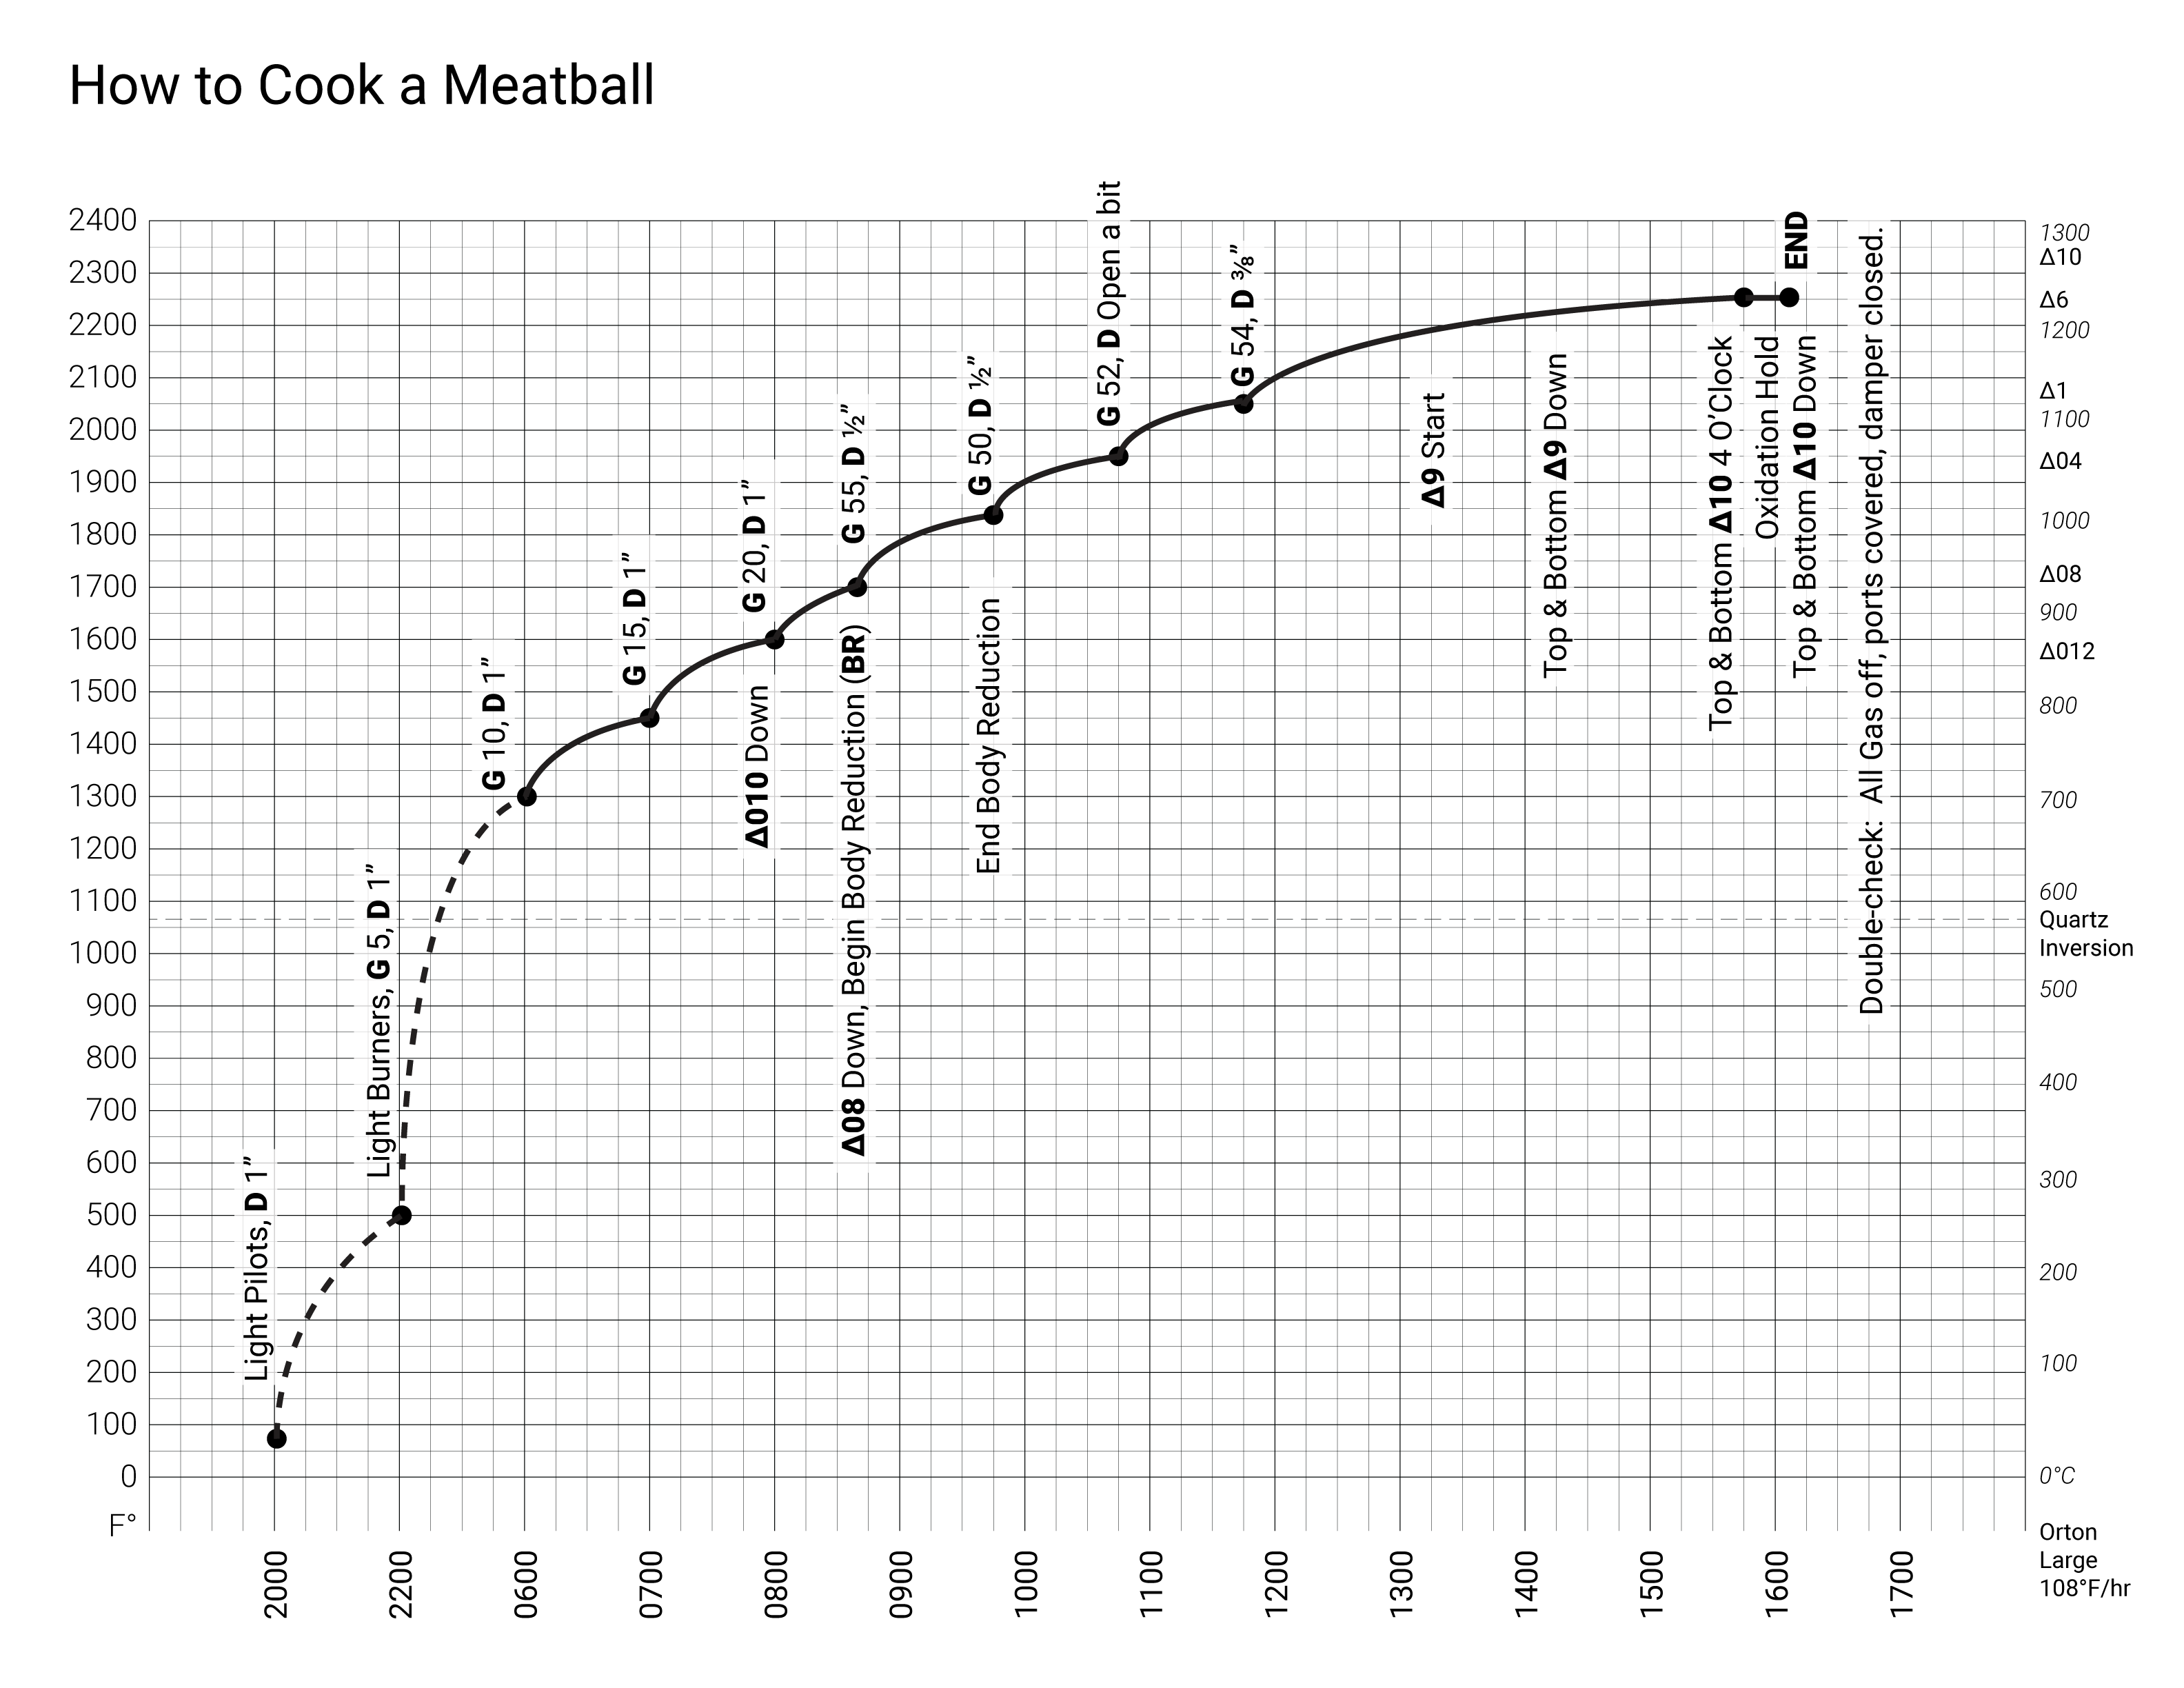
Download the firing profile for Meatball here:
Firing_Chart_Fahrenheit_Meatball.pdf (872.7 KB)
Resources
Firing the ACC Downdraft Kiln by Vince Pitelka, 2016
Local copy:
Firing-the-ACC-Downdraft.pdf (412.1 KB)


